Maybe it seems harder than it really is. Boiling water isn’t hard - turn the burner on and walk away.
By the time I’ve got my scions and labels together the wax is ready for dipping. And I can dip a scion faster than someone can wrap one. But it comes down to what you are comfortable with. I like this for rooting hardwood cuttings for the same reason.
4 Likes
I just melt mine in a very small crock pot.
1 Like
I waxed all my hardwood cuttings too except the Juliet I did before I learned this. I think it’s way faster. I did 22 bench grafts today and when I was done I cut up all the tops to the rootstock and dipped the tops of them in wax and the bottoms in rooting hormone. Then planted them in coarse sand. I figure what do I have to loose. It only took about ten minutes to do that whole process. I did the thick trunks two so maybe I can graft on them next year. My Juliet’s are on their second leaf. I’m beginning to think hardwood cuttings are easier than softwood because there is barley any maintenance.
2 Likes
Evidently you’ve never burned boiling water. 
Seriously though, it’s probably a matter of the perspective which one approaches grafting. From my perspective, I generally have about a dozen things to do the morning I decide grafting/budding, so I take my toolbox with parafilm and go.
I can see where folks approach grafting more measured and carefully, especially with lots of grafts, or lots of benchgrafting, and the liquid wax probably makes more sense. No right or wrong way imo, just offering a different perspective for all the folks melting wax.
4 Likes
You can wax them days before. You can do a hundred in no time at all and then the day you want to graft take them along. You can wax them after harvesting them in February or March too. They wont get moldy that way.
3 Likes
I happen to share the same perspective Mark has. When I read about melting wax and all that, I was like “so much work”. Maybe, because I don’t like cooking so when I see anything that requires a stove, crock pot, etc., It remind me of cooking 
The way I do it probably more time consuming but I enjoy doing it. When scions arrive (ordered and exchanged), I clean them in a water/vinegar solution, dry and wrap them with parafilm. Then, they go in ziplock bags into the fridge. No need to put any damp paper in those bags.
I do this in the winter when I have all the time in my hand. Once, grafting time arrives, I grab the bags of wrapped scions and off I go. I invest more time upfront and save time in the end,
6 Likes
All’s were doing is putting little pieces of wax in an insulated coffee mug dumping boiling water on it. I even put the cap on it. Stays ready for about 30 minutes or so. Whats so hard about that?
1 Like
Waxing would be a waste of time for me because I only use a fraction of my wood and what I use depends on the diameter of what I’m grafting to.
1 Like
Your method is not hard at all. To each, his/her own, 
3 Likes
It is nice to see so many options to wax or not to wax. This has been a vigorous debate about each of our choices. I think several others will benefit from everyone contribution. We all will end up choosing the method of choice.
3 Likes
I size my scions up too and cut right through the wax. I still use parafilm too. I like using electrical tape also.
1 Like
I don’t use wax on my grafts. I like to do a quick simple bark or cleft. Instead of parafilm, I used IV Tegaderm to cover the whole Scion. It is stretchable and waterproof. It cost 50 cents a piece.
Here is my multi grafts of Hybrid persimmons on a 4 years old American persimmon understock.
Tony
3 Likes
That looks kind of like a bag Tony. Brady
1 Like
I just fold the sticky side together to enclose the scion…
Tony
2 Likes
Tony I have three American persimmons. I bought them off of ebay last year. They were three foot long. Are there preferred American’s that I should graft to them or are they all about the same when it come to the American Persimmon? I’m in zone 6 on the cold side close to 5.
Tony, have you used this before and do the leaves push through OK?
The buds will pierced through the IV tegaderm. I have been using them for the past 6 years.
Tony
1 Like
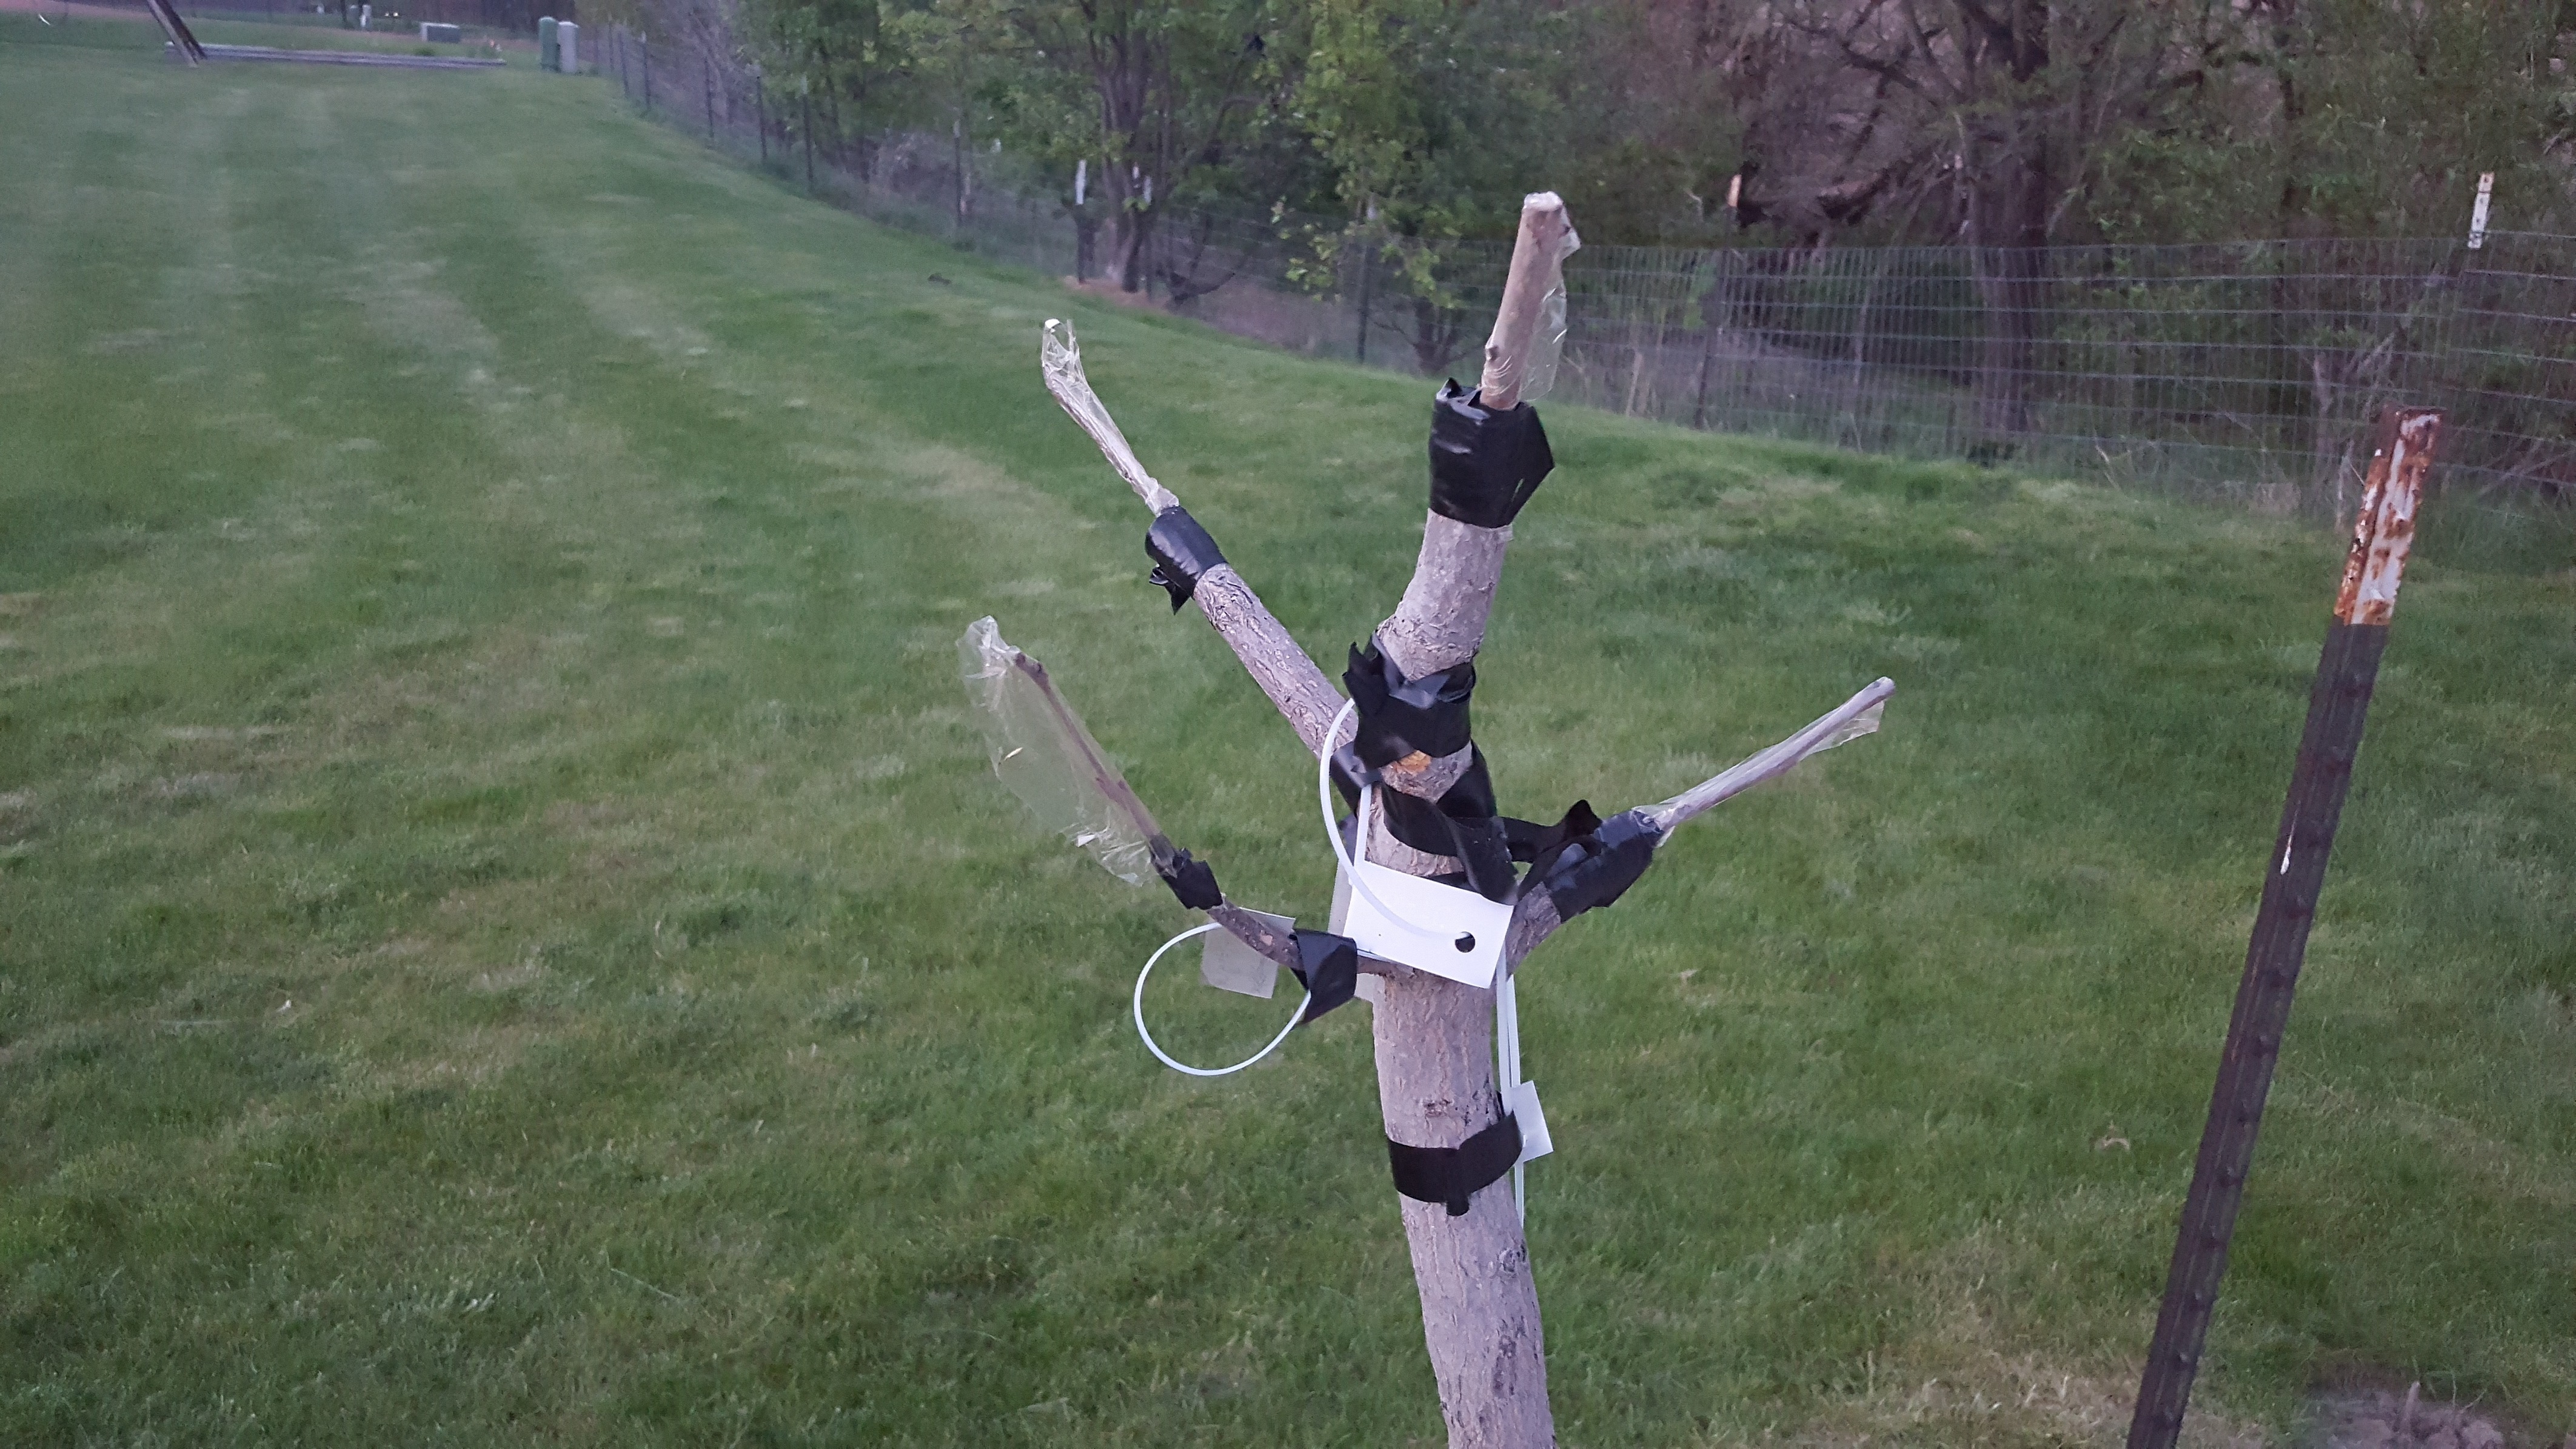
For some of us it is bagging time again. I intended to make a new templet before posting how I go about modifying my zip-lock bags but I’m still using my old one. It is not pretty but still works well.
Rough time estimate to prepare 40 bags
-5 minutes to load 40 bags
-5 minutes to drill holes in 40 bags
-20 minutes to trim tops and clip stem slots for 40 bags
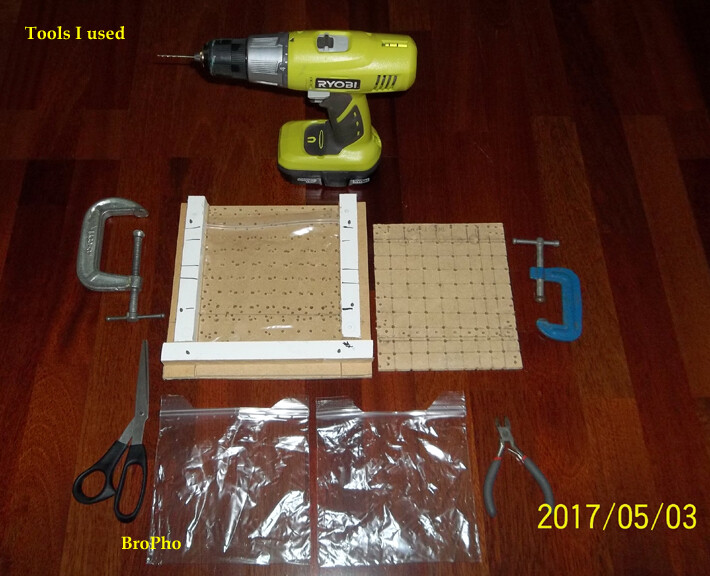
001
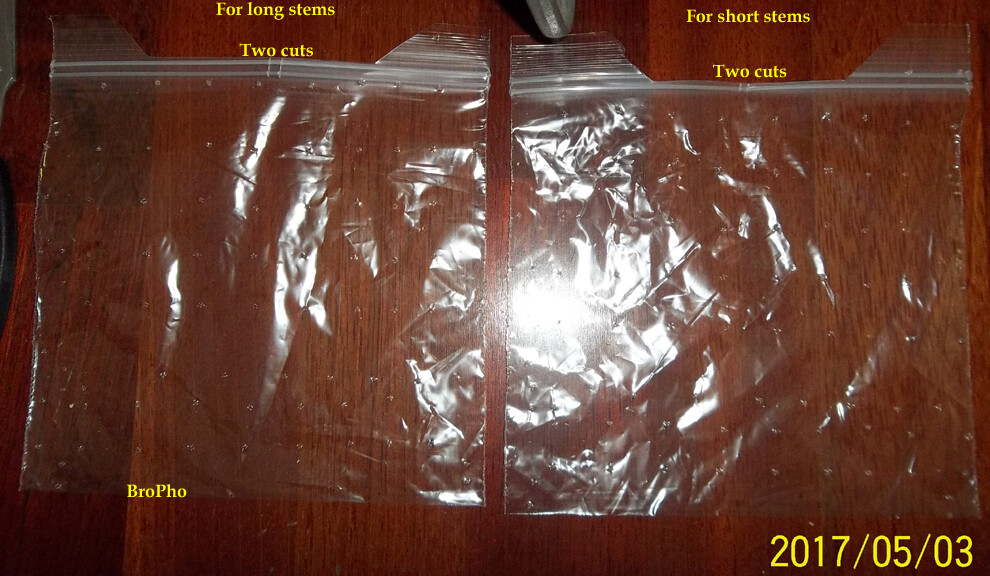
002
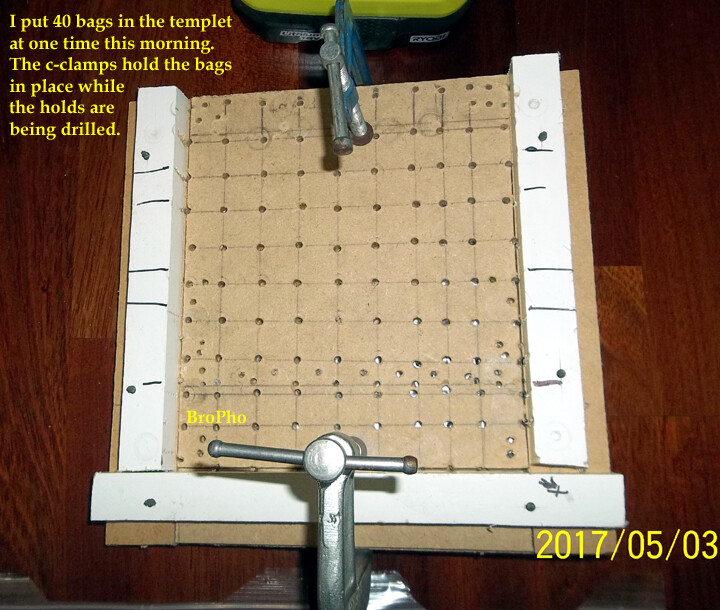
003
4 Likes
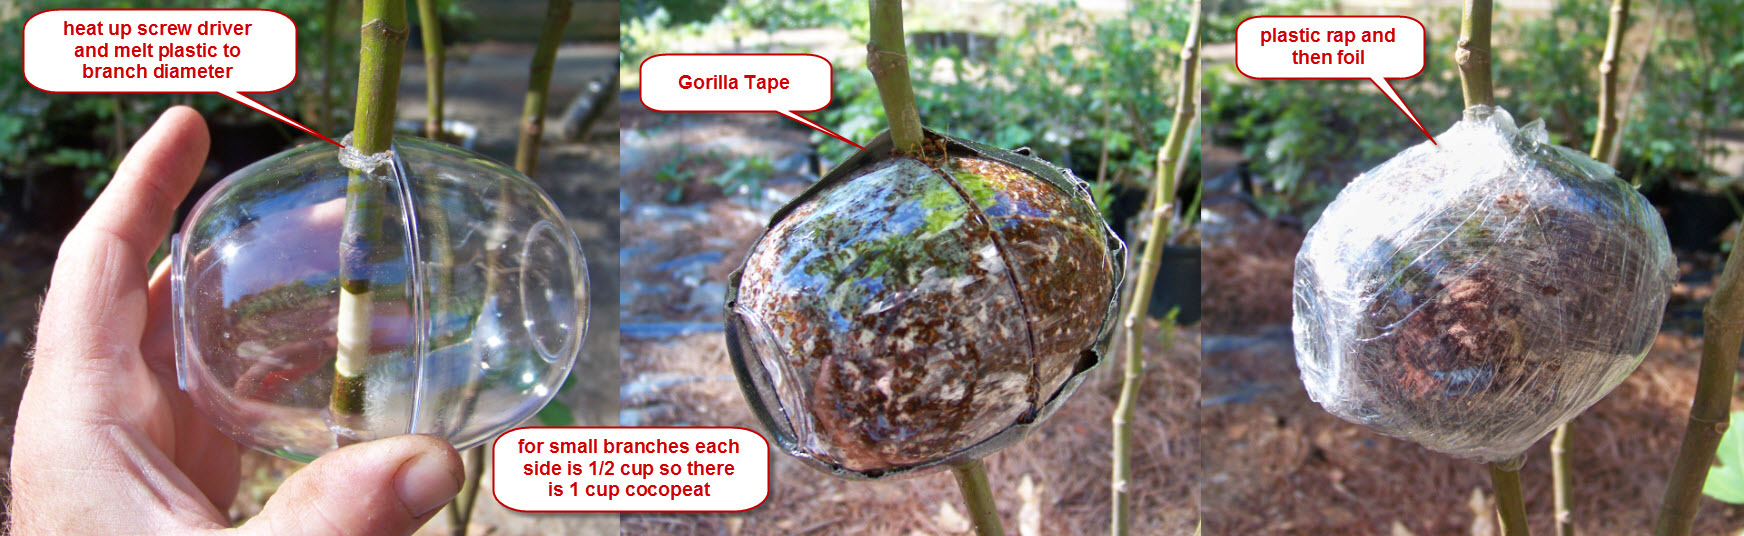
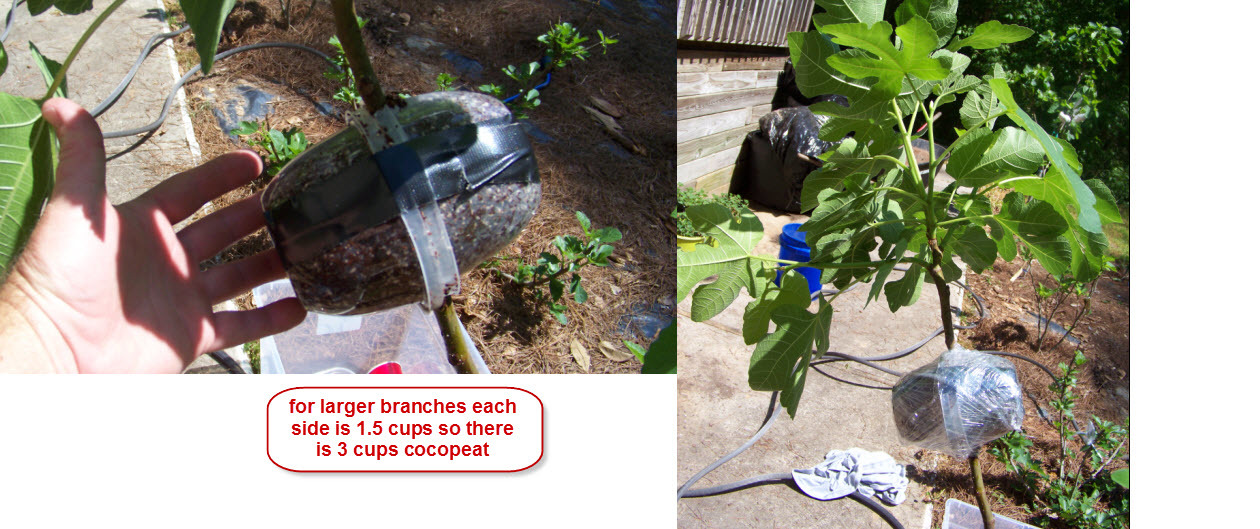
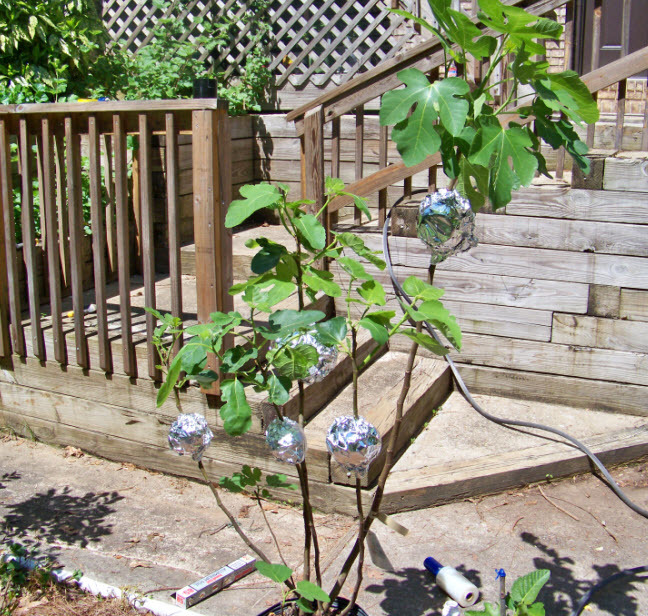
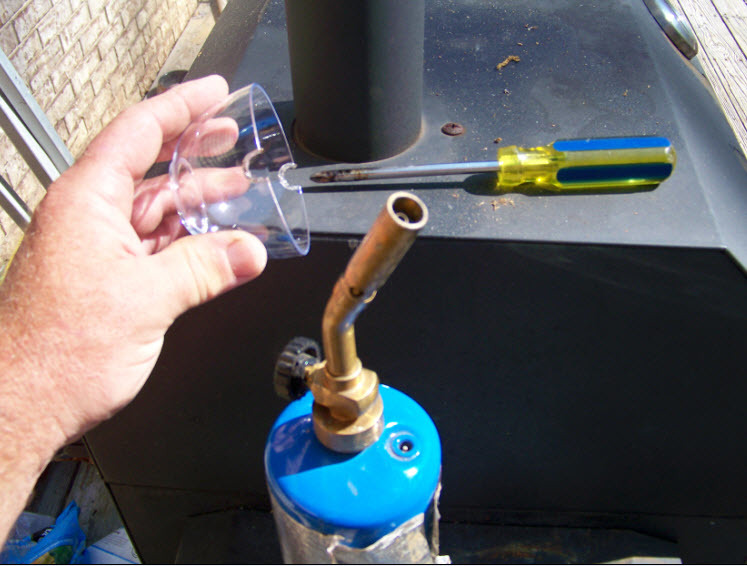
I ended up doing some more air layering today I went to the Dollar Store and bought some plastic containers which made it a lot easier to do (pics below) and I used Root Farm Soil Less Growing Media from Lowes ( coco coir and perlite).
I just heated up a screw driver and made the hole by melting the plastic the same diameter as the branch. The mini bowls are a hard plastic and should last a long time, the sure fresh bowls are just cheap tupperware. I also melt a hole in the top of the air layer and inject water through the hole with a meat injector when needed.
Anyone else in the South do air layers in May and June? if so how often did you have to water?

14 Likes
I just use a paper punch to make a hole in the center, then quickly clip the bottom corners one by one with the bags in a stack on the table.If you buy the right cheapo brands, you won’t have to trim the top.
1 Like