I did not fasten it to the vent directly, but used the rope And “spring “
To allow some “ give “ in the moving part.
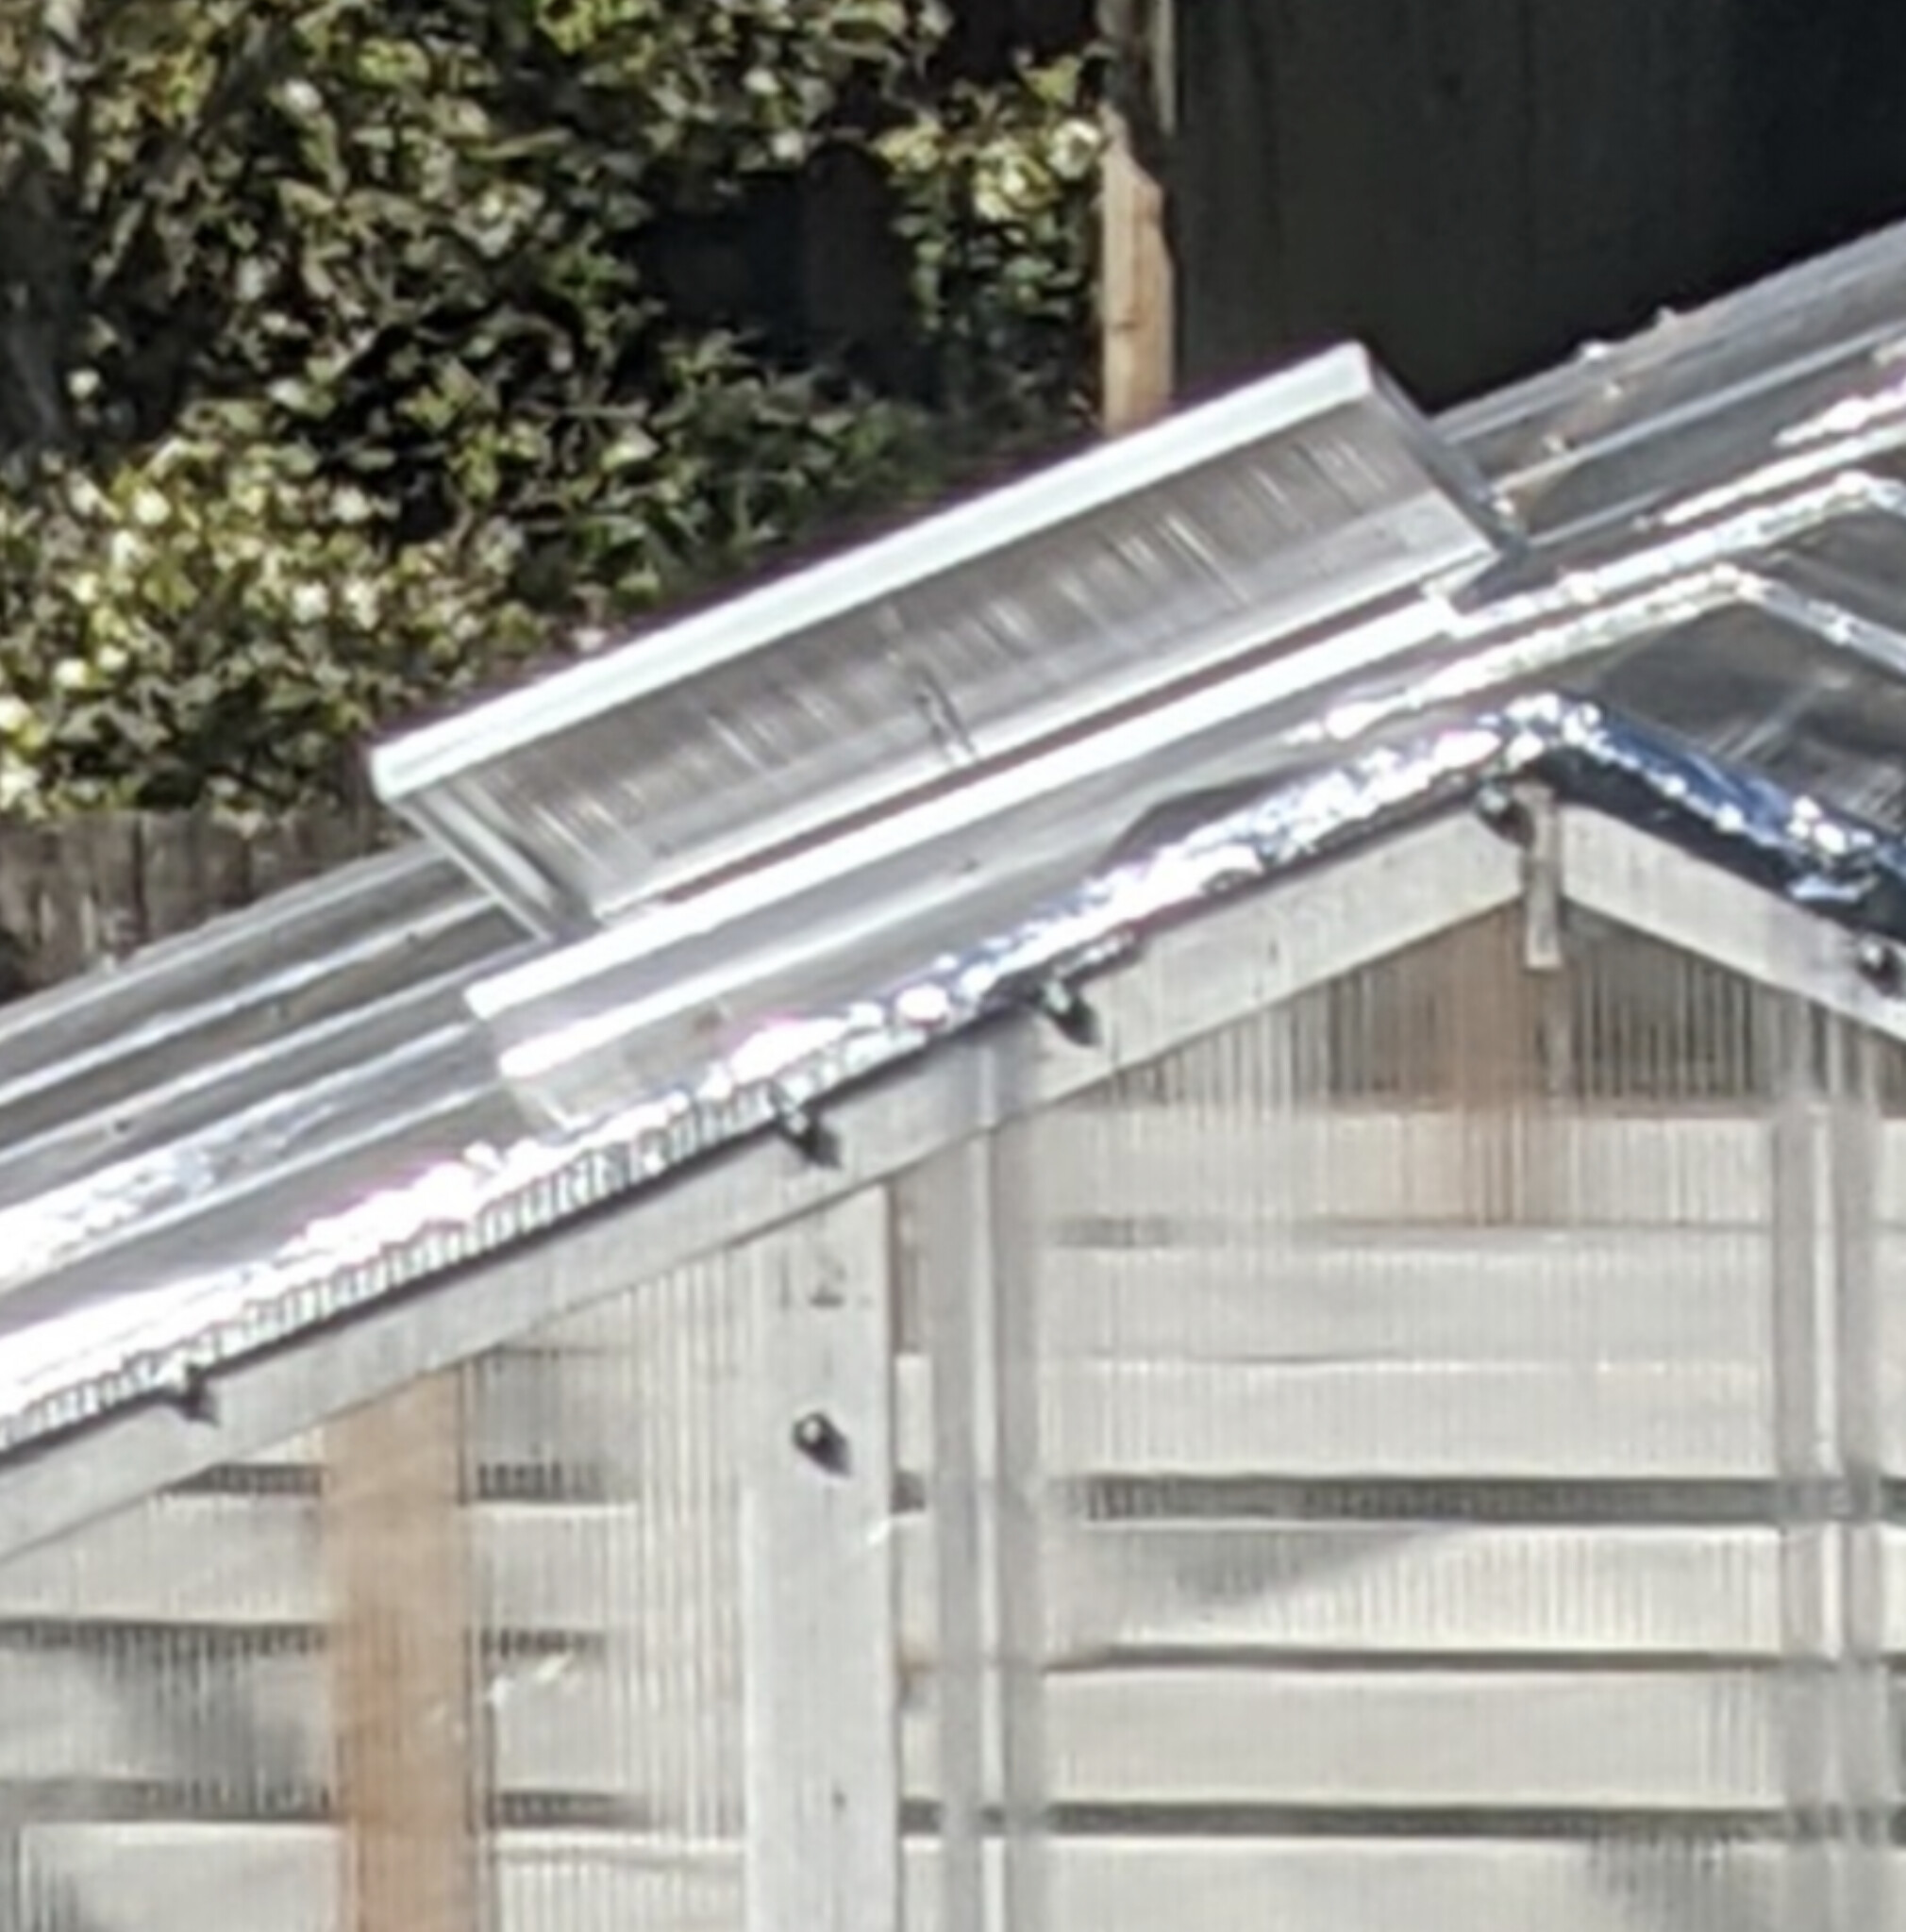
Need the cylinder up high where the heat is .
Not sure what the louvers are called , ? What type I used .
But they would be the type on a exhaust fan, such that when the fan comes on it blows them open , each panel is connected to a common bar, I just rigged the rope / spring / gigavent up to that common bar. It works !
So the one gigavent opens two 4x4 ft. Louver vents side by side
A 4x8 ft opening .
Right now there is nowhere for air to get in, though, so I’m relying on the leakiness of the walls, and as I seal stuff up I’ll need to add intakes. I was thinking of adding another auto-opener lower down, but wasn’t sure if it would open soon enough and didn’t think about rigging one up high to pulleys so it opens louvers down low. I like the idea!
Our summer is too cool here for citrus to thrive, and the panels are sealed with silicone in many sections, so removal would be a challenge! If I were somewhere with hotter summers, I’d definitely have considered that when deciding how to build the greenhouse, though.
Sealing it up good may pay off when it’s really cold and you need to conserve heat.
But .
I find humidity can be a big problem in a sealed up greenhouse.
I often open vents even when cool, just a little , to get rid of to much humidity, other wise things can rot.
Too much humidity can be a big problem ,so a little venting is often needed. Small air leaks can be a good thing .
Here is the company I used for my heat pump and the brand I chose. This is their cheapest 20 SEER ductless DIY (You can install yourself if you have the wiring know-how) system.
Is there a reason why you are not trying to build an evaporative cooler system? From the book I’ve been reading about the nursery business, they seem to be a go-to option but with the recommendations that backup options exist. Greenhouse Evaporative Air / Swamp Coolers on sale from ACF Greenhouses
If improving ventilation proves insufficient, evaporative cooling on my short list of next steps to consider. I suspect ventilation will be enough, though, with a couple fans. Sun angle is low and summers are cool here so
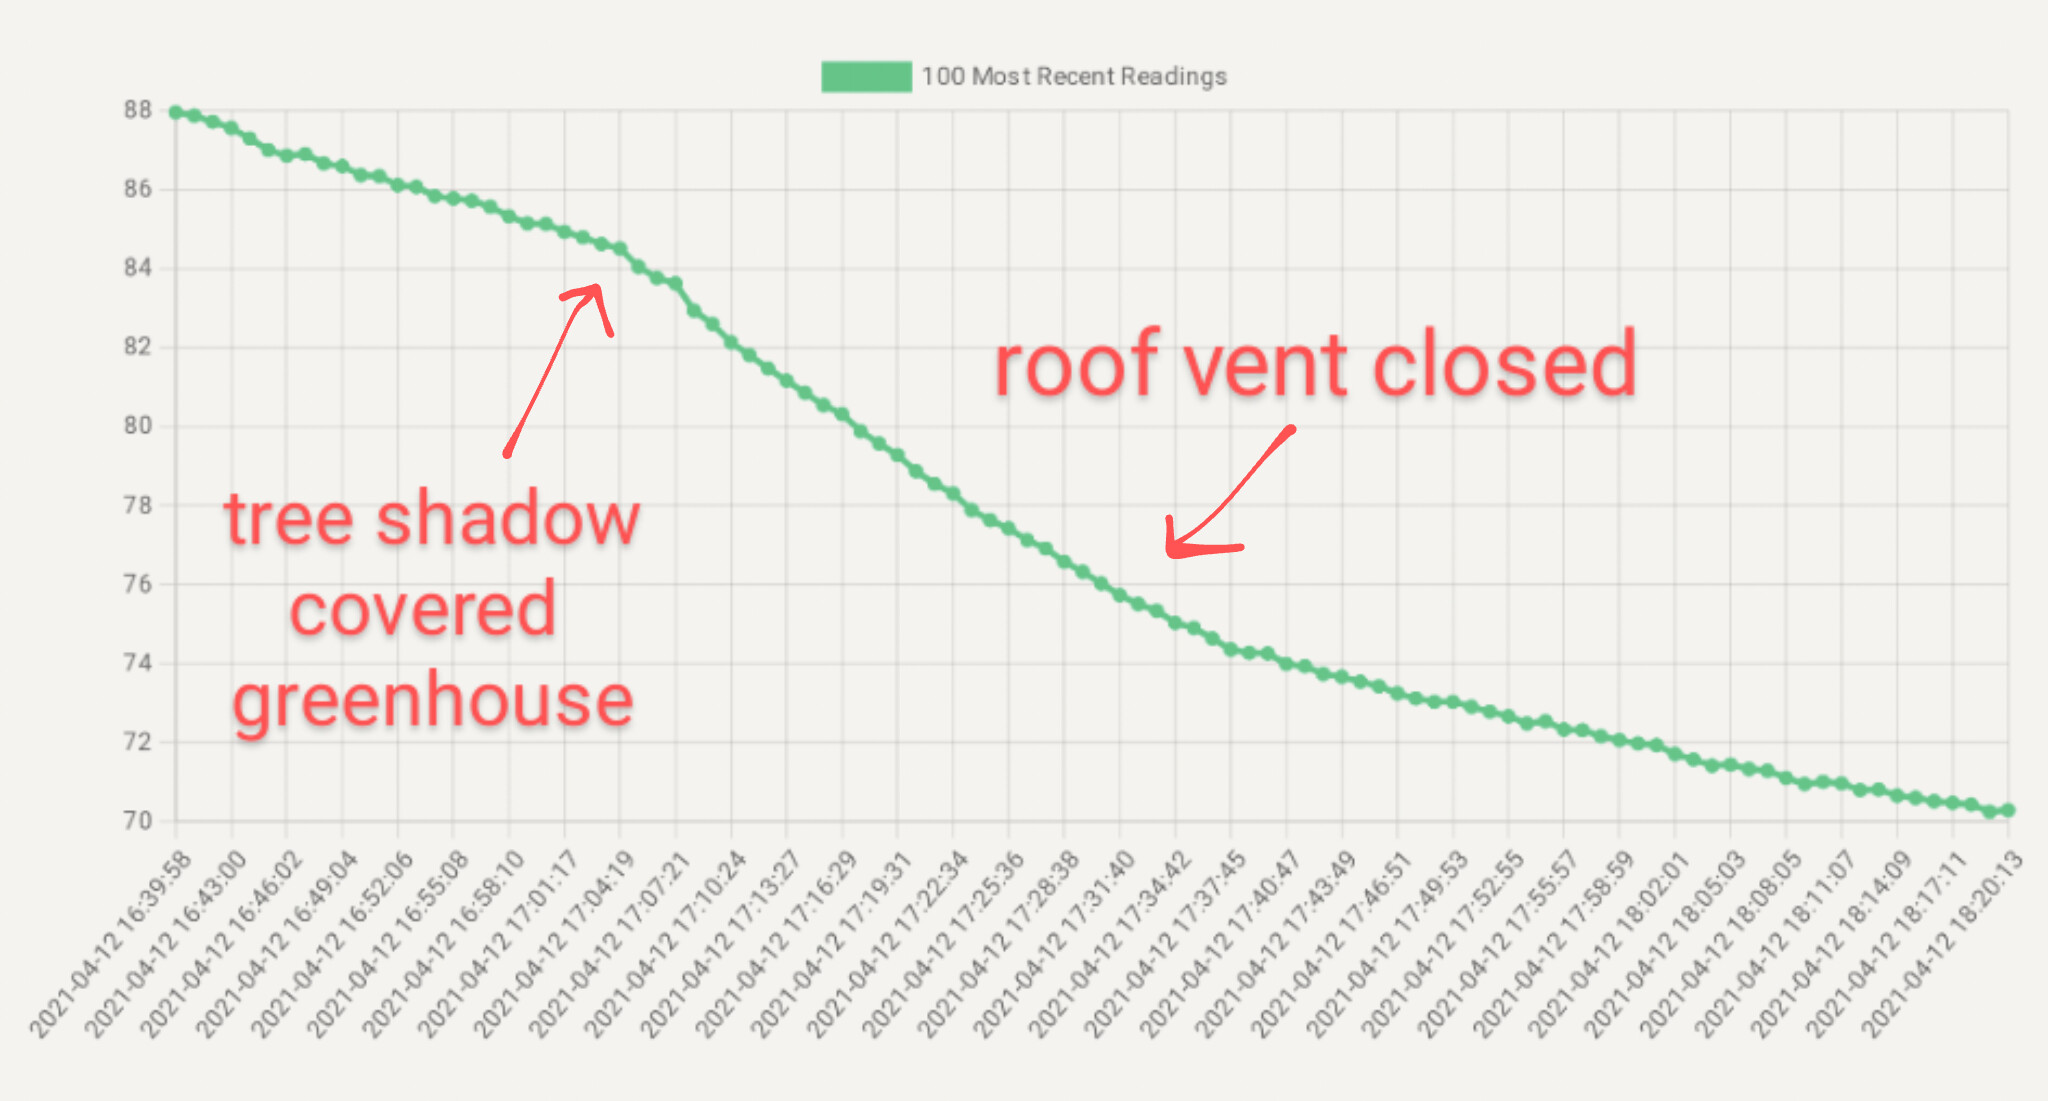
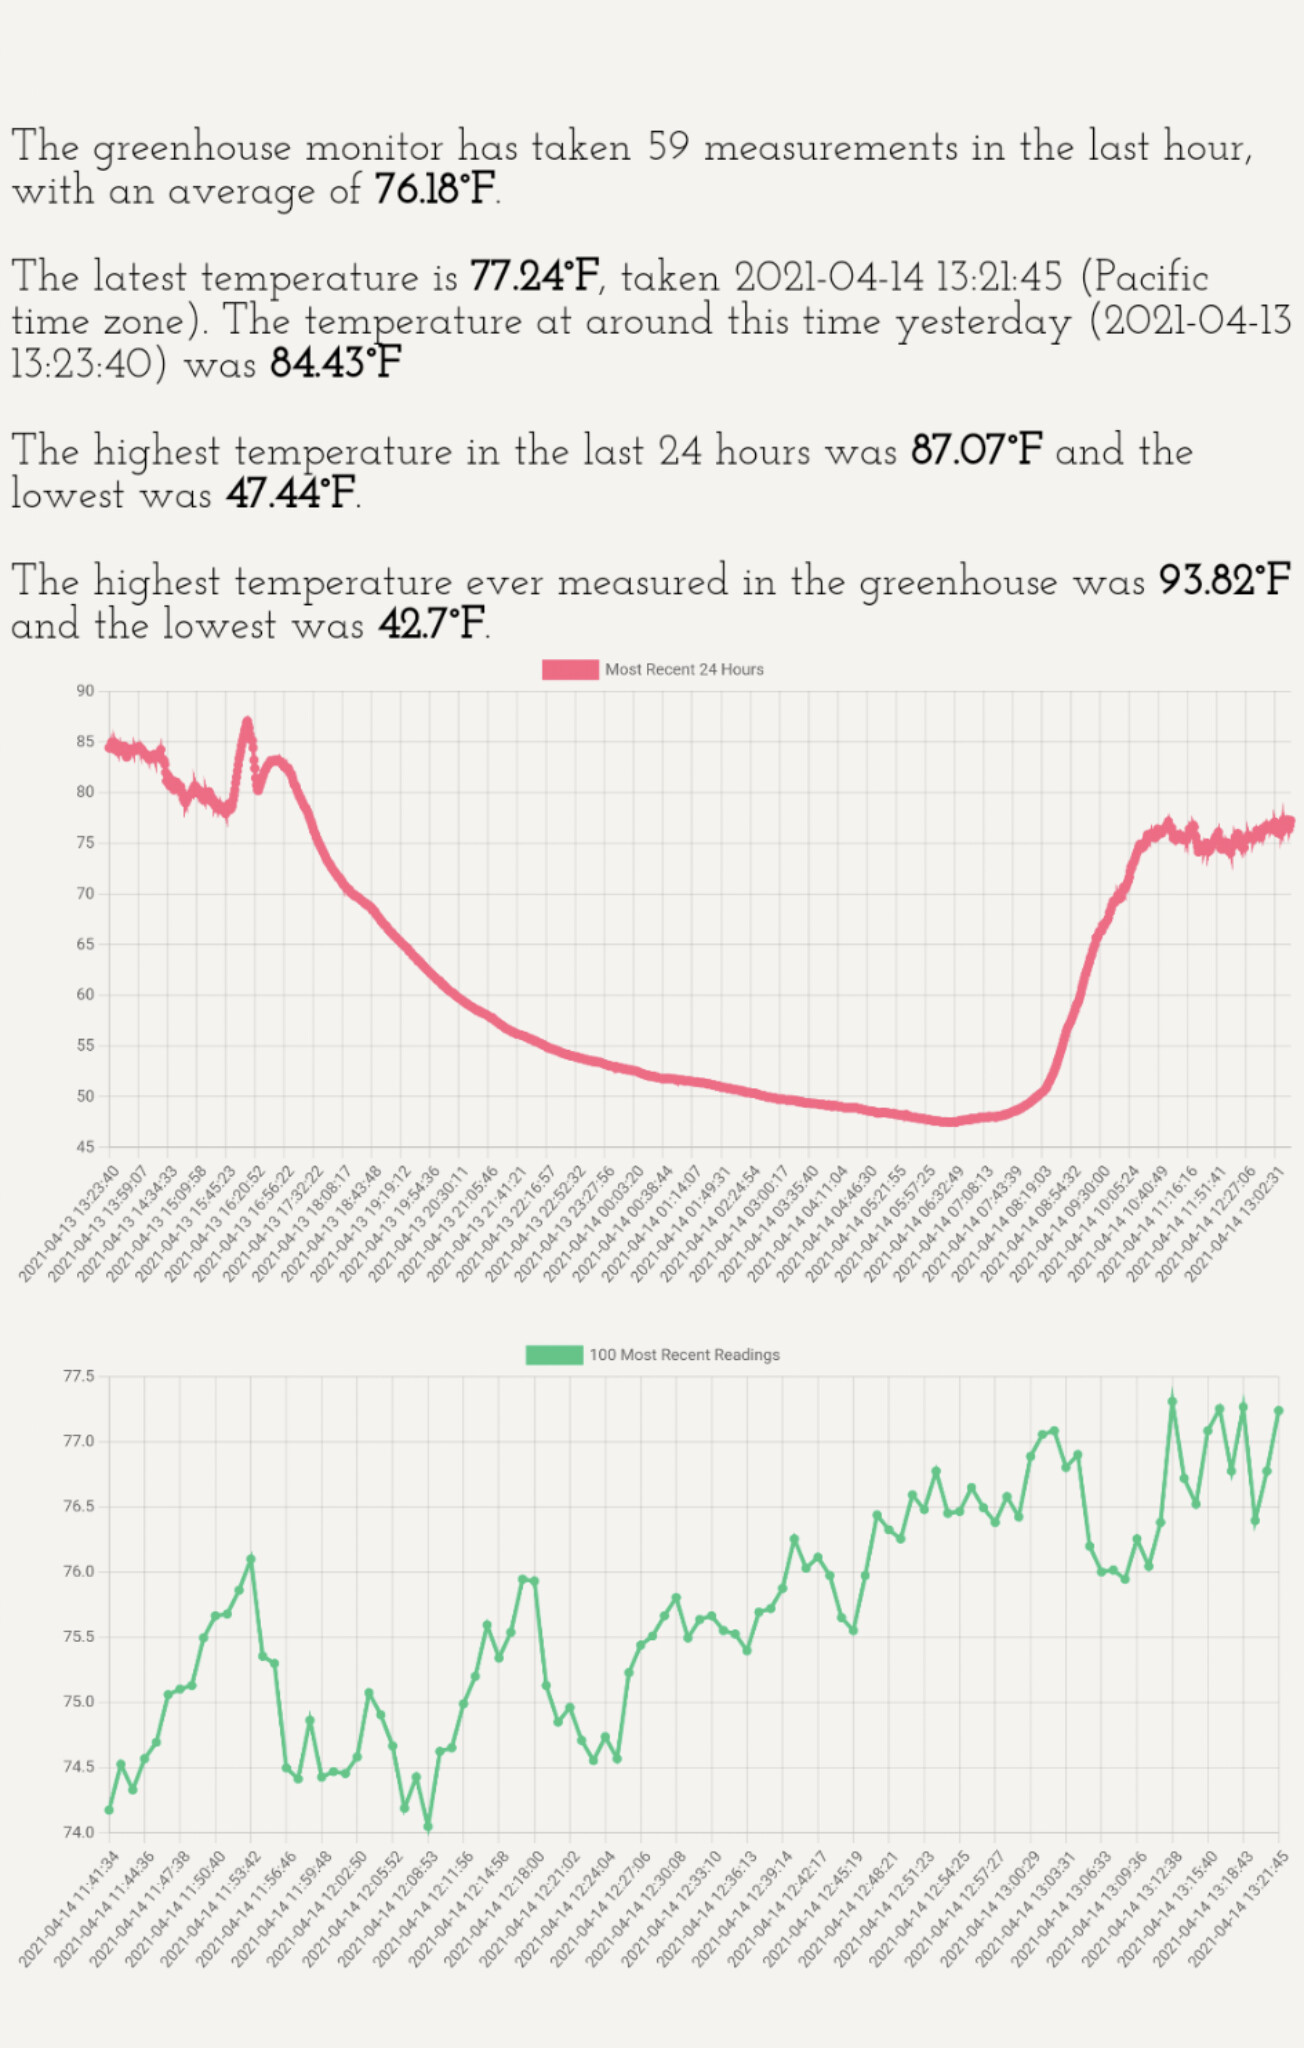
Last night was the first night with no heater running, and the overnight low outside the greenhouse was 33.2°F, the greenhouse held it about 9° warmer:
This is still with no circulating fan (arrives today), so might have been colder at ground level. Today I’ll test manually opening one window when the roof vent opens, and see how the temperatures do with that compared to yesterday all closed up.
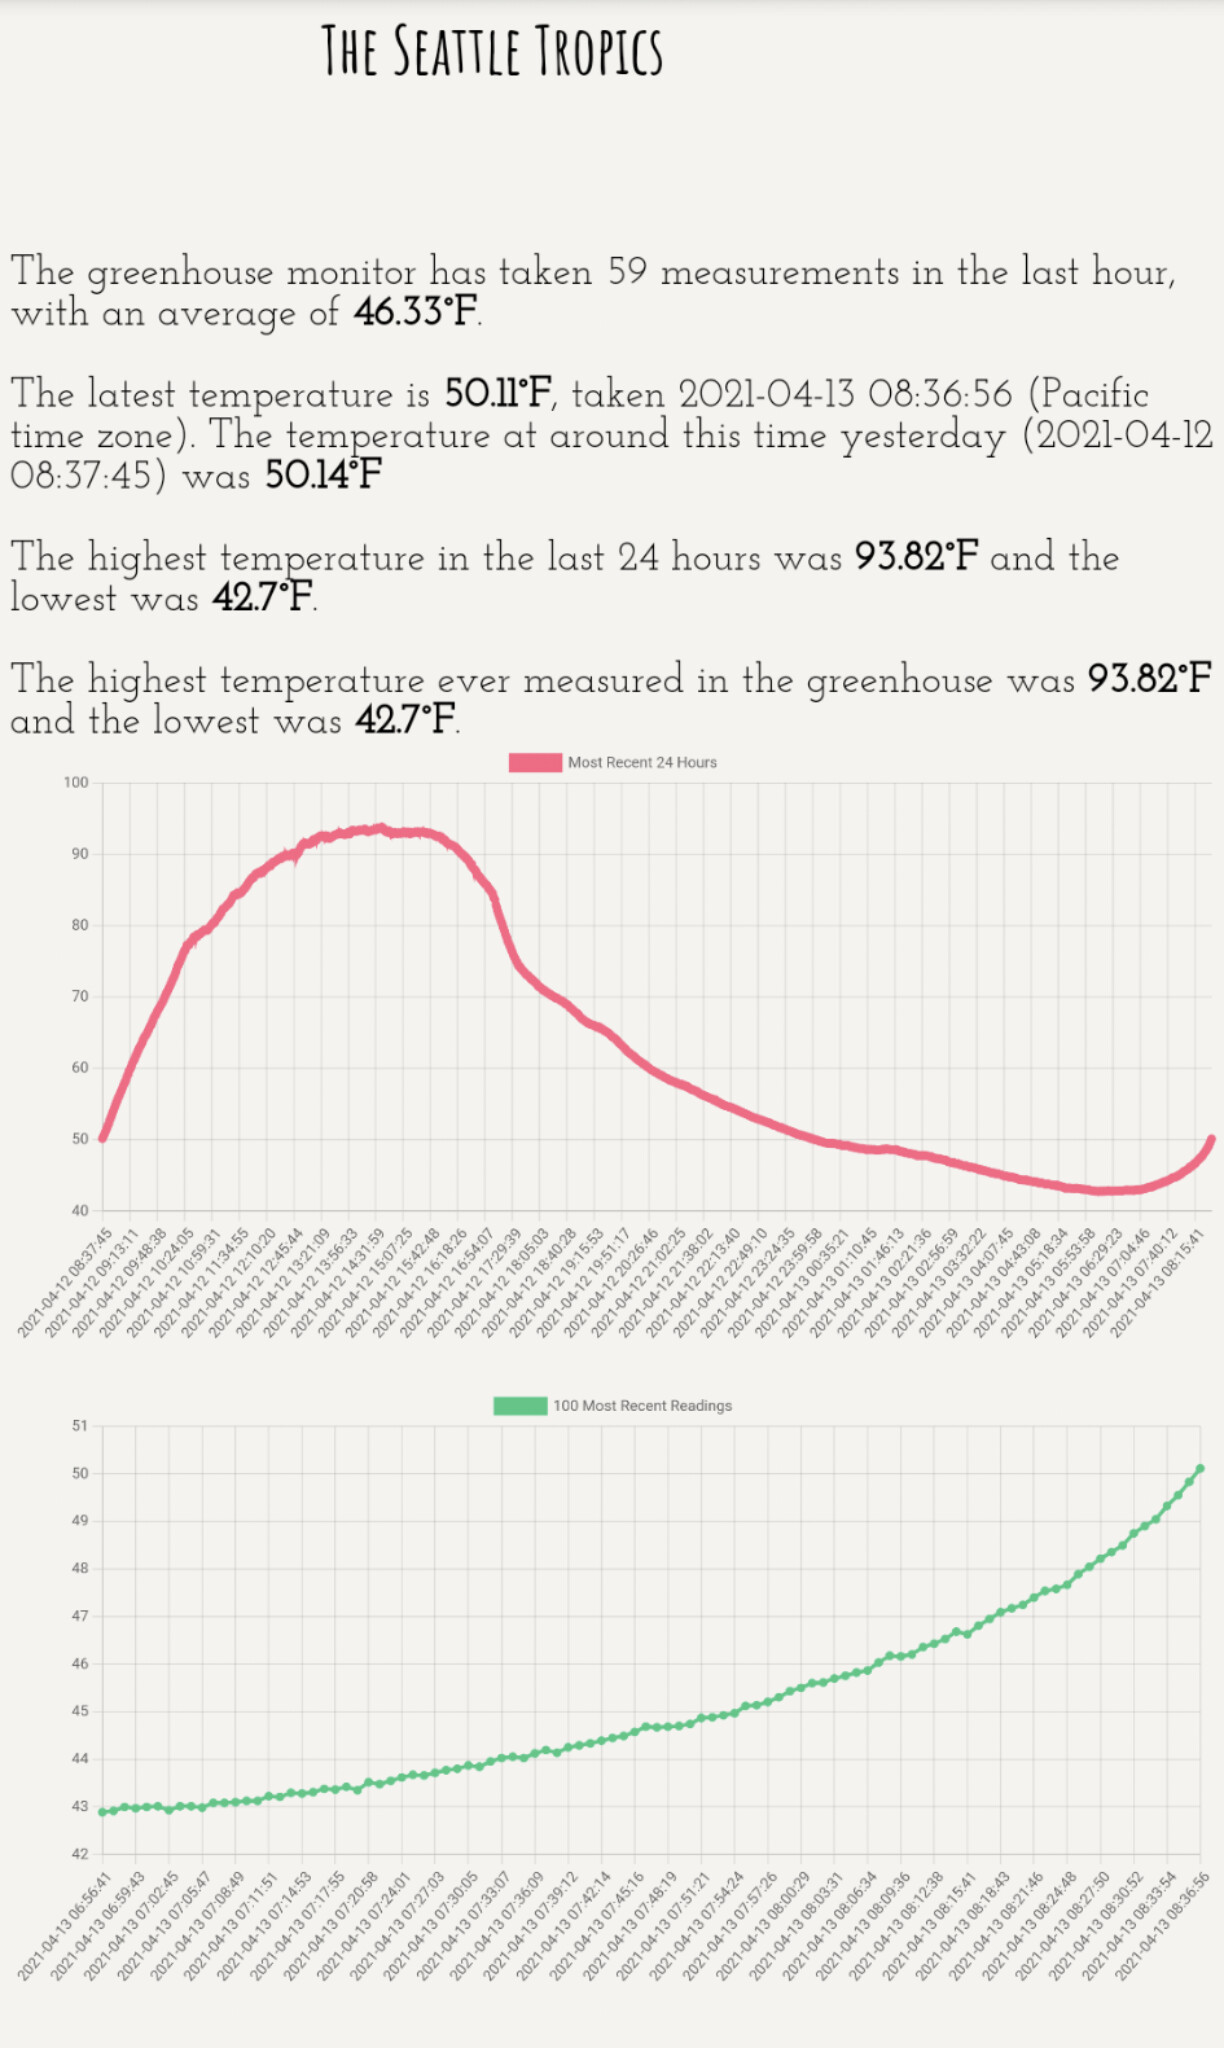
Today was warmer than yesterday outside (high of 66°F), so it’s great to see a peak of ~85° in the greenhouse with doors open (the only spike above that was when I prematurely closed the doors at 3:50pm). However, +19° will probably still end up being too much for the warmest summer temperatures. We’re getting up to mid-70s in a few days, so I’ll see if that means mid-90s with doors open, and if so I’ll look into more active cooling options like misting or a water wall.
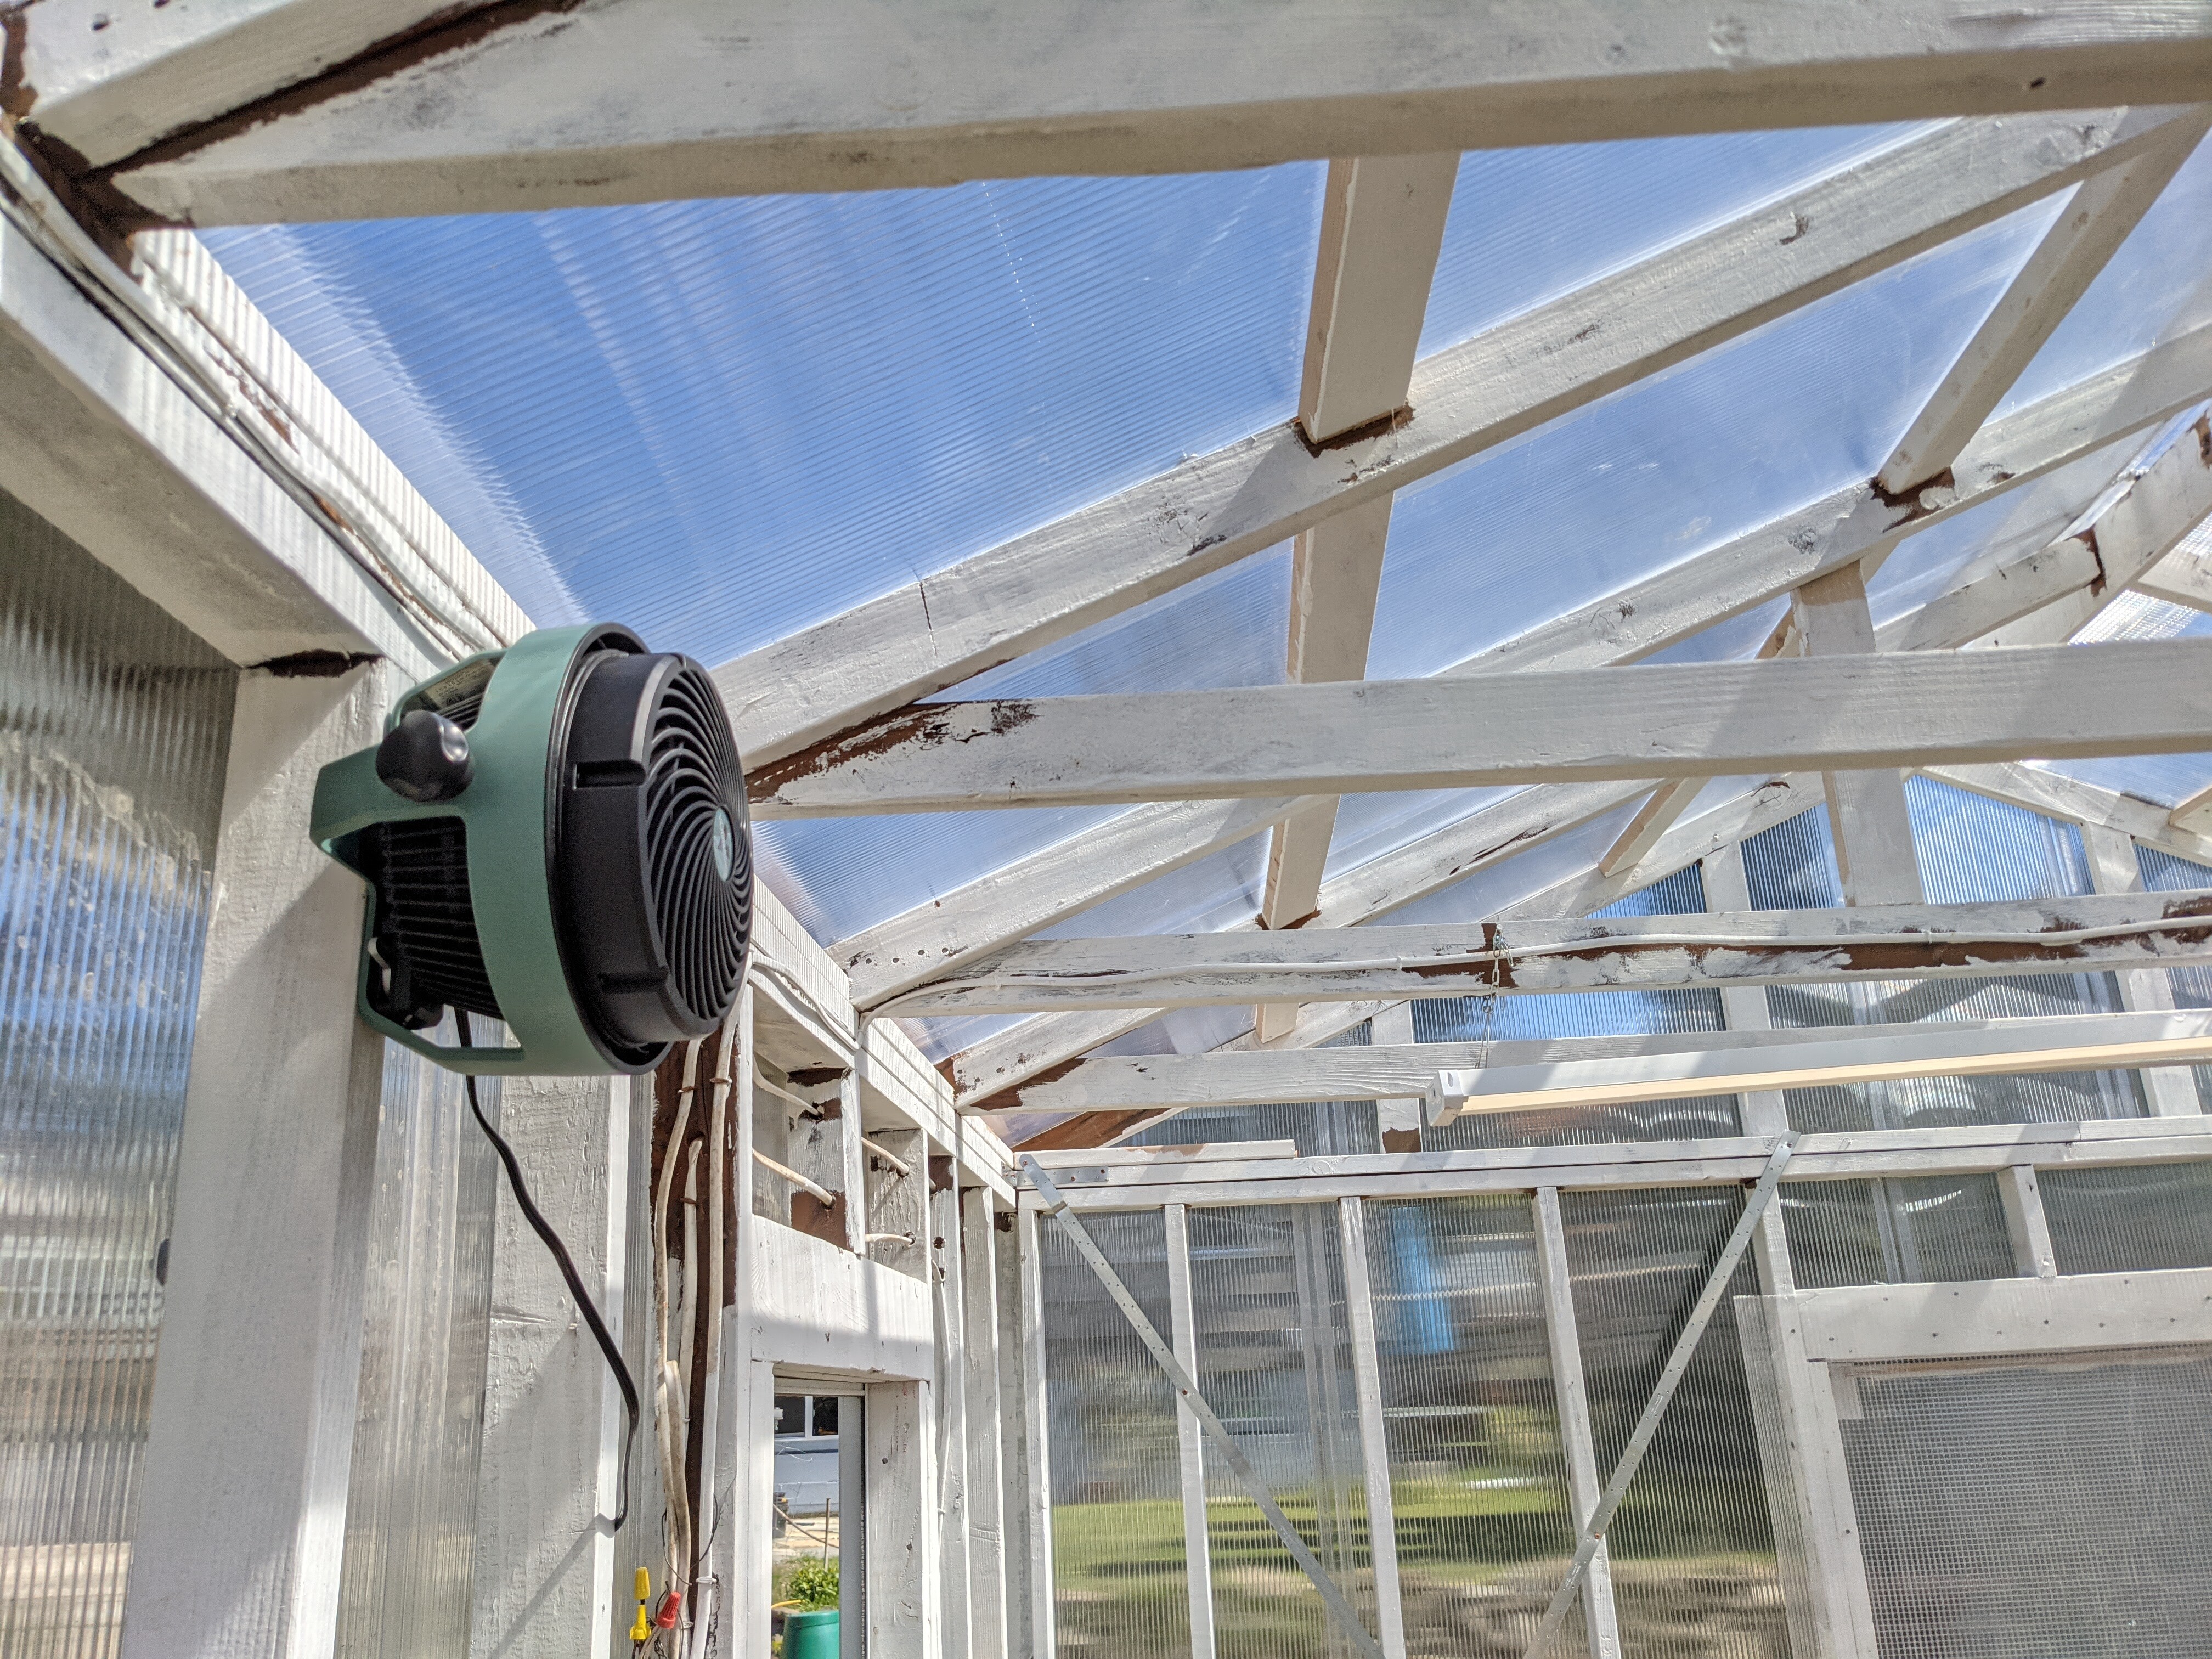
I’ll be curious to see whether the circulation fan will impact the overnight temperatures tonight. I went with a vornado shop fan, which is aimed roughly at the roof vent from the far wall:
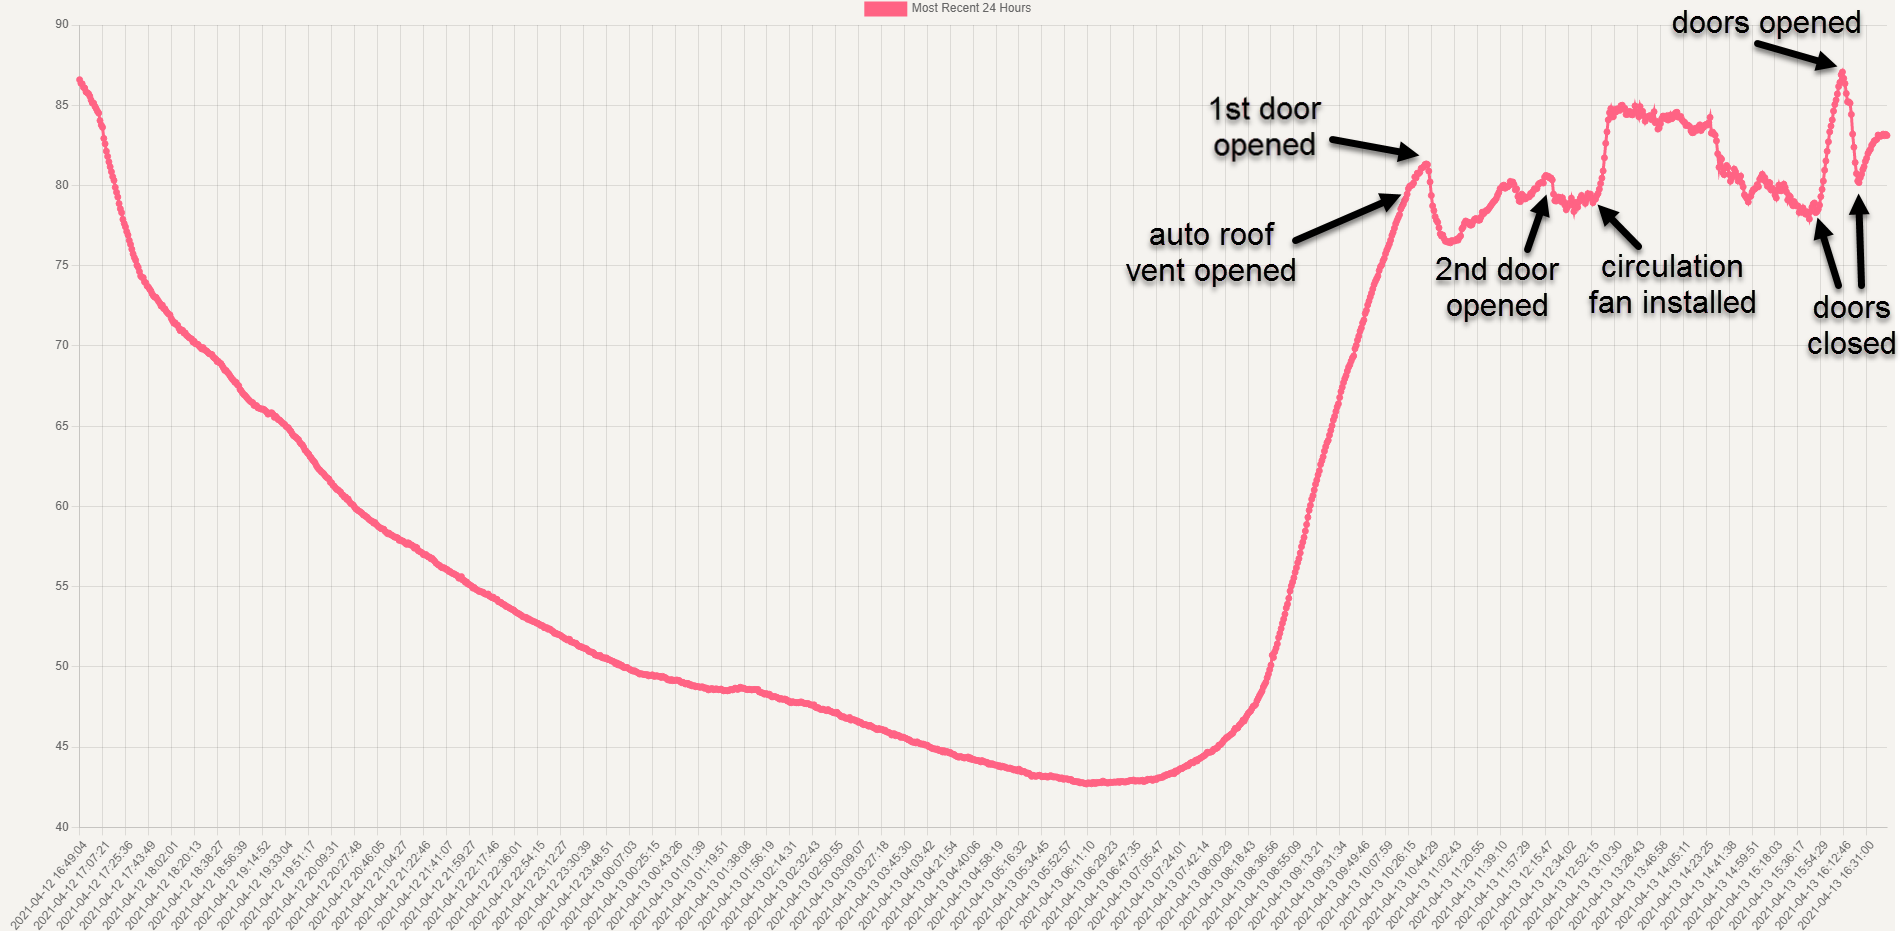
I adjusted the auto opener for the roof vent to open at its lowest setting (manual says that’s 60°F, but it seemed more like ~65°-70°); before it was set at the max (78°)
I manually opened windows as soon as the temperature started spiking in the morning, instead of waiting for the roof vent to open first (doors were opened later, because I was going in and out a lot, but didn’t seem to cause a temperature drop)
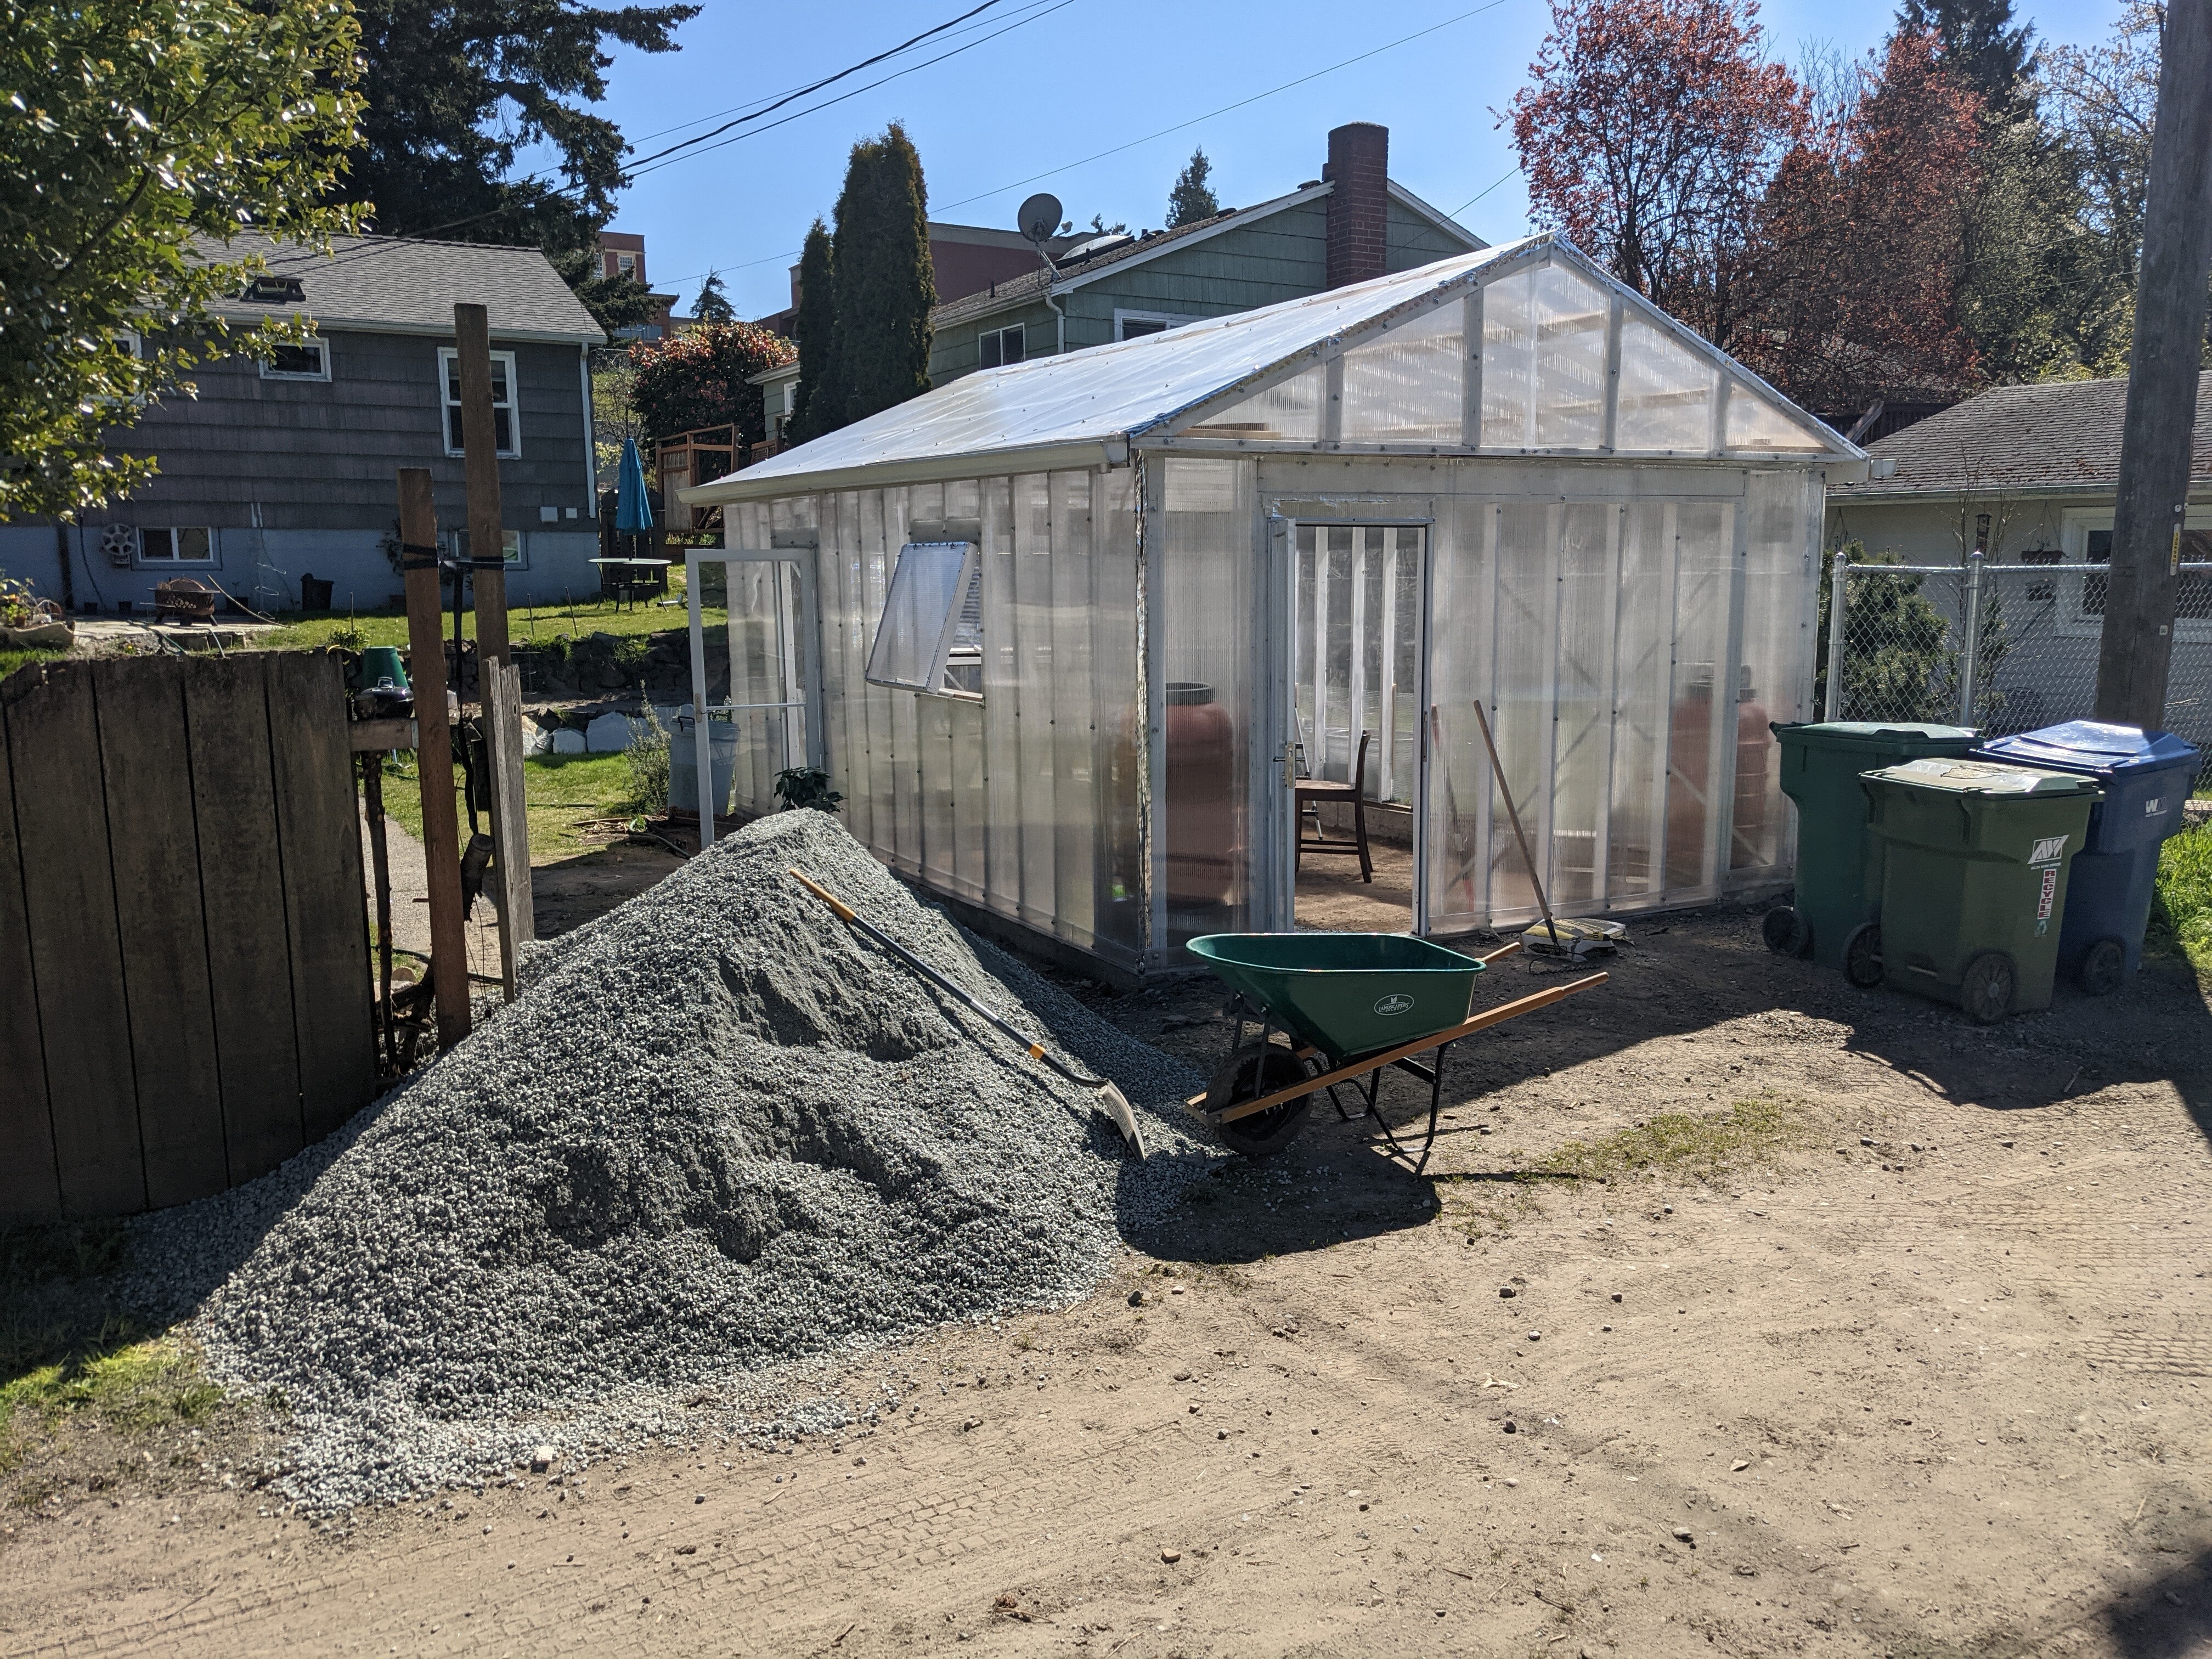
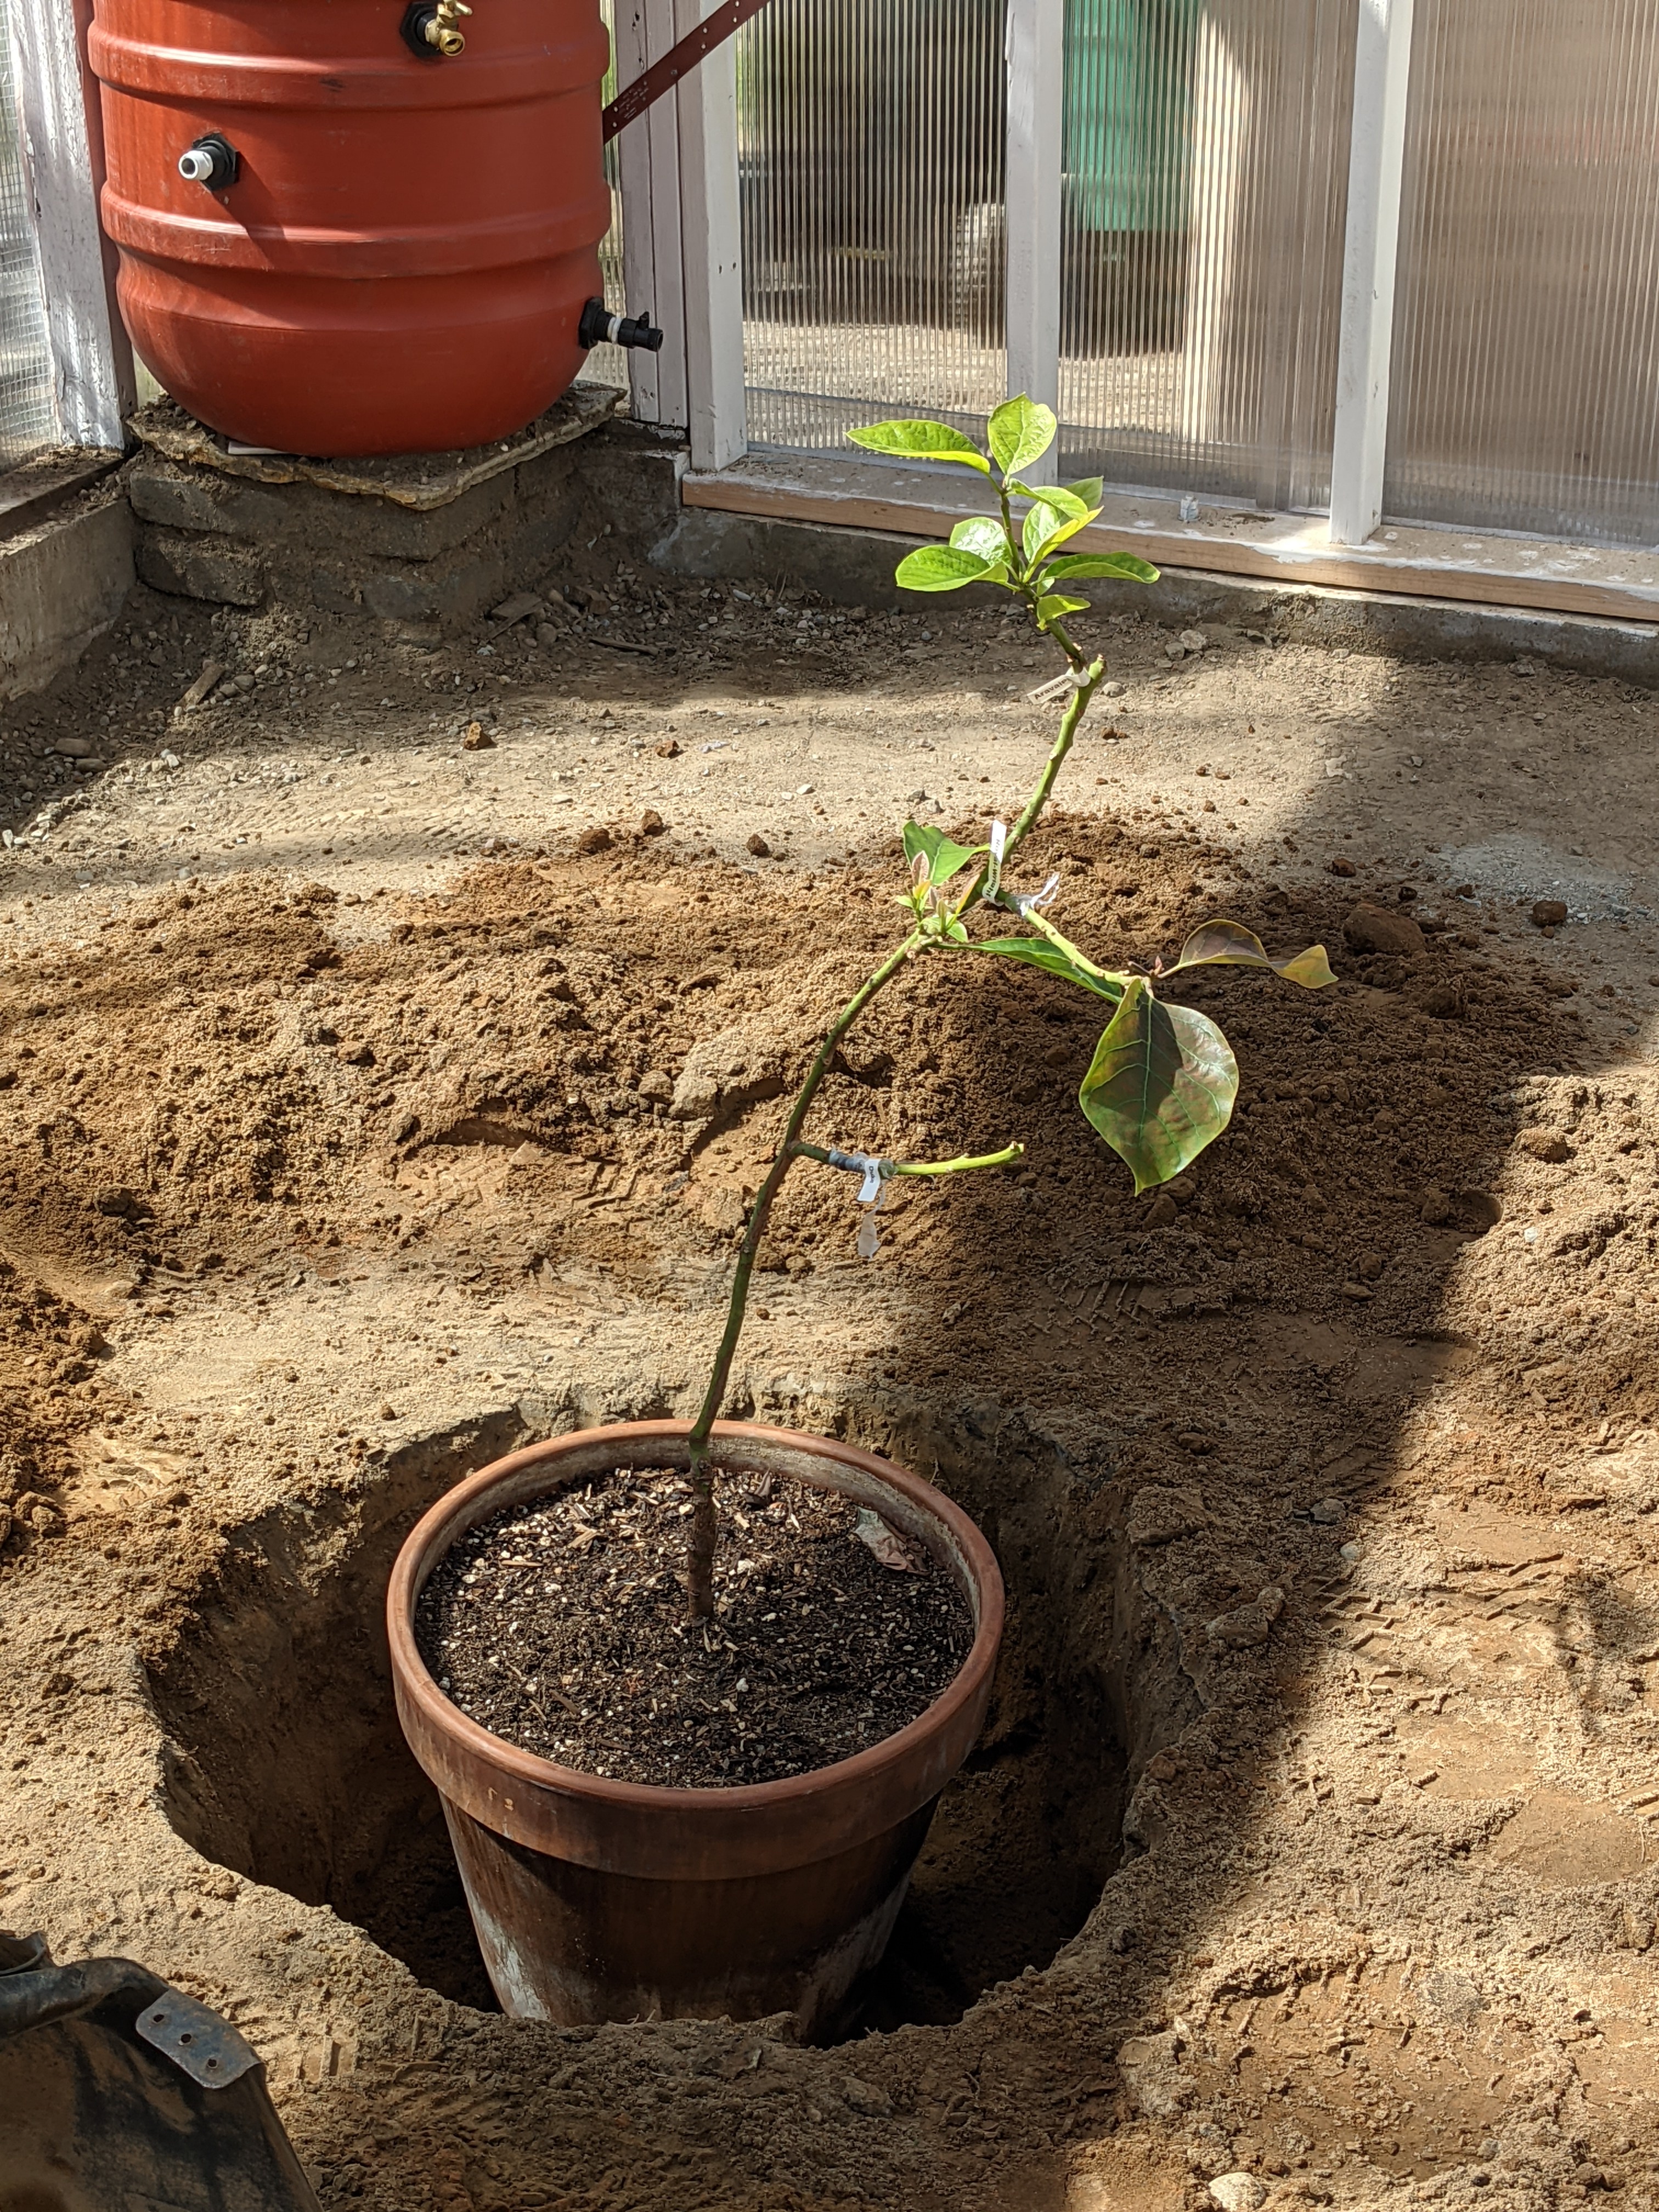
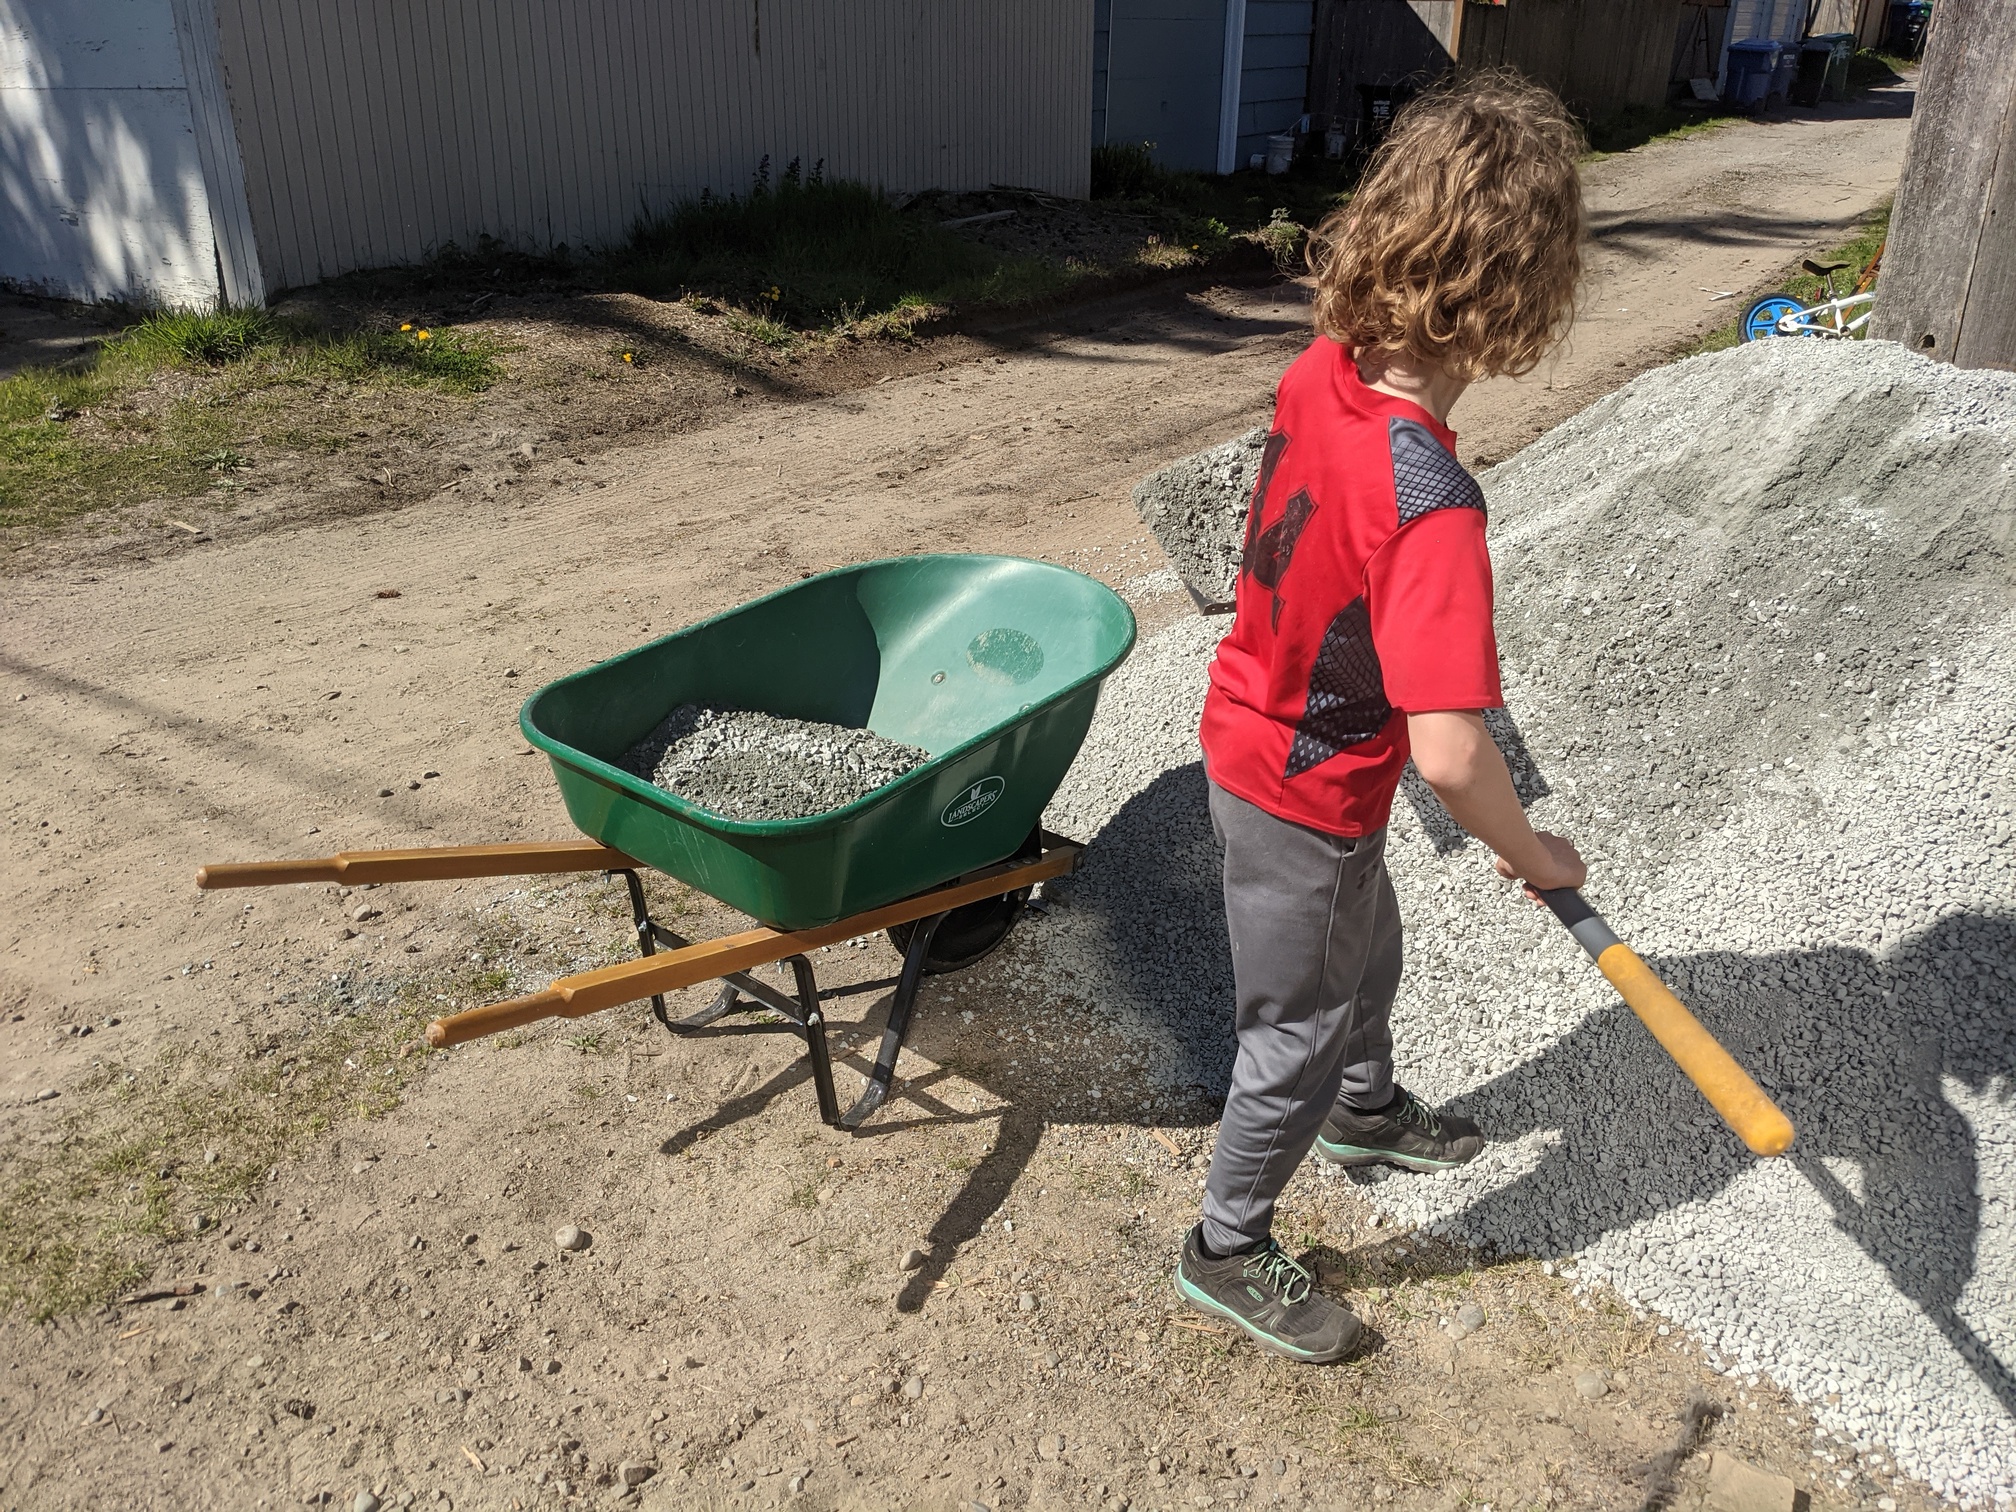
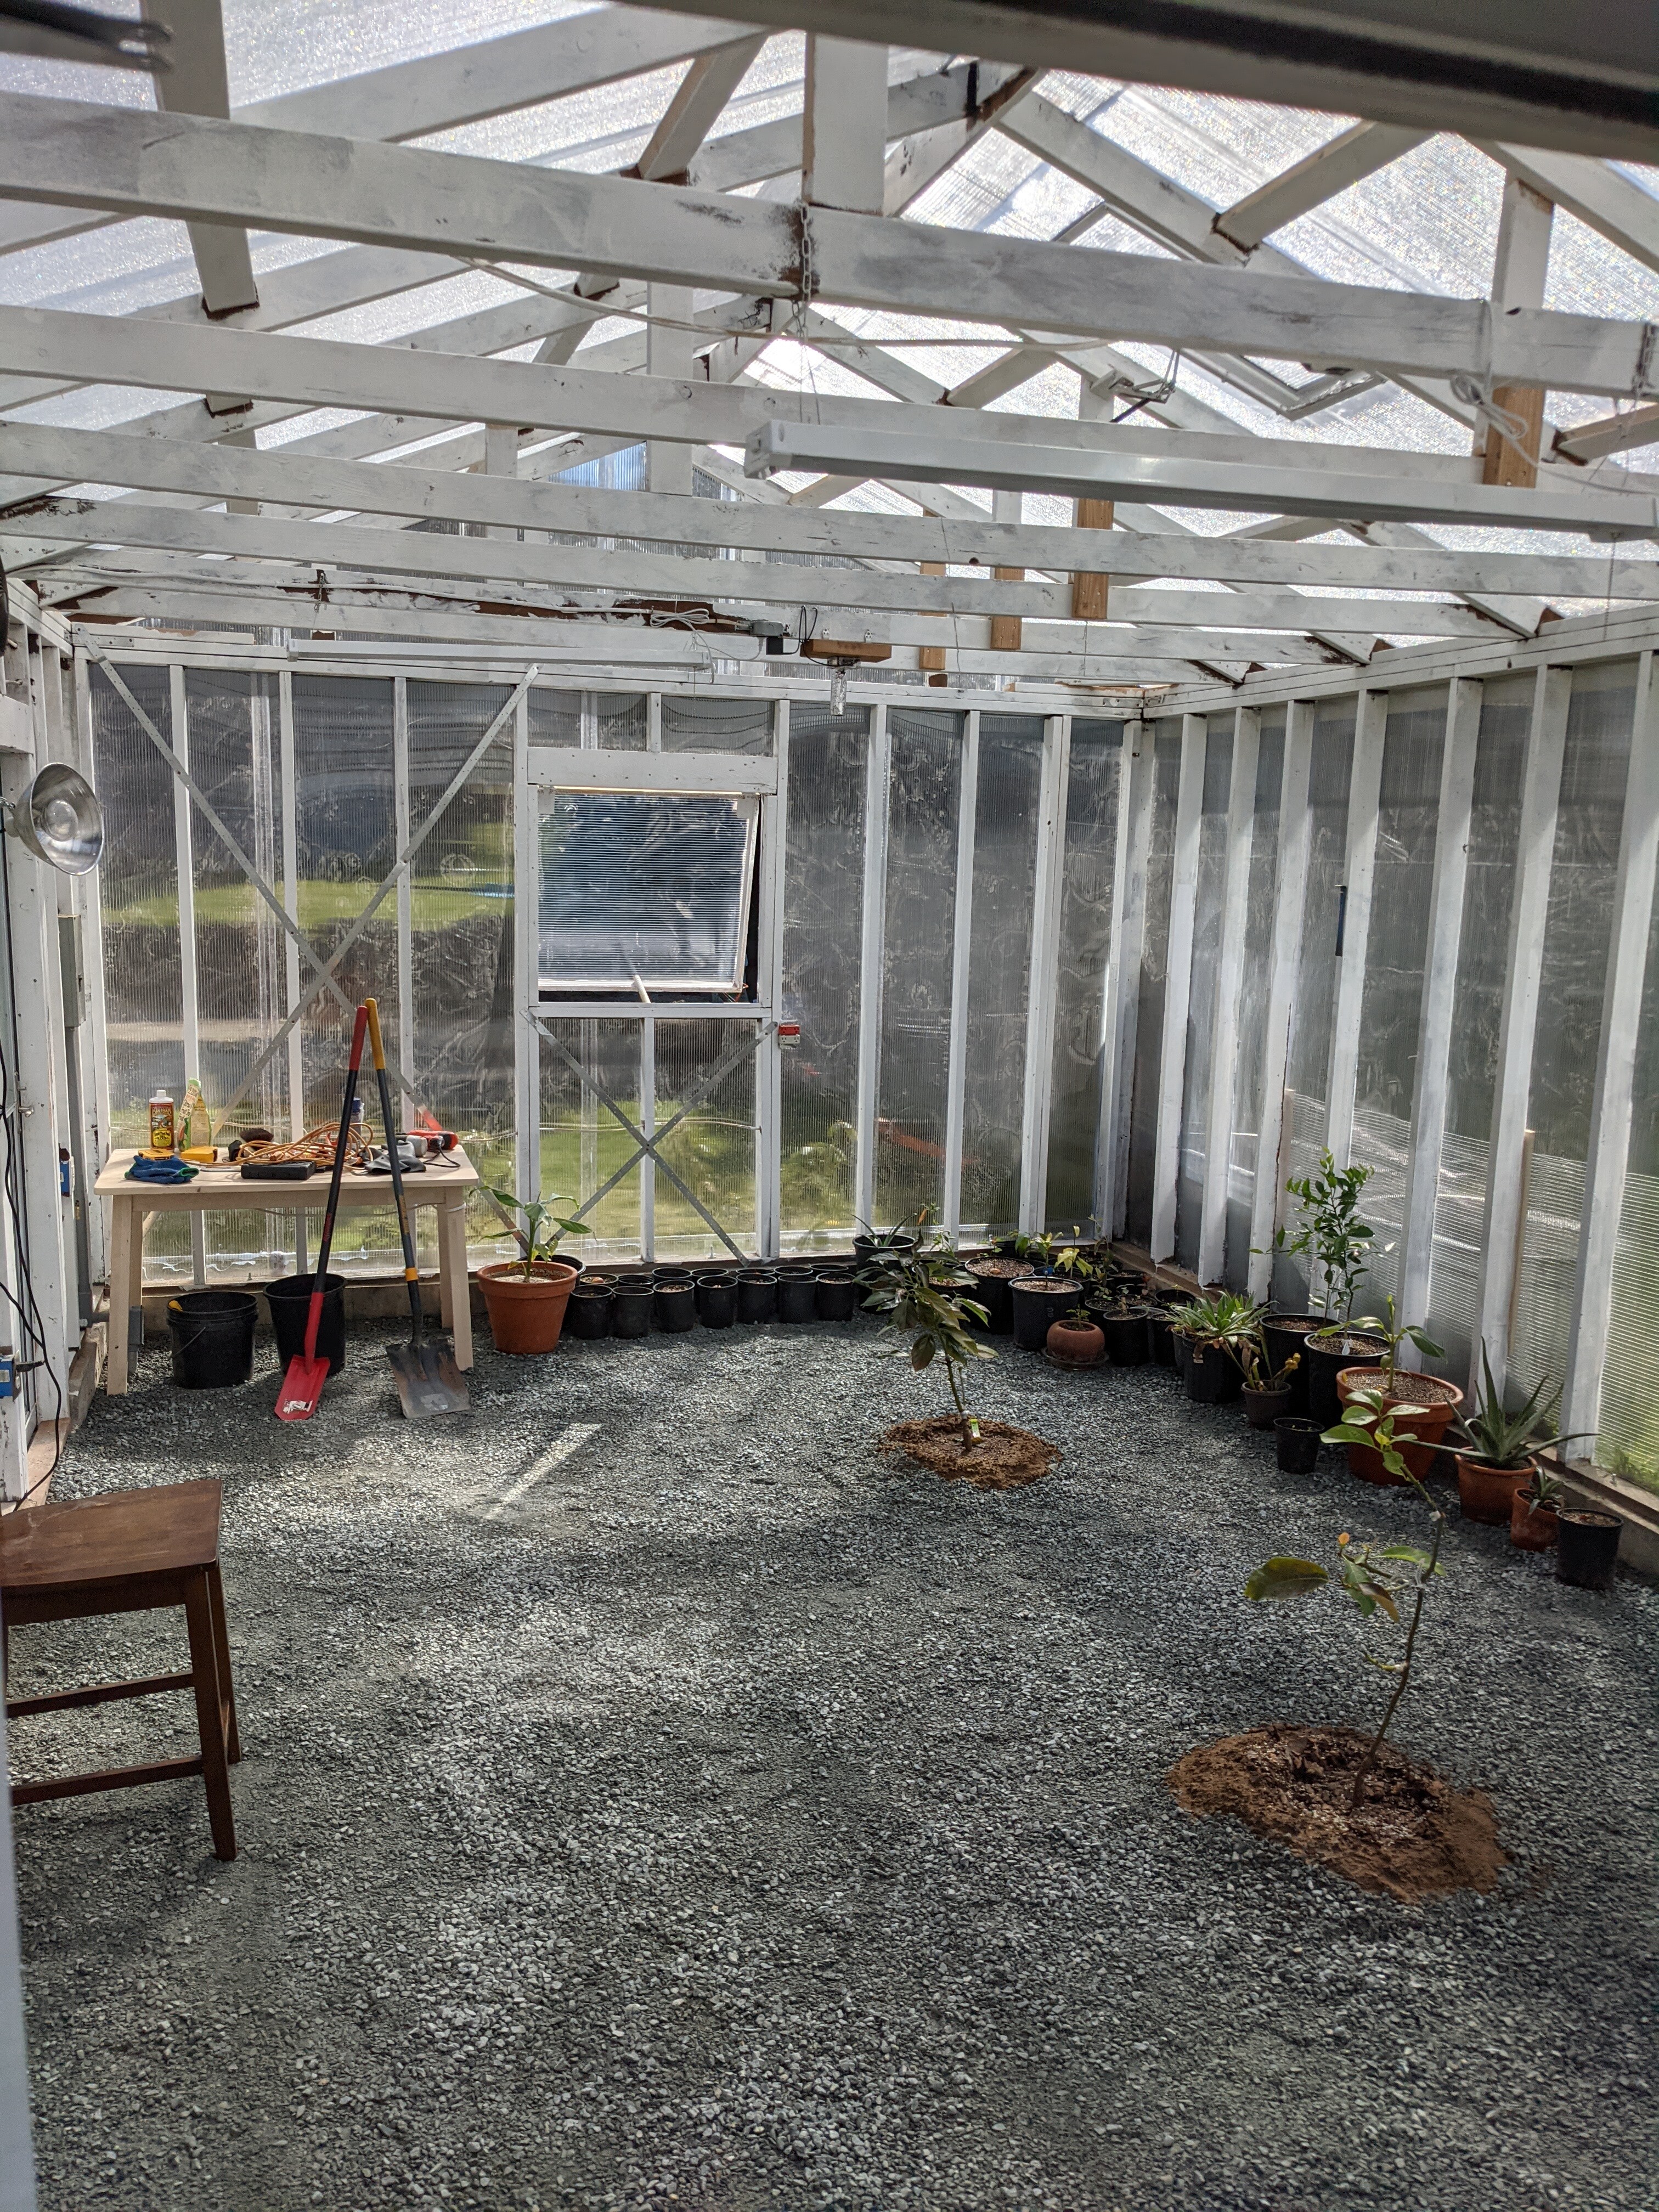
In other news, the gravel has arrived, so I’ve been digging the holes for the two avocado trees that are going in the ground (1 down, 1 to go), and will begin shoveling the gravel next:
Zor had a great point that what you should look at is what your heat inside compared to what it is outside is it +5 or +30. What was your outside temp and how closely did it mirror your greenhouse? I would also try to focus on calm non windy days (how many of those do yall get?) for more of an idea of what your absolute temperature is.
What i enjoy is that you have about the same amount of love for your back and neck that all of us do. I am not sure what they did to us when we were younger but we sure like to get back at them!
Today with the modified ventilation test, I was able to maintain a max of +11°F (high outside was 68°), and this is without any intake or exhaust fans, just opening doors, windows and roof vent earlier:
I’m hoping that with the right combination of fans that I will be able to replicate this result without having to manually open and close stuff (I want it able to survive when I’m not home).
Today was slightly breezy at times (10mph maybe?), but calm at times as well.
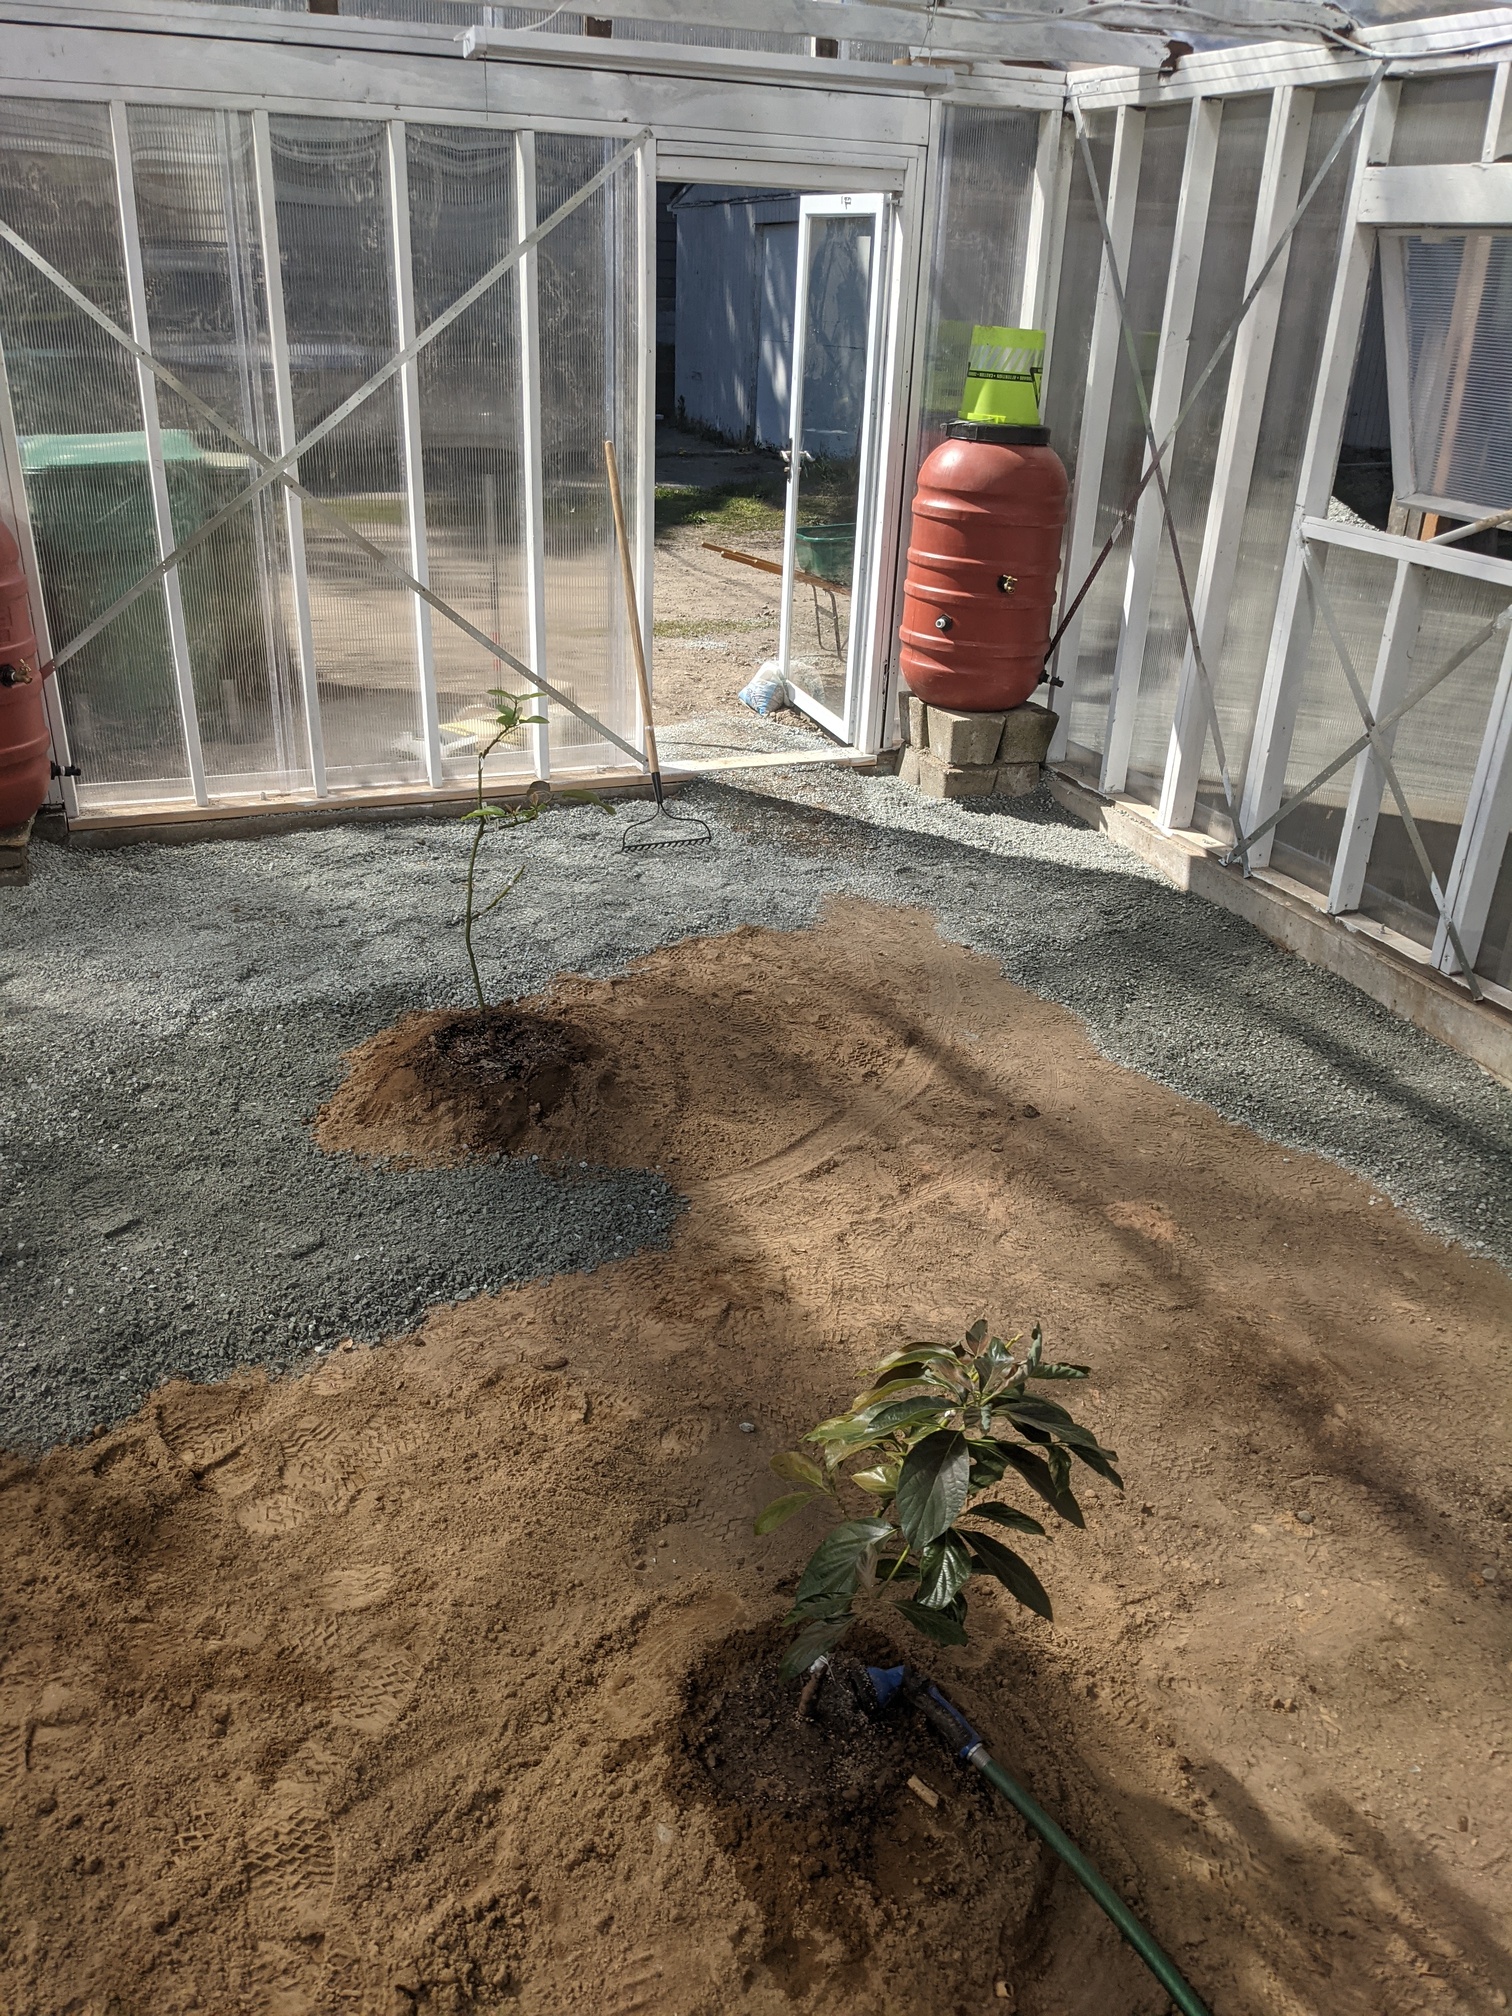
I took a photo shortly after we started with the first layer of gravel (we tamped and watered and then added another layer), but neglected to take any at the end. It shows the two permanent residents (avocados) in the ground (you may notice the nearer one is a little crispy from sunburn):
Swincher: Your helper with own wheelbarrow - perfect.
I’m wondering about your soil mix for in ground avocados.
Something like 1/3 perlite (or sand or DE), 1/3 peat moss (or coco coir), 1/3 worm castings, plus a bit of azomite?
From pic looks like planted on a bit of a mound. Is this for soil settling or intended to permanently remain higher than soil level for necessary good drainage?
Thanks for the inspiration to do something similar with my potted avos!
I mixed up a batch of soil in a corner of the garden, without any precise ratio. We have a patch next to the decomposing stump of an old fir tree where the top 4-5 inches of the soil is highly decomposed fir needles, and I’ve used a mixture of that and worm castings as the main organic matter in the mix. If I were to estimate the ratio of the mix it would be:
5 parts native topsoil (sandy clay/glacial till)
3 parts perlite
3 parts sand
3 parts decomposed fir needles
1 part vermiculite
1 part worm castings
a bit of dry fertilizer and liquid fertilizer
I could have probably just used the native soil from another part of the yard, but the floor of the greenhouse was for 50+ years a compacted dirt garage floor, which is resting on clay semi-hardpan that underlies my topsoil, so I couldn’t just plant them in that.
Mostly for soil settling, but also we added more gravel so that it’s less of a mound relative to the gravel floor:
If it were outdoors I would plant on more of a mound, but since I’m controlling watering I’m not as worried about drainage. I’ll just use a moisture meter!