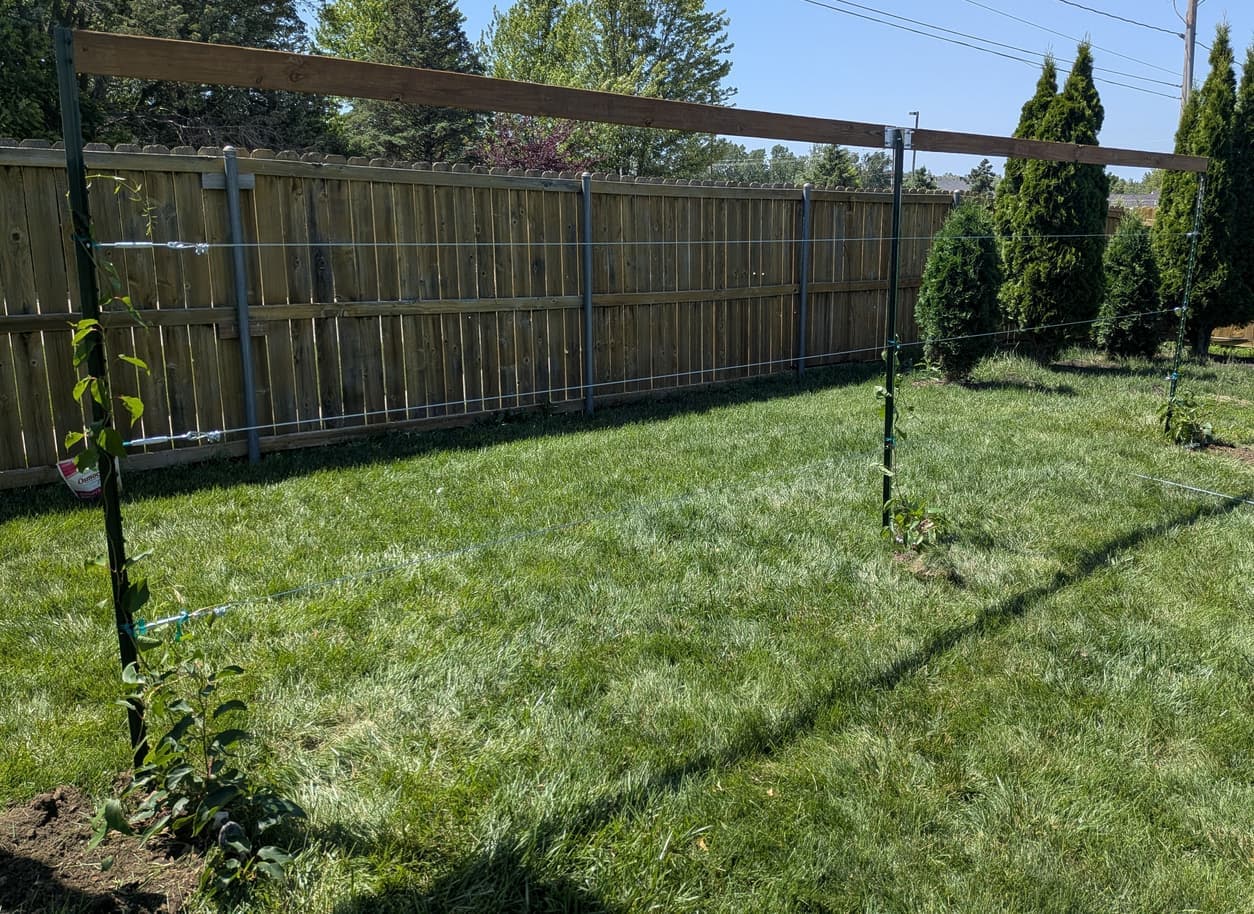
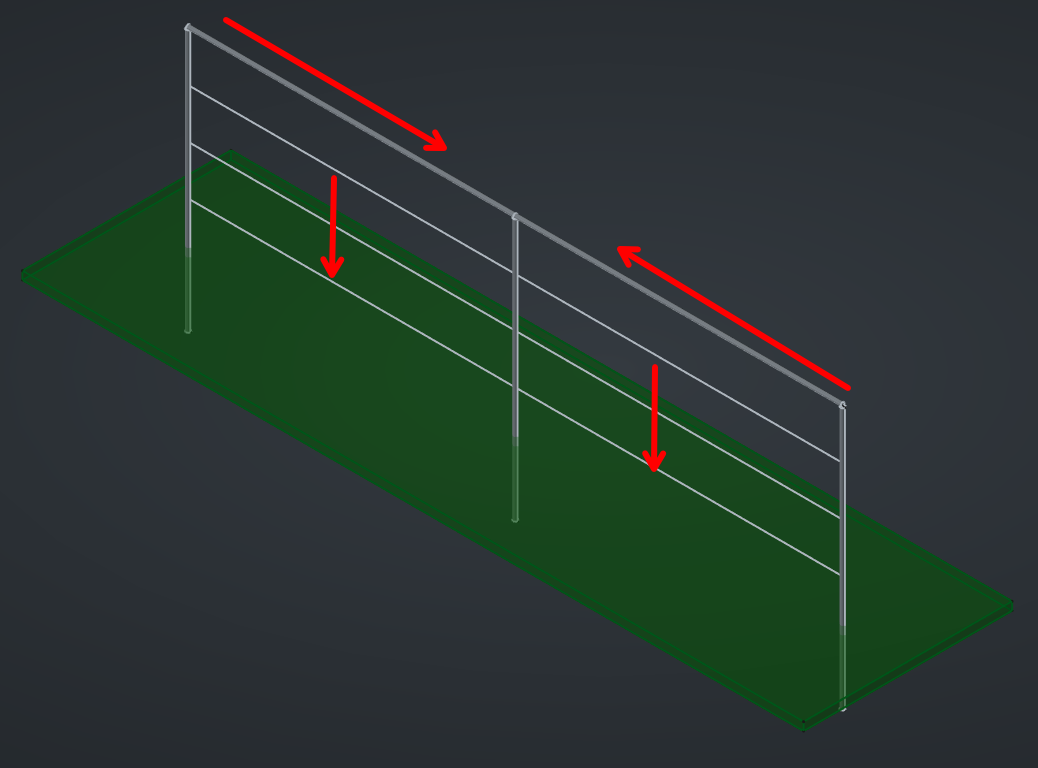
Here is an image of the H Brace I put on my tall spindle trellis this spring. Post were 14’ and 4’ in the ground. I used 304 limestone gravel around the post, instead of concrete. I compacted it with a hand tamper every 8" or so in18" augered holes.
Using gravel saved a lot time, expense, and effort for me as I had no help. Mistakes are fixable.
I’m very happy at its stability and I think the gravel will continue to tighten up with time and drain better than the concrete.
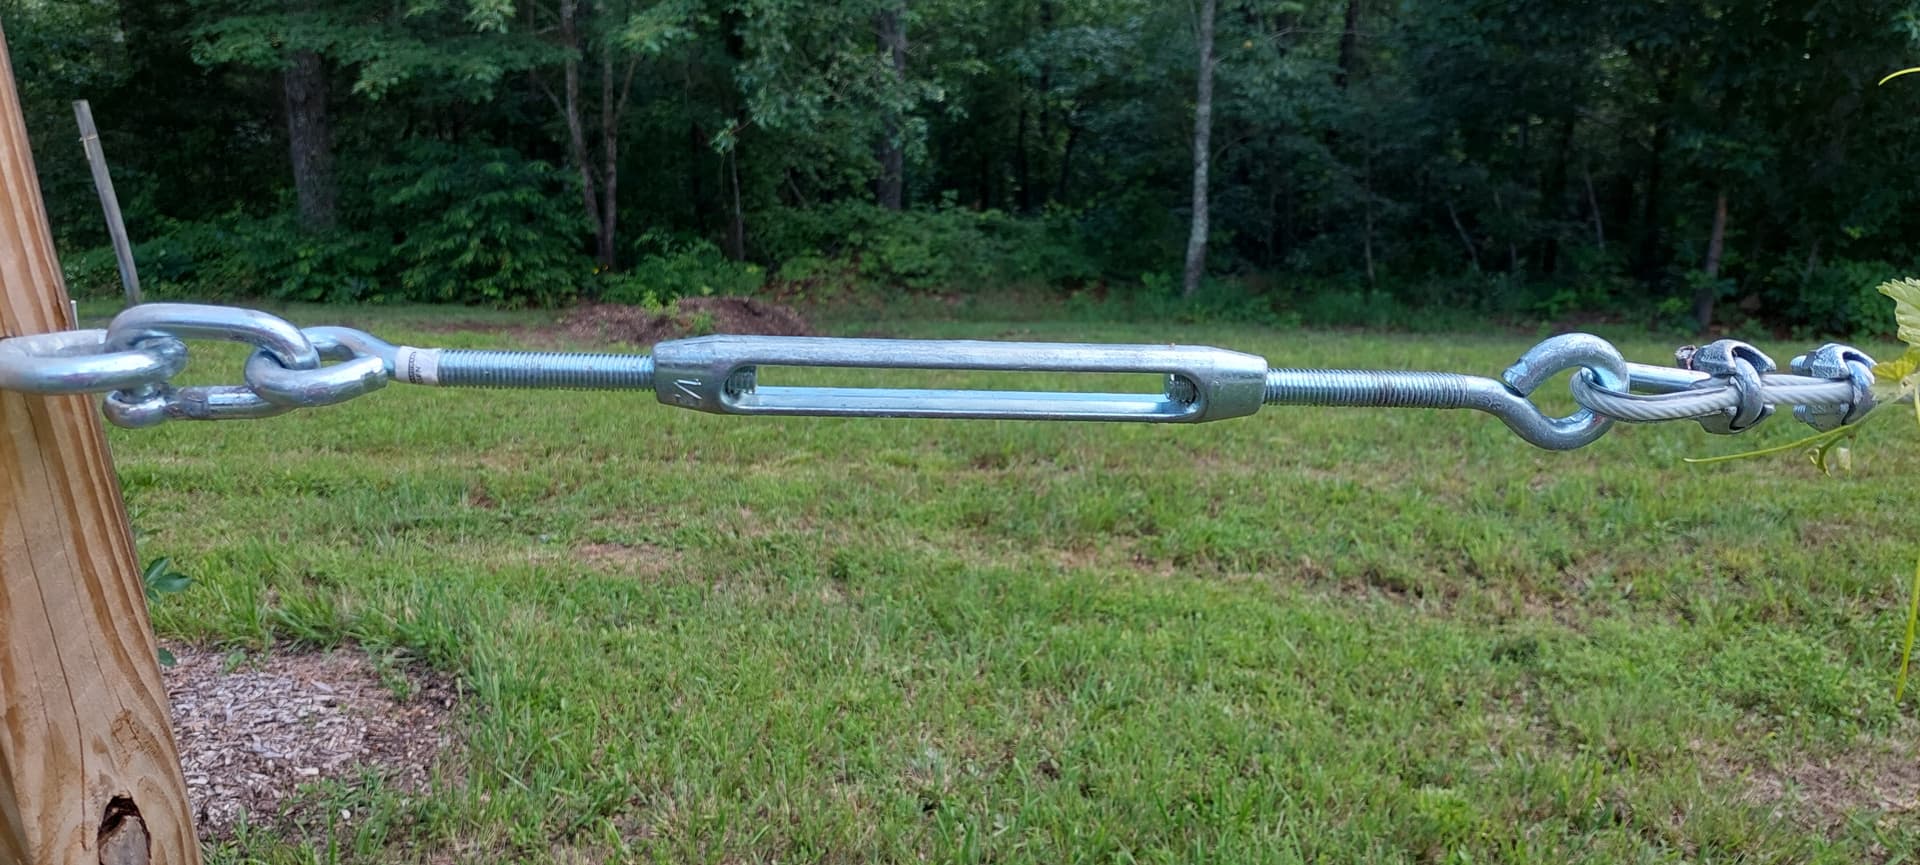
I used 10 Guage LOW tensile wire for the cross wire brace and a double loop with a wire strainer to tighten it up. The wire takes force from the bottom of the end post to the top of the second post and then puts back onto the top of the end posts through the cross post. Wires have about 180#'s of tension on them. No brace movement yet.
Might be over kill for a small trellis, I built two of them 230’ long. Happy with results. I figured I dont want to do repairs as I get older, or experience the heart break of a massive faliure, so I built it to last to the end of my journey.
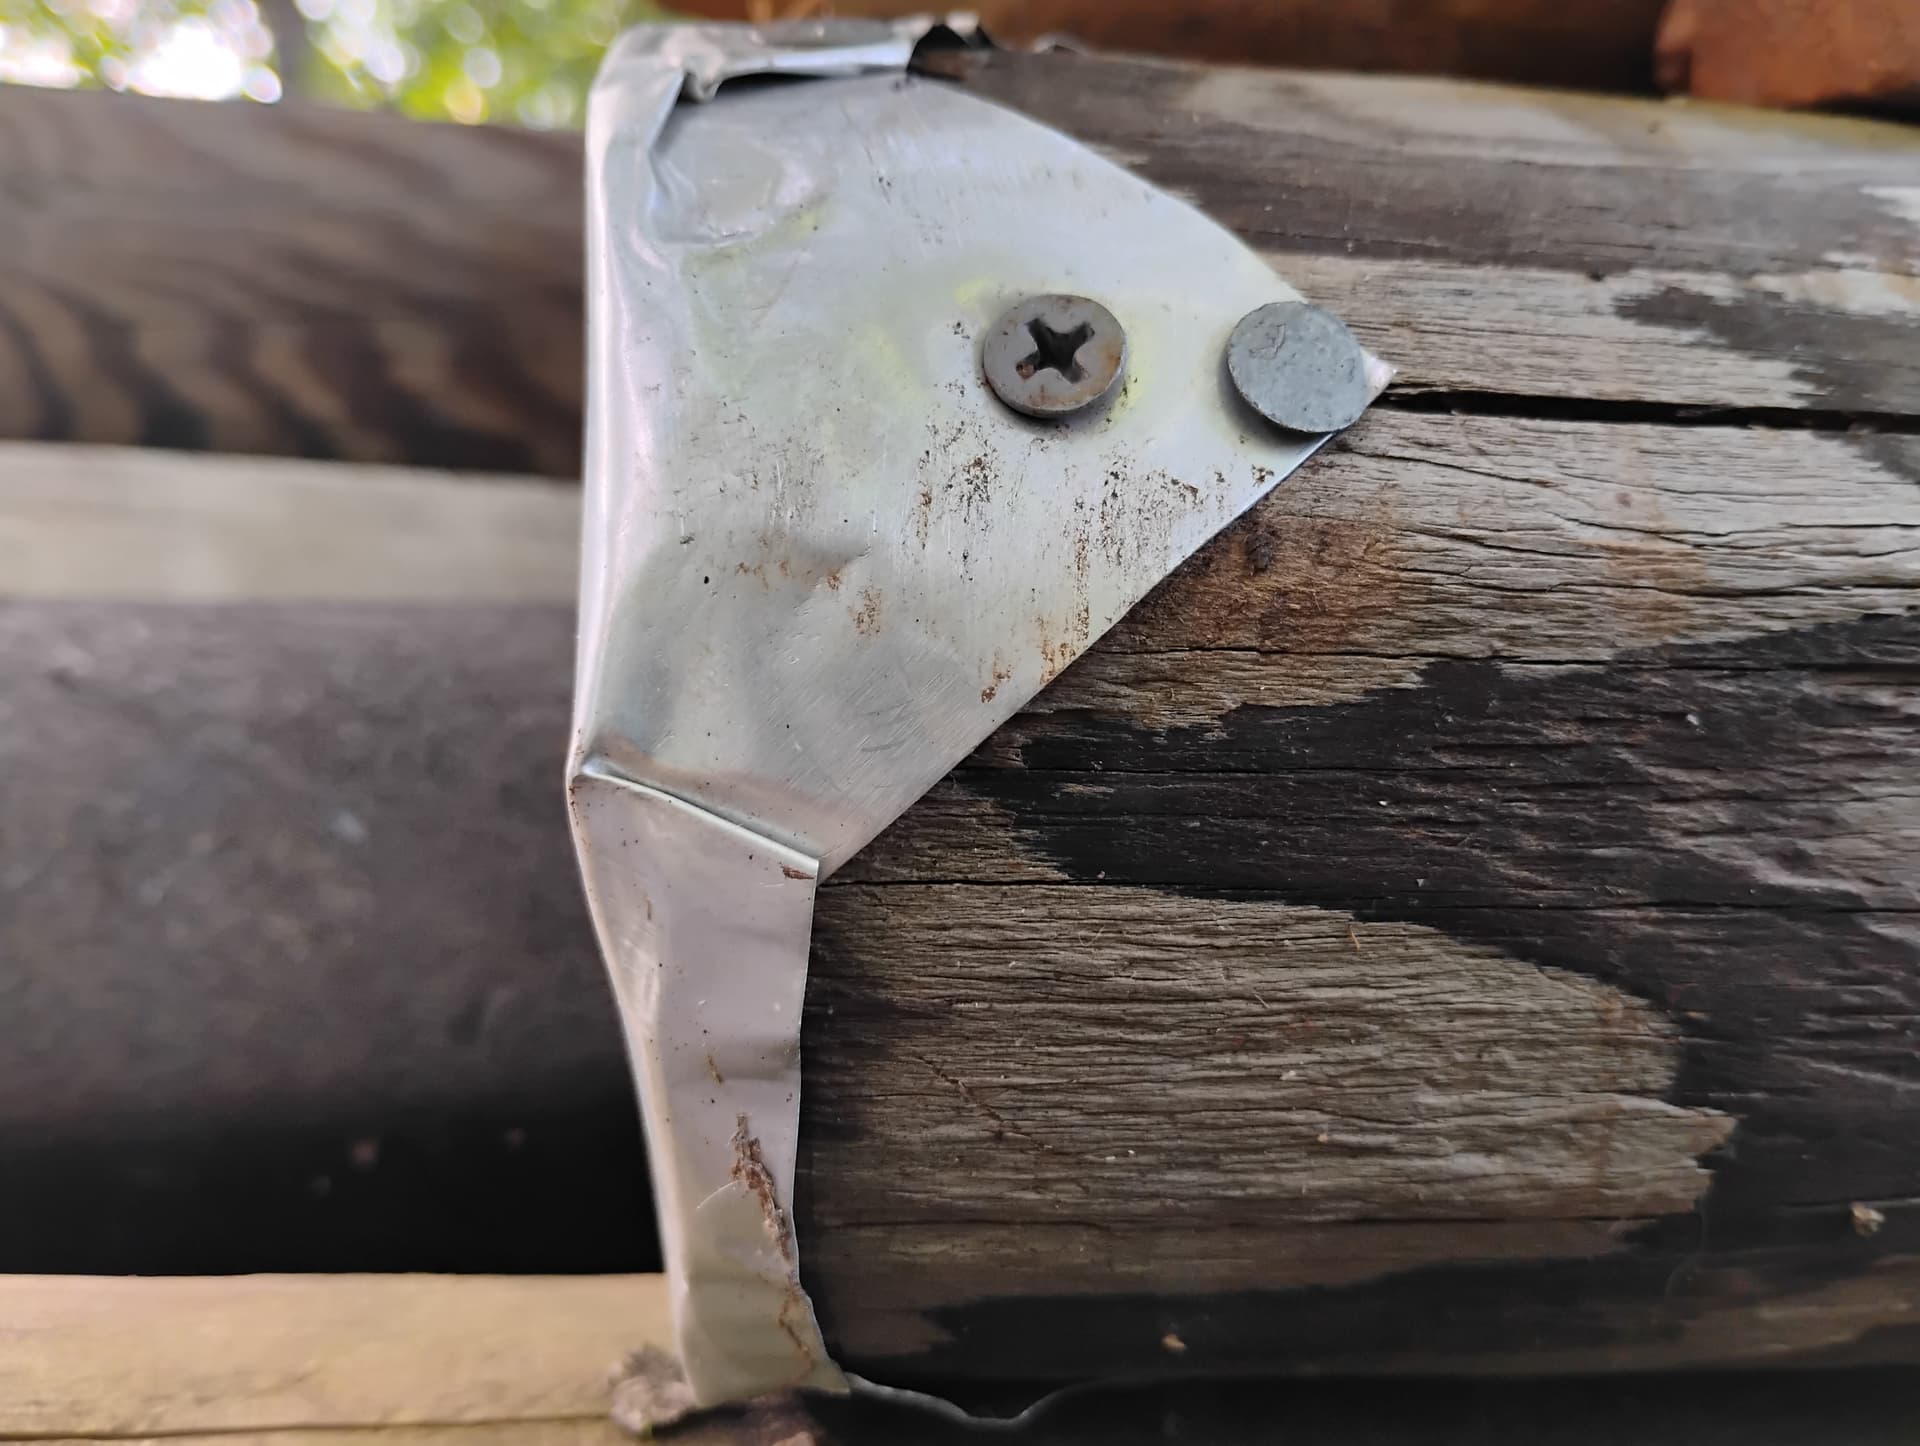
You won’t want any nail holes on the top, so just cut a square of aluminum flashing at least an inch wider than the top of your post. Center it on the top and, while holding it down with gloves on, hammer it gently right on the edge of the post to start a crease, then whang it with the hammer on the side of the post to bend that one corner the rest of the way down and then drive a roofing nail (or something with a substantial head) most of the way in. Switch to the opposite corner of the flashing and do the same. Two nails is enough so you can now hammer down the remaining corners and the bits in-between. We are simply trying to create a drip edge that hangs below the top of the post in order to keep water from accumulating.
But my dad asked, why not just put chain link fence posts in and use the little collar thingies to hold the wire? He has a top bar for said chain link fencing to use as a top brace. Thoughts?
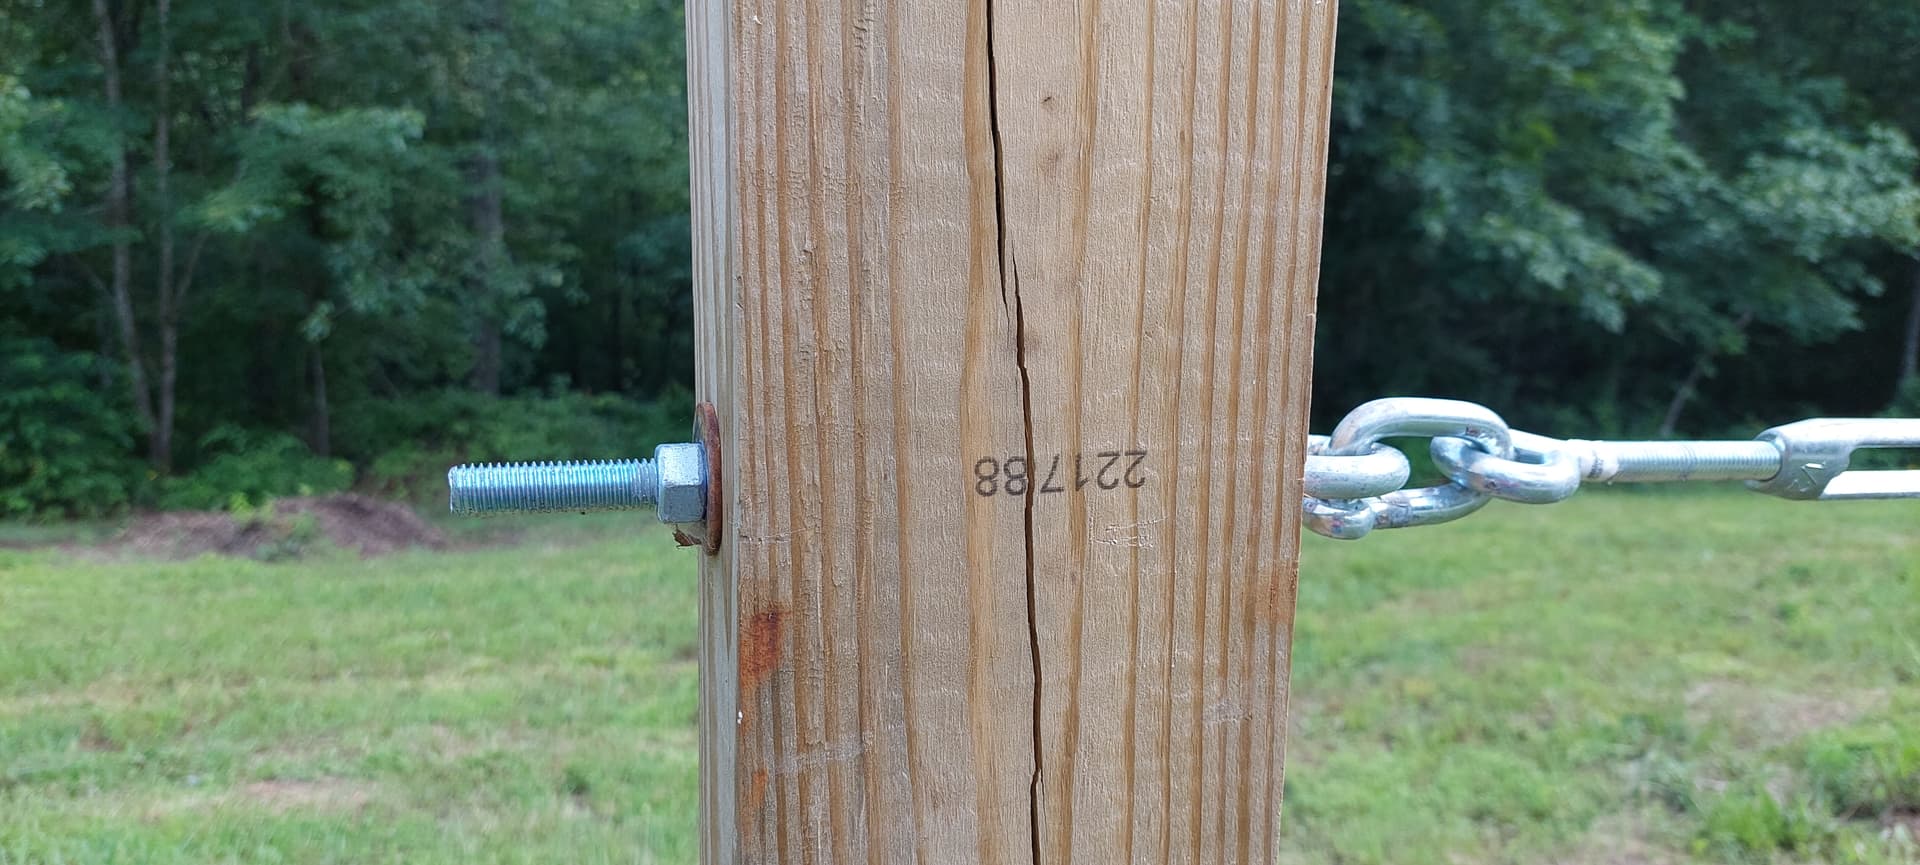
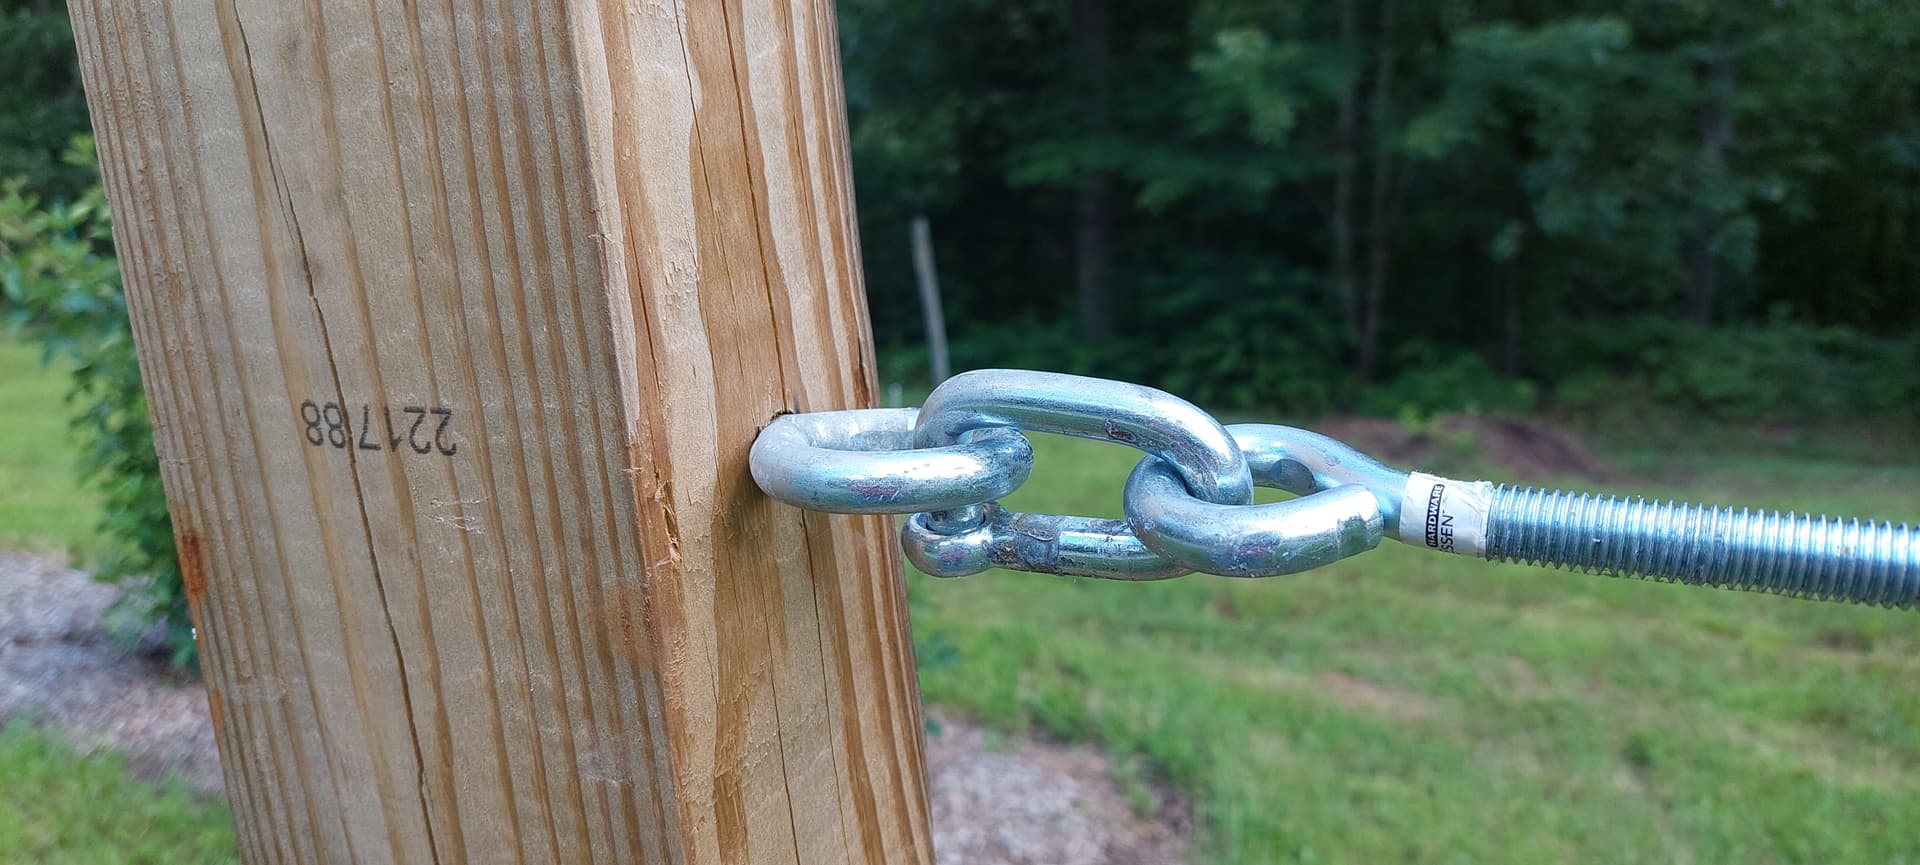
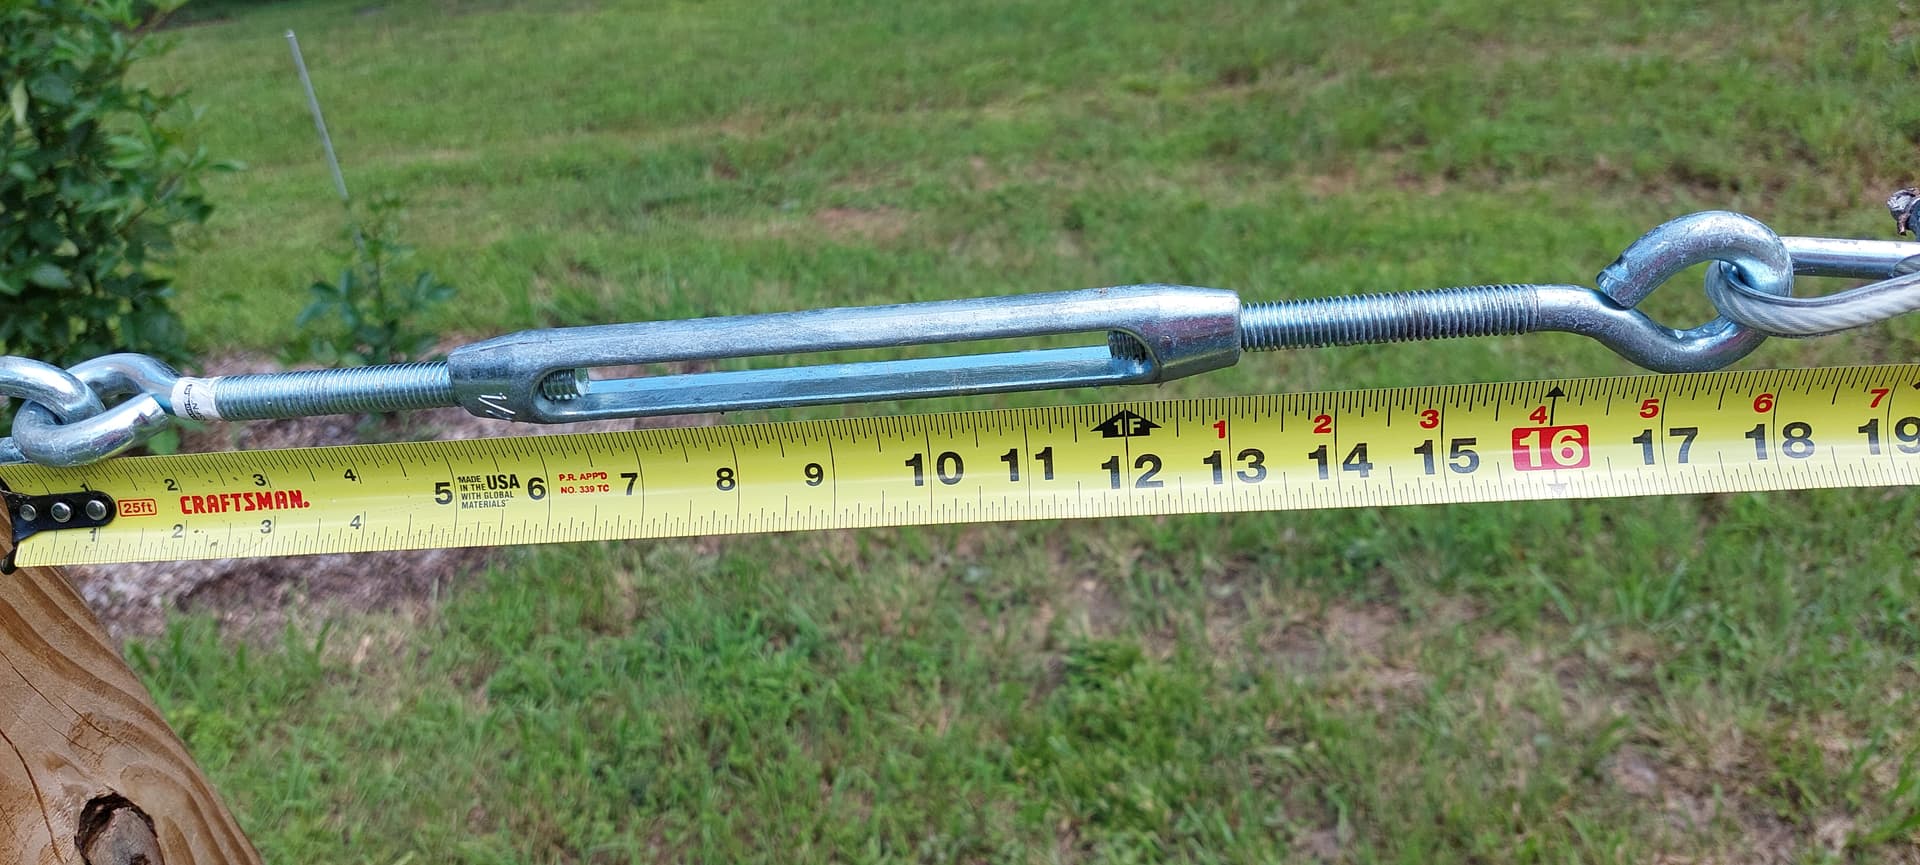
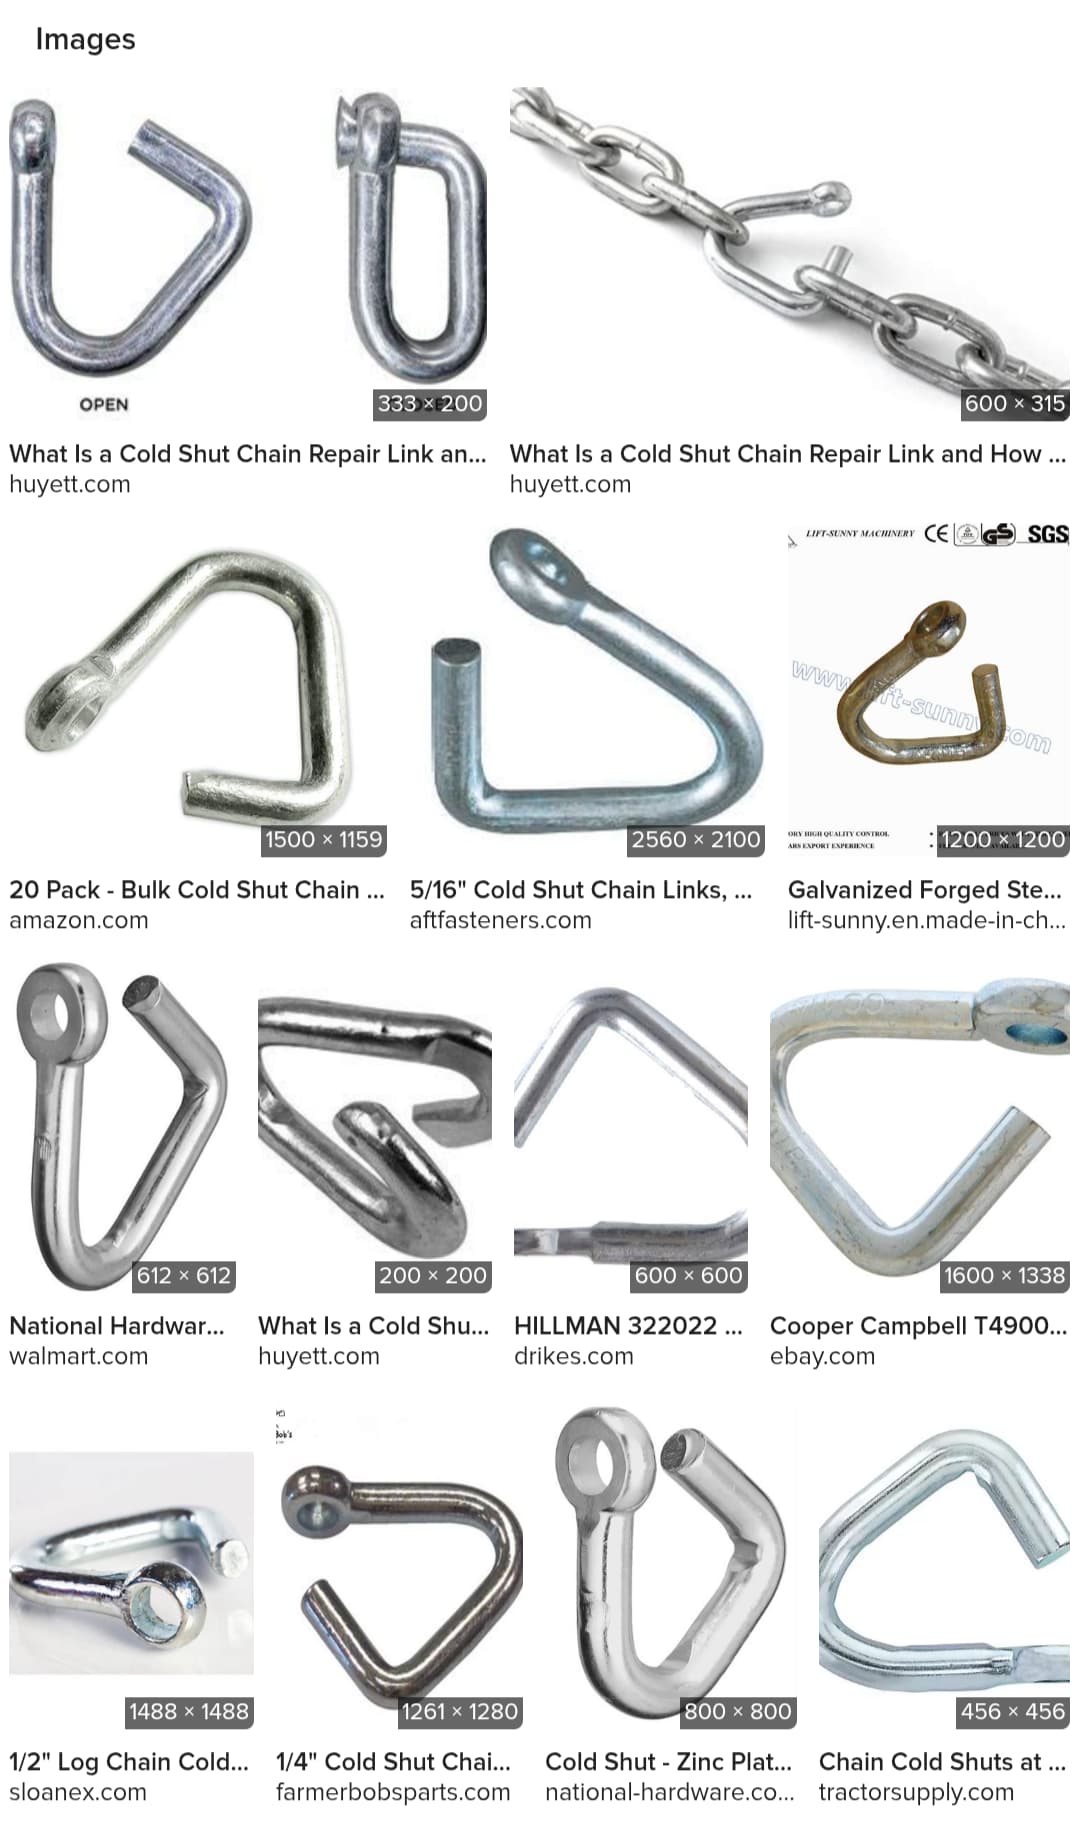
For anyone wondering what the thing is joining the eyebolt which passes through the 4x4 to the eye of the turnbuckle, that is called a “cold shut” or a “cold shut chain link” in many circles.
You can give it a shot. In my experience, the metal that the top bar in chainlink fencing is made of is not anywhere near as stiff as the posts are.
When I made kiwi braces I used T posts from Tractor Supply for the diagonal member, and the same wire tensioners I posted earlier. The black high-tensile wire that Kencove sells made some great trellis wire as well as low visibility electric fences wire.
Good to know; I’m not sure what we’ll do, I was sort of blindsided by the idea and haven’t shifted away from the wooden posts and wires…but I still don’t have a good design for those either, so I feel stuck. (I’m also past my due date so my brain is extra muddled…)
Double check me on what T posts are? Because those sound easier to use! We also haven’t bought the wire yet so maybe we’d switch to the black option.
Thank you very much, I am so used to purchasing such things from Tractor Supply that I didn’t even consider the local old-school lumber store as being able to supply ones that are longer.
These guys, available at Tractor Supply and others like it, are called T posts, so named for their cross section when viewed from an end:
When I used them to create kiwi braces I took round wooden posts which were eight feet long and sank them two feet into the earth for my end posts. I ran a loop of the wire around the base of the wooden post and crimped it together using the gritted crimp sleeves, then slid the free end of the wire into the Quick-End self-securing socket on the strainer. I used a chainsaw to cut a shallow X into the face of the wooden post where I wanted the upper end of the T post to sit, used a cut-off scrap of 6x6 as the foot that the lower end of the T post rode on, then created a tight bight of high-tensile wire between the lugs of the T post using gritted crimp sleeves. The free end of that wire I slid through the tightening spool of the strainer and then started cranking on it, tightening it to where it was pushing the wooden post rearwards as much as I wanted, then I started filling the hole around the post and tamping the soil.
The only additional thing that I would suggest? That plate that is crimped onto the lugs of the T post towards its base can be knocked off with a couple of well-placed hammer blows, and I feel that removing it increases the safety for anyone who might accidentally come into contact with the T post.
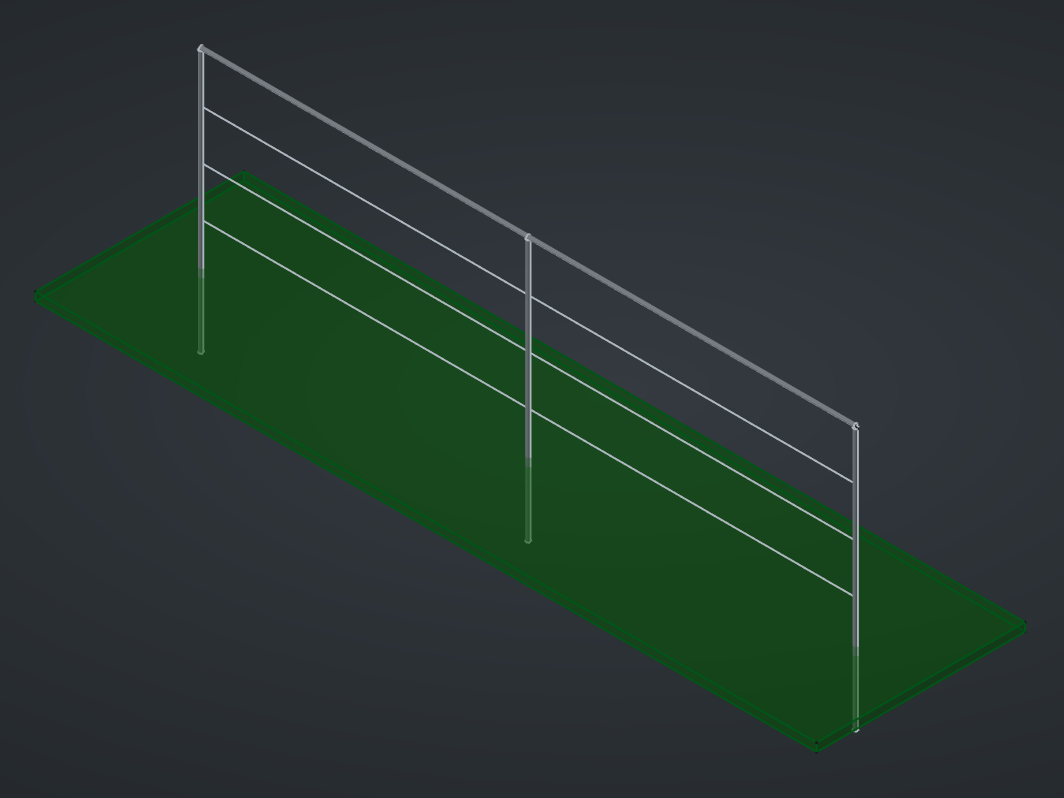
i had been mocking up a few ideas from a t trellis to a vertical one for my hardy kiwis. my span is only 20’ and its my first go at it so i went with the cheapest solution and did a vertical one with t posts and 2x4s:
its using 10’ 2x4s for bracing at the top and 8’ t posts set 2’ in ground. was going to use chain link fence materials but that would significantly increase the cost. completely underestimated drilling holes in the t posts. take it slow and chip away at it. literally bit by bit
U posts are similar but have a different profile.
In this area they are commonly used to mount speed limit signs and other road signs by public works departments.
This is the strainer that I use for my kiwi braces, for the loops of wire I use for my trellises and for my fence wire. At $6.15 a piece they are affordable and easy to use.
Here’s a picture showing what a bight is:
I would slide the gritted crimp sleeve on the free end of the wire, wrap the wire around the T post between two lugs getting the wire so tight that it couldn’t slip past the projection of the lug. I would bend the free end and the middle section of the wire so they were perfectly parallel and then slide the crimp sleeve as tight to the T post as possible, then use the correct slot on the tool to crimp it. I hope this makes sense now.
@Audi_o_phile I FEEL VINDICATED! I didn’t know those were U posts but it sure makes more sense. Okay, that’s the strainer I was considering after someone above concurred on it, I just don’t remember who posts what without scrolling up (and boy that’s just too much work!). Do you have one on each side or one per wire?
Okay, so you use a bight with wire crimp sleeves, that makes sense. Thanks!
The way that I build a trellis, each kiwi brace gets a strainer and each stretch of wire gets its own strainer, whether that is a loop or a straight run of high tensile wire.
Before I even ordered anything my first time round I spent a good bit of time reading through the educational center that Kencove, Mother Earth News, Grit (and likely others) had so I understood how to construct everything.
if youre referring to the side to side(west/east) forces from wind, there will be some, but its not like a fence or sail. there should be plenty of airflow through the vines even when they fill out. theres also a fence parallel to the trellis right there that will aid in blocking a lot of it. putting posts to a depth of 1/3 of its overall height is pretty standard.
I gotcha! We haven’t done a doggone thing to put up a real trellis yet, so currently it’s all vining over regular twine, which isn’t my favorite but it’s what I’ve got.
Beautiful end support. Well done. I have shorter rows at 140’ with just a single post anchoring now. I have cable harpoon anchors and extra posts available, but you have convinced me to use the latter and make an H brace.
I have the Gripple tension devices and they work well. Pull them taught by hand, then use the tool to tighen them fully. Release them like a ratchet strap - tighten them slightly, push the pin tool in to release.