Good system for preparing winter dormancy graft cuttings

Do we need clarification on whether this level of effort, including the bleach, is necessary for scions that will only be stored for a couple months?

I have used just a sprinkle of water or the ubiquitous moist paper towel with no apparent issues.
I check the towels and replace if mold or discoloration appears.
If I were trying to store cuttings for a year or more, i could see where more intensive prep would be good.

P.S. Ziplocs are not 100%. The environment inside the average refrigerator produces a drying effect. Stuff inside of ziplocs can lose moisture over time, in my experience

4 Likes

TrilobaTracker, " you have put the finger, right in the sore ".
That is the problem with Ziploc bags, that the plastic quality is tremendously poor and does not allow a perfect seal, so the cuttings dry out, and if you put something wet, there will always be fungal contamination.
Therefore, the Ziploc bag, at most, is useful for short distance shipments.
For international shipments, or between very distant North American states (your country is huge in size), where the package can be traveling 20 days (or even more), the Ziploc bag is totally inadvisable.

I understand that seems like a somewhat laborious method, but it is not.
Once it has been done a few times, it becomes routine and is tremendously easy to perform.
And obviously it is an essential method in to the reception of cuttings that have not been previously hydrated, cleaned and disinfected with the dilution of water and bleach.

If we are going to carry out the cleaning and disinfection process, at the reception of cuttings, it is the same job to put the cuttings in a Ziploc bag, than to wrap them in quality plastic film.
But the difference in the final result with one method and another is abysmal.
If not, I will have to be the one to convince you to use this method, since I am sure that some of you will do it, and when the results are discussed in this forum , and talk about the magnificent results, you will be convinced to use it as a standard procedure.

Regards
Jose

5 Likes

I’ve had too many times when I have gotten scion from a person and none or only a few of them where successfully grafted. I attribute that partially to poor preparation and storage of the scion. Certainly poorly stored scion can be grafted successfully but the statistical benefit my be worth the extra effort. Actually the effort involved in the guide seems simple and low enough for me.

2 Likes

If it is tremendously easy to perform, and since the correct thing is to do the hydration process, cleaning and disinfection of the cuttings (it increases the success rate to a great extent), so after this process, it is the same to use a ziploc bag, or wrap, in quality plastic film , but the longevity and freshness of the cuttings in film plastic wrap is incredible.
Just use you this method once to experiment , and then comment on the results.

Regards
Jose

6 Likes

sounds good guys…thank you!
yes, I’ve had my share of failed grafts for sure. Obviously there are MANY variables affecting graft success but might as well eliminate as many as possible.

I would for sure use a method that didn’t call for moist paper towels. Too moist. Not enough moisture. It drives me nuts!!!

1 Like

k8tpayaso, this is another advantage of this method.
Once the cuttings have rested 15 or 20 minute in the dilution of water and bleach, and after resting on the cloth tablecloth until its total exterior drying.
You no longer have to worry about anything.
They have the “exact” humidity to remain a long time inside the packages of the plastic kitchen film , inside the fridge fruit drawer (several months).
They will have an internal microclimate that does not allow their drying out, nor does it allow their contamination.
When opening the packages at the time of grafting, the cuttings are like freshly cut.

Regards
Jose

7 Likes

I think I know the answer already but why not ask would dipping the cut end in wax be “icing on the cake” or an unnecessary step if all the above is followed precisely.

Thanks[quote=“Jose-Albacete, post:27, topic:33412, full:true”]
k8tpayaso, this is another advantage of this method.
Once the cuttings have rested 15 or 20 minute in the dilution of water and bleach, and after resting on the cloth tablecloth until its total exterior drying.
You no longer have to worry about anything.
They have the “exact” humidity to remain a long time inside the packages of the plastic kitchen film , inside the fridge fruit drawer (several months).
They will have an internal microclimate that does not allow their drying out, nor does it allow their contamination.
When opening the packages at the time of grafting, the cuttings are like freshly cut.

Regards
Jose
[/quote]

1 Like

Just collected 3 apple and 8 peach scions. Thank you Jose.

This past winter, I did something similar to this method, except I individually added parafilm to each scion, rather than wrapping it in saran wrap. It makes it faster in the spring, something that I appreciate when I am trying to make a bunch of grafts before it gets dark.

I should say that I generally get pretty good results on things like apples, pears, jujube, etc even without this. But I think this could benefit the tougher fruits, such as peaches and persimmons. I think one of the things that make these two tougher is that it is harder to keep the wood in good condition. Both tend to be grafted later in the grafting season, meaning they have sat around for longer. This is especially true of persimmon, as it is often collected early to make sure that it isn’t winter damaged prior to collection. I’ve found myself looking at dead/dying/drying wood in the spring and wondering if it is even worth trying to graft it.

This year, I saved a few persimmon scions in the bag with a bit of moisture, while most got the soaking, bleaching, and parafilming (I’m making it into a verb…) treatment. Here is a pic of two scions (same variety), with the one on the right getting the full treatment. The difference in moisture (green vs brown) is pretty remarkable.

14 Likes

Hi mates.
As I always go with a lot of work and I have just enough time to do the odd intervention in the forum.
Your remember that this post began on January 2, explaining how to prepare “really well” winter cuttings.
Ha ha ha ha ha ha
Time gives me reason and to the tests I refer .

Now it is July 27, and my industrial cold room is full of cuttings.

What happen ?

That my brother has prepared some spaces to plant fruit trees around his house, but he tells me now and he had not told me before, and my brother is very capricious and knows the varieties that he likes from my orchard (fortunately I have refrigerated material such as I told you that it had to be prepared).

Therefore it is simple, since I am going to graft using the Chip Budding system (that easy ).

I always have available rootstock, so no problem.

Important, not sorry “VERY IMPORTANT”.

The rootstocks a few days before being grafted on these dates, most of the branches are removed, leaving only the necessary branches, and important irrigation is applied.

After a week the rootstocks have been invigorated and are ready to be grafted.

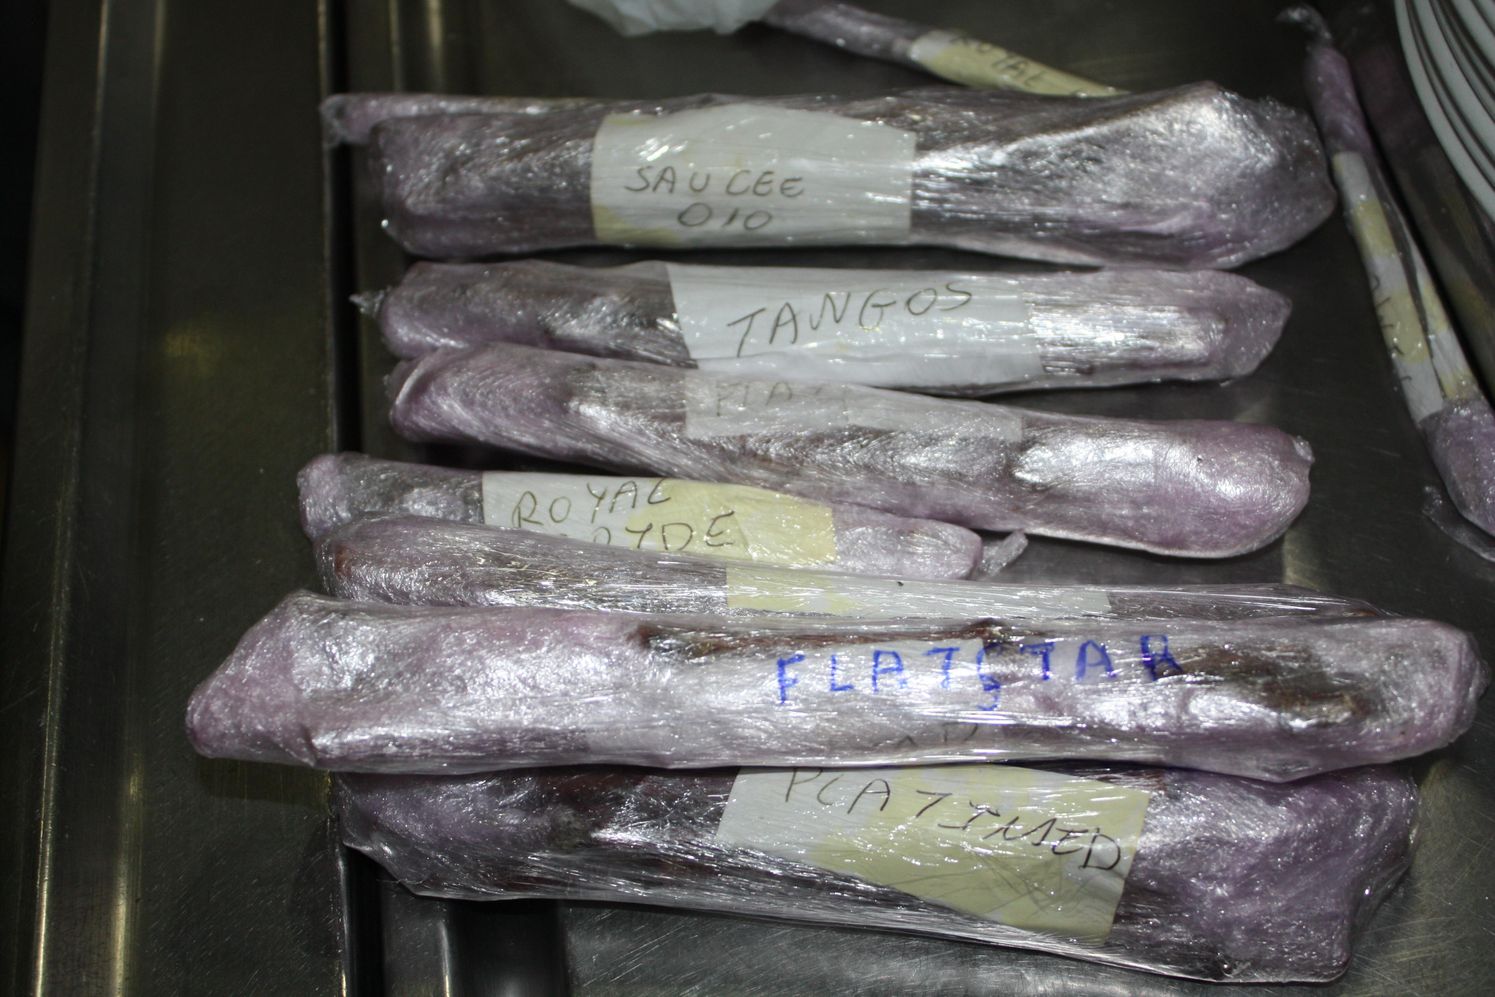
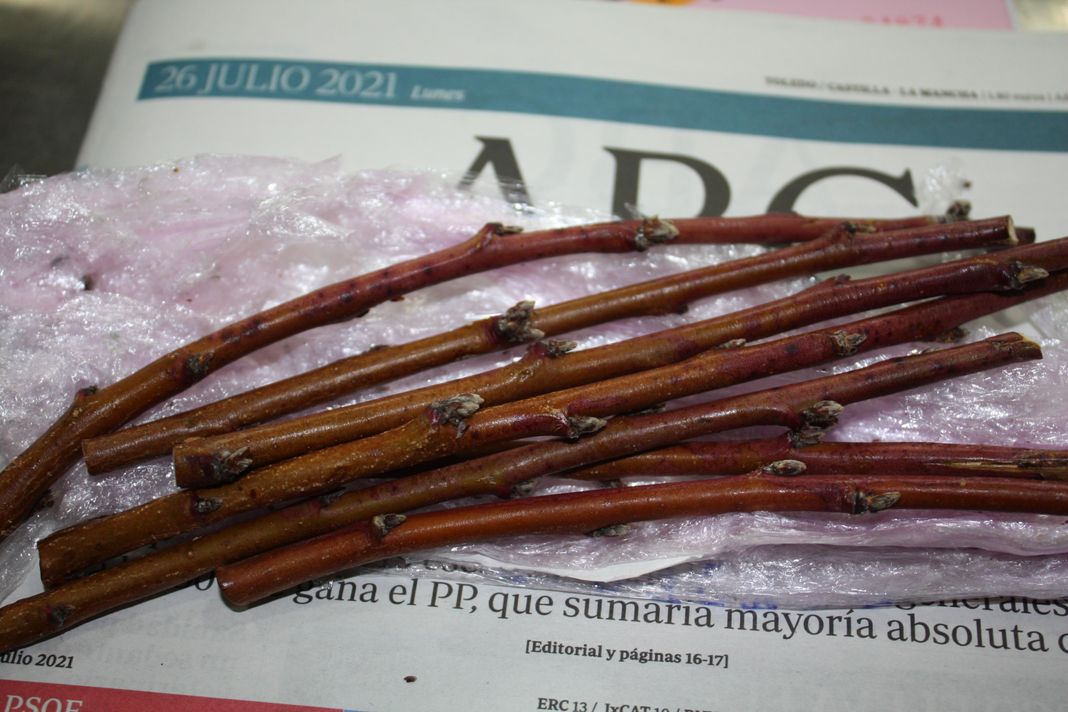
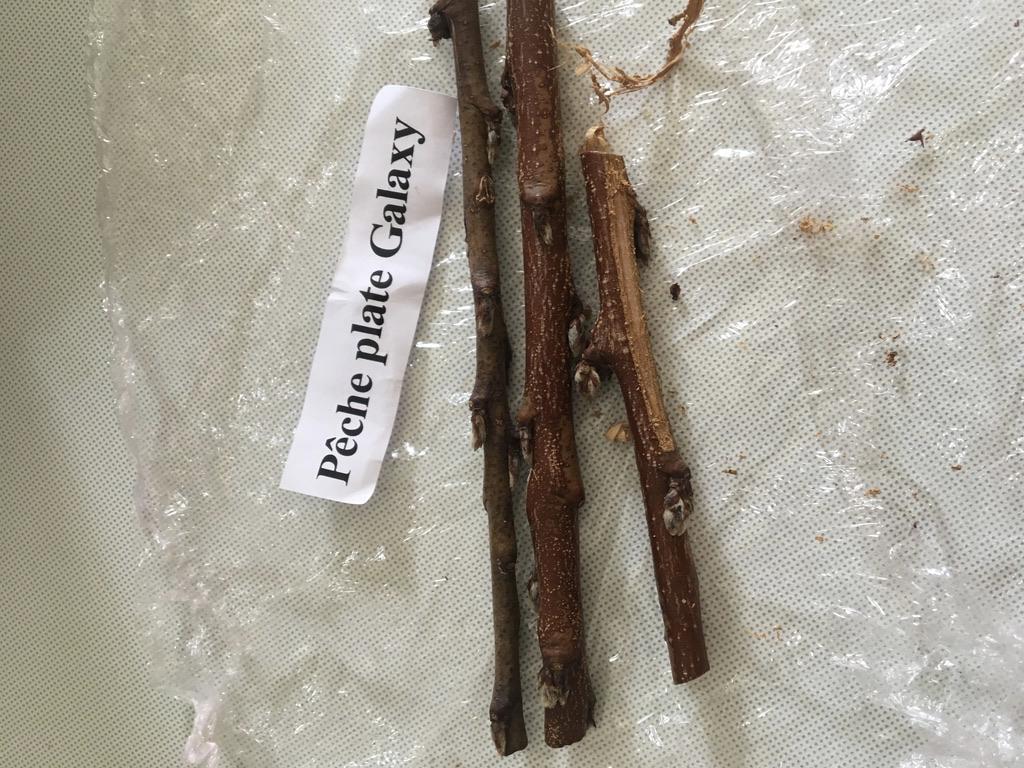
Well, we started the process with the selection of varieties for my brother, from this photograph that you are going to see, I am interested in the variety of flat pech ASF-0798 Flatstar (it is a flat peach with white flesh, late maturing, fruit size AAAA ), an incredible exterior coloration, with an incredible flavor and texture, it is a variety that is in the ranking of my 10 favorite flat peaches.

Prepared rootstock

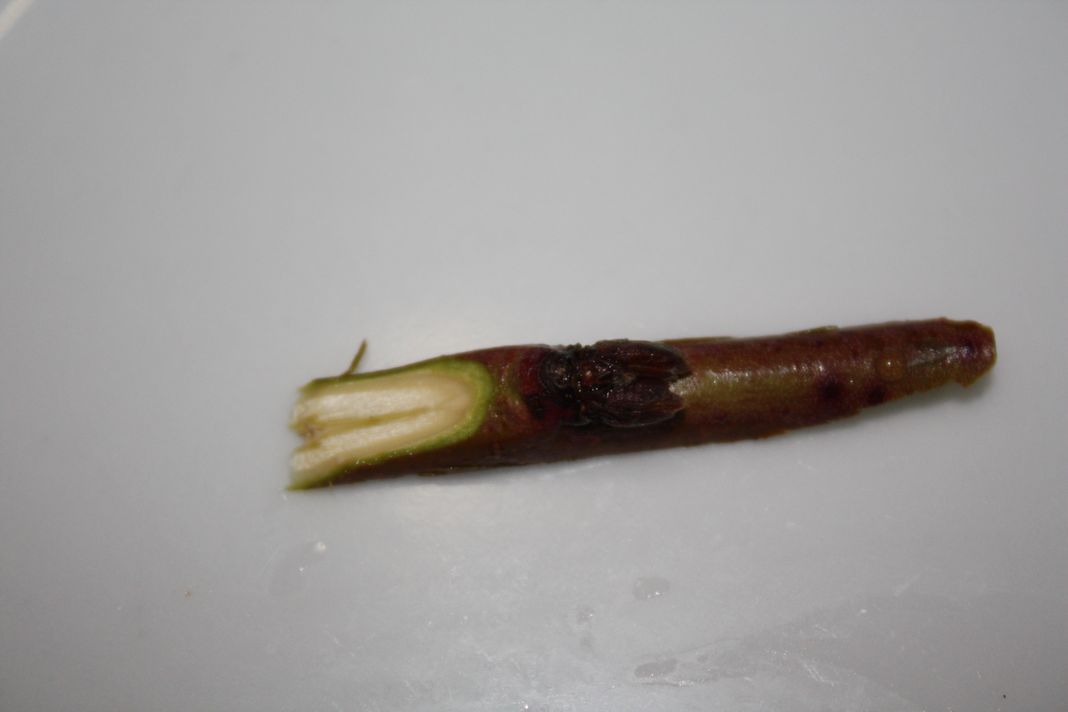
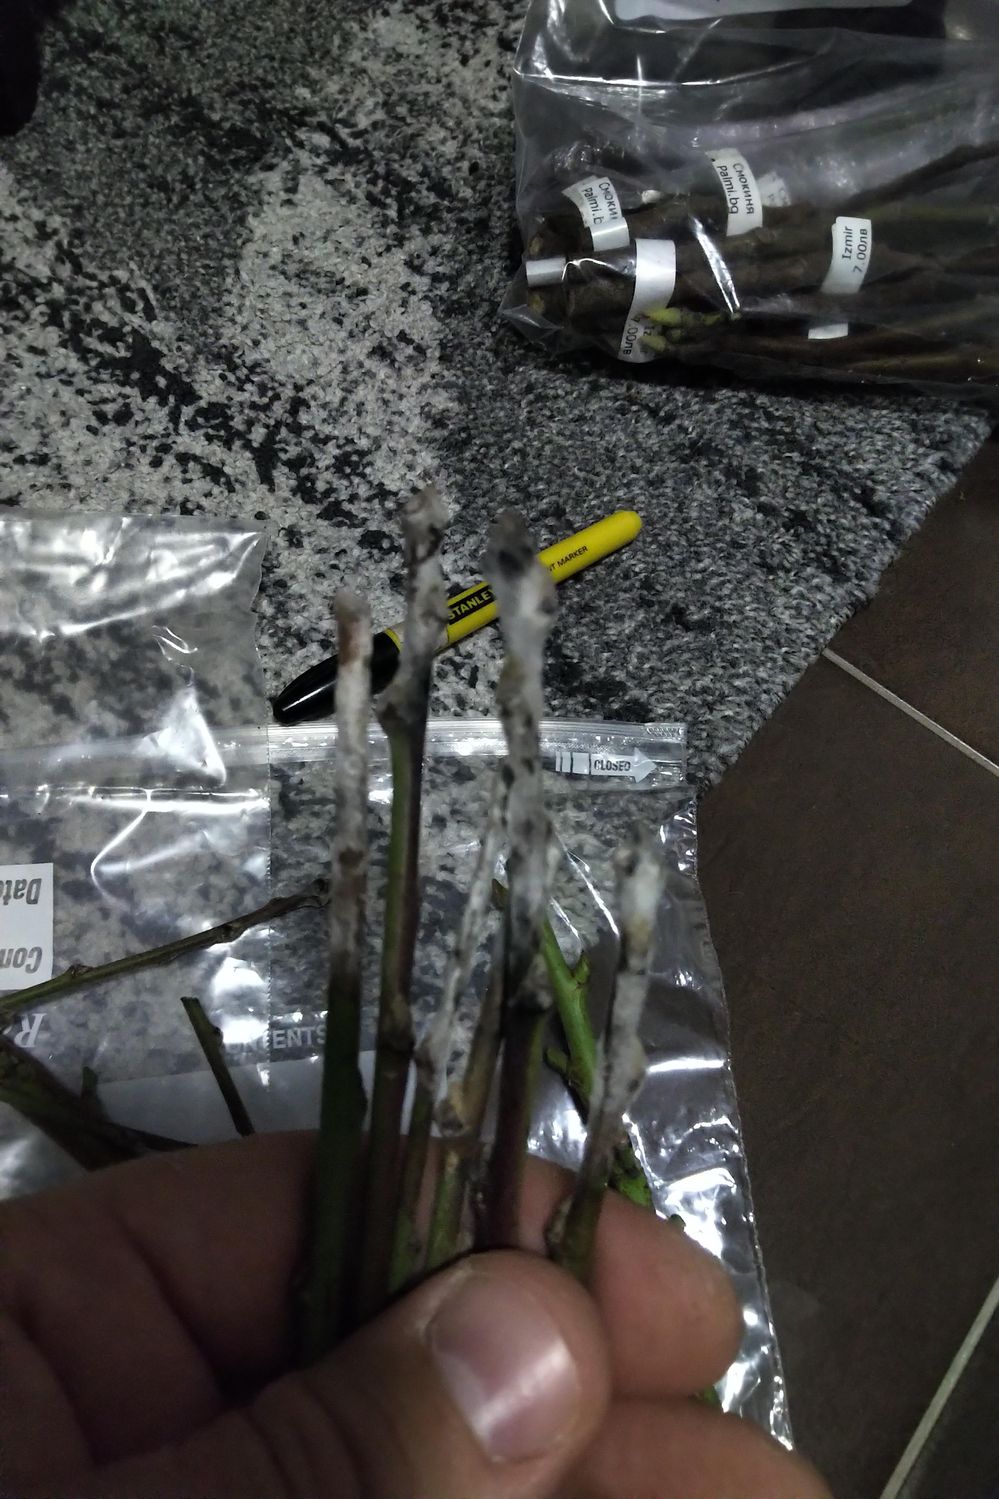
We start with the cuttings packages

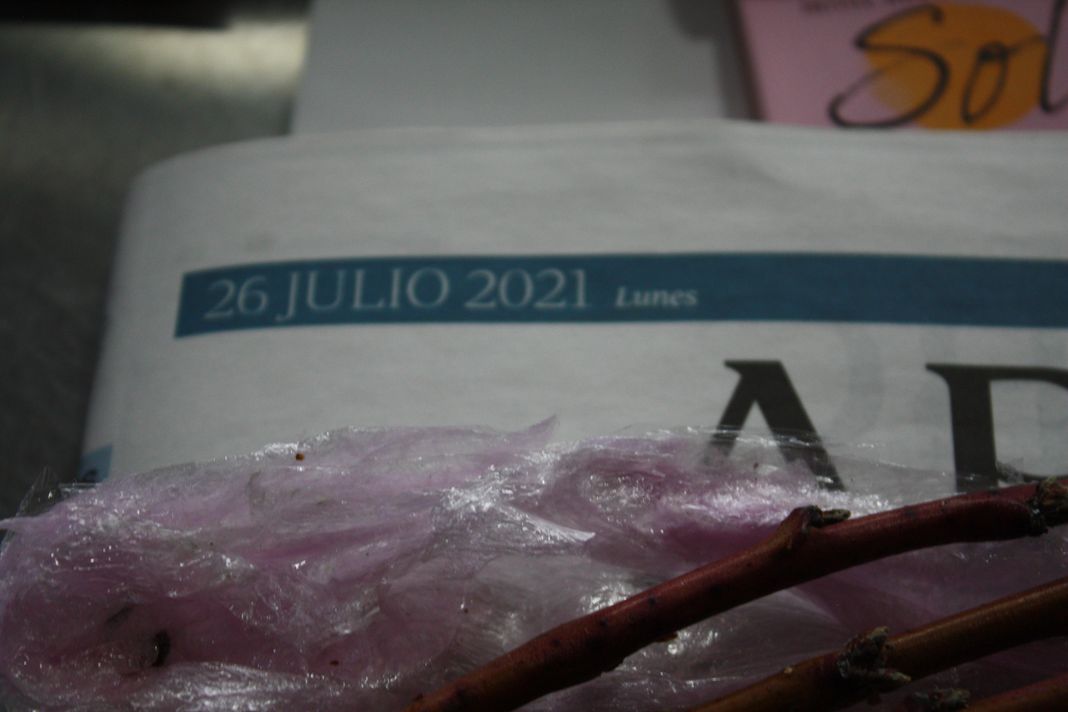
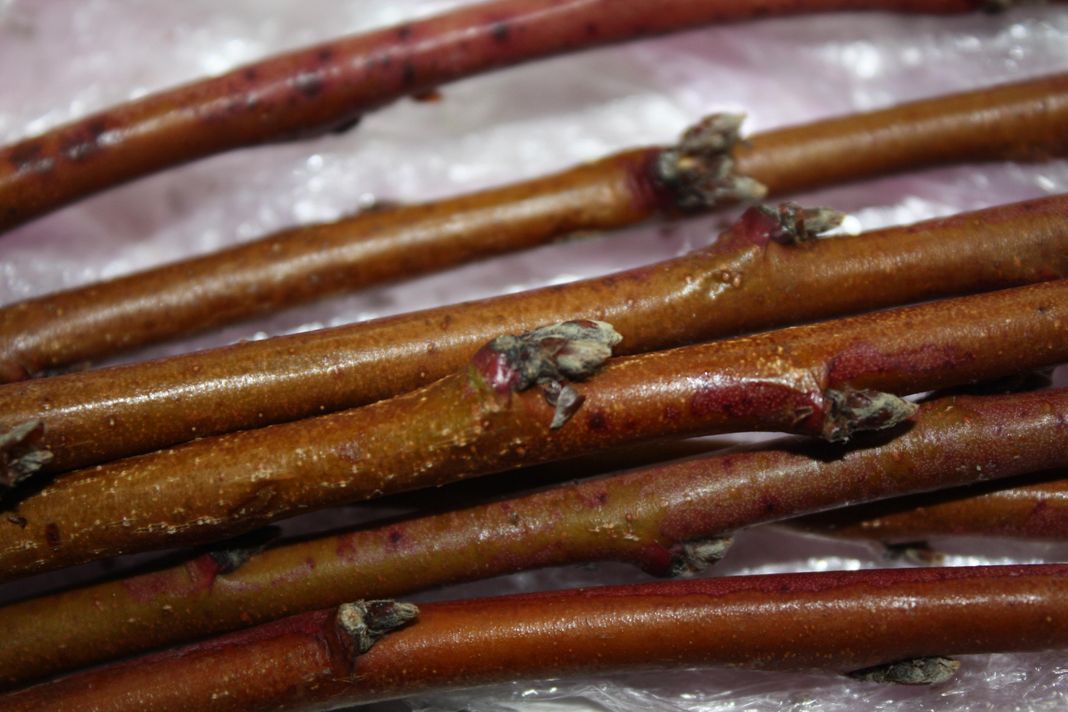
The date that we are

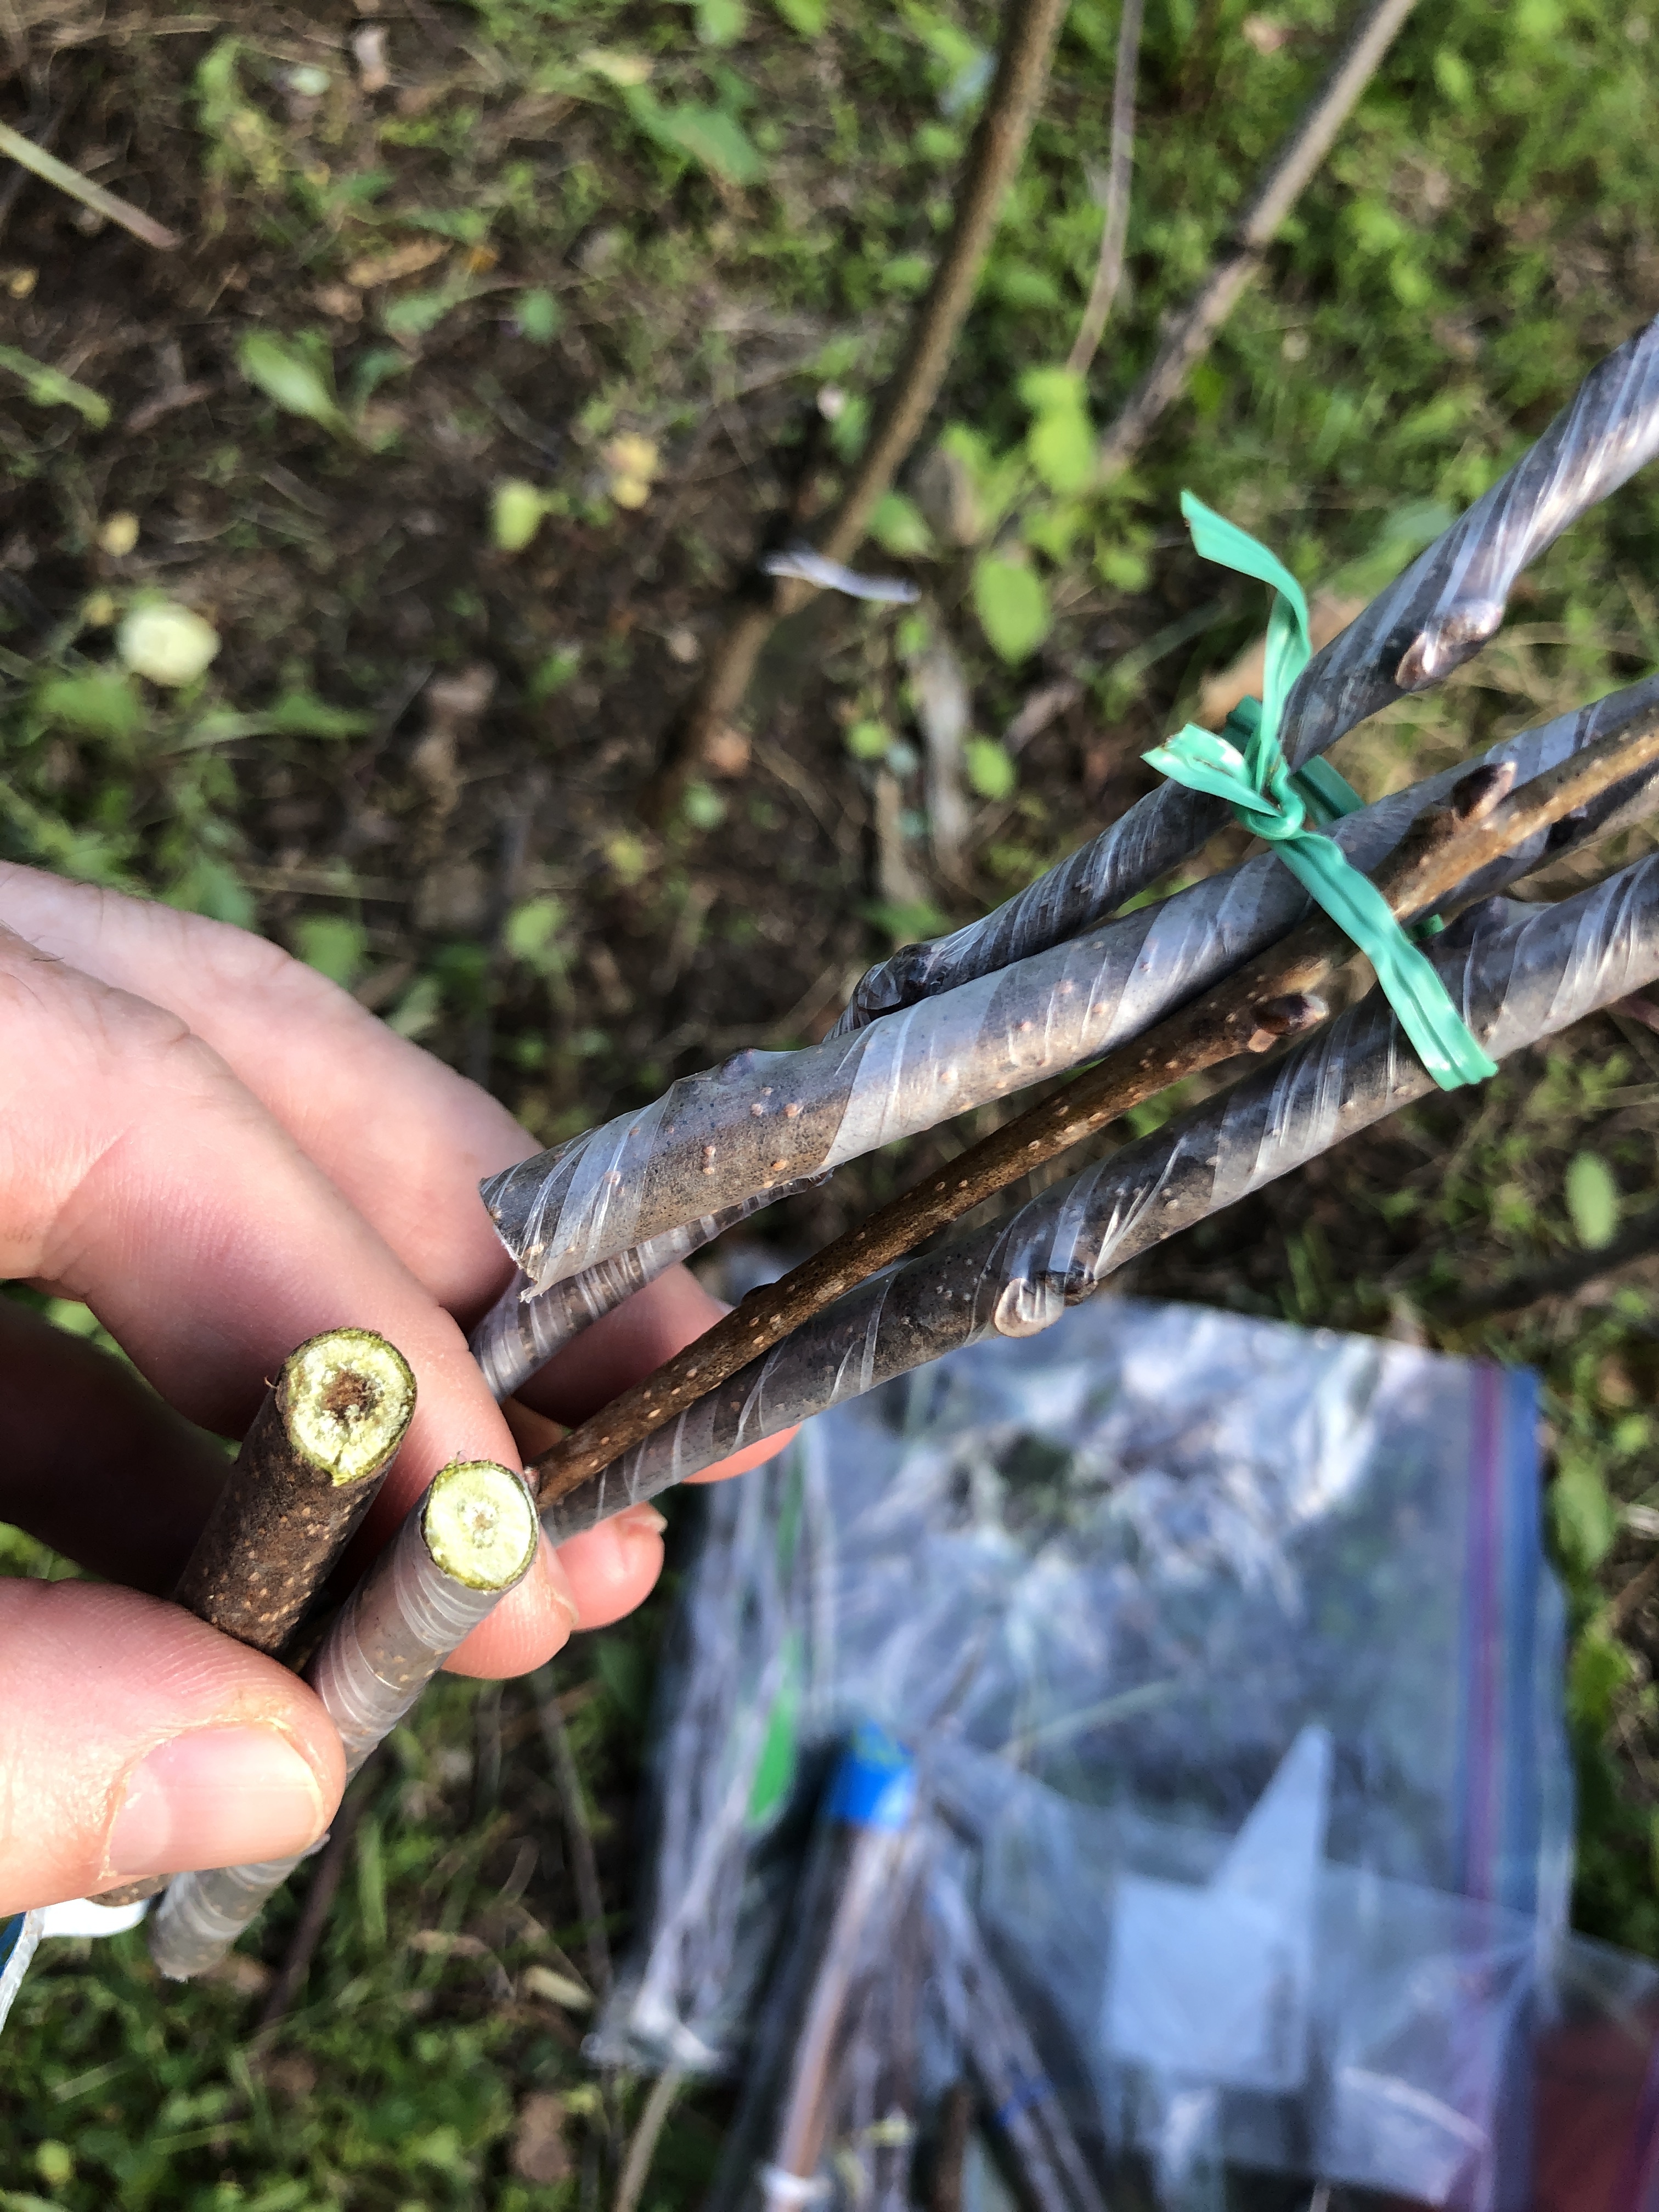
The current quality of cuttings today

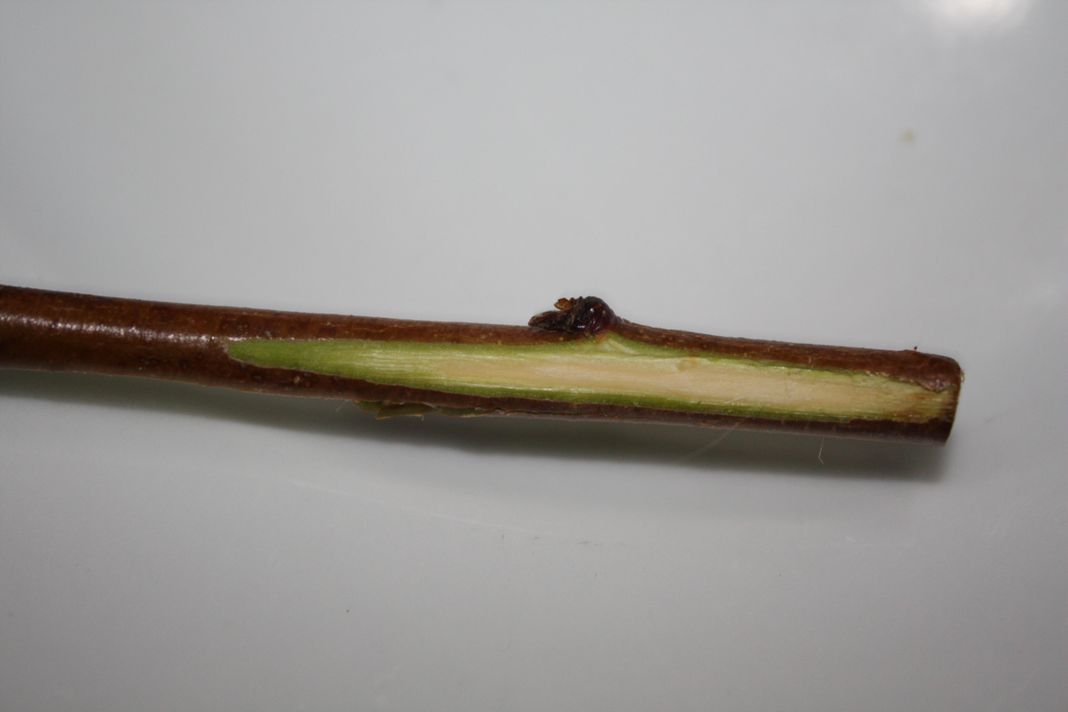
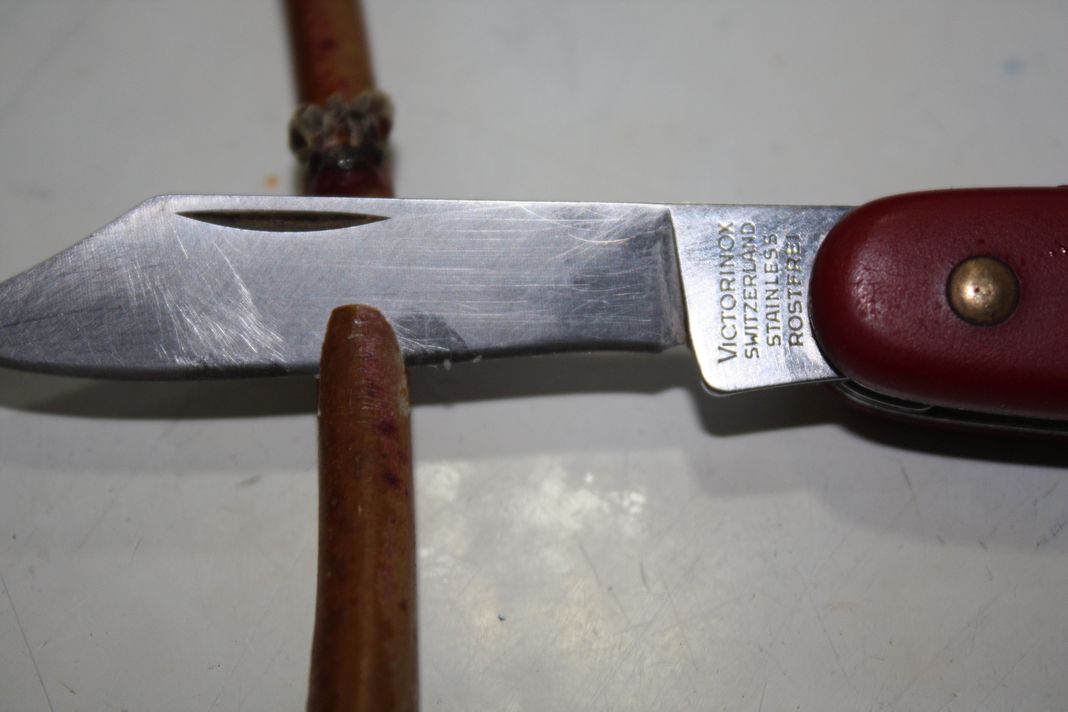
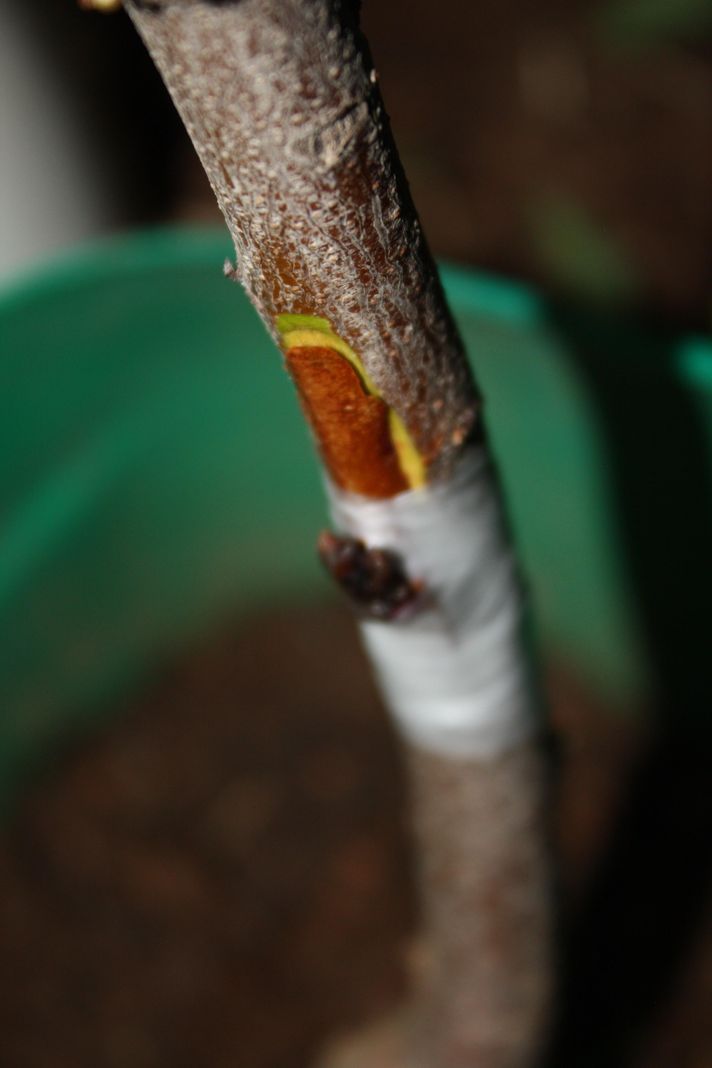
Chip Budding grafting system (everyone knows how to graft Chip Budding)

And it’s that easy.

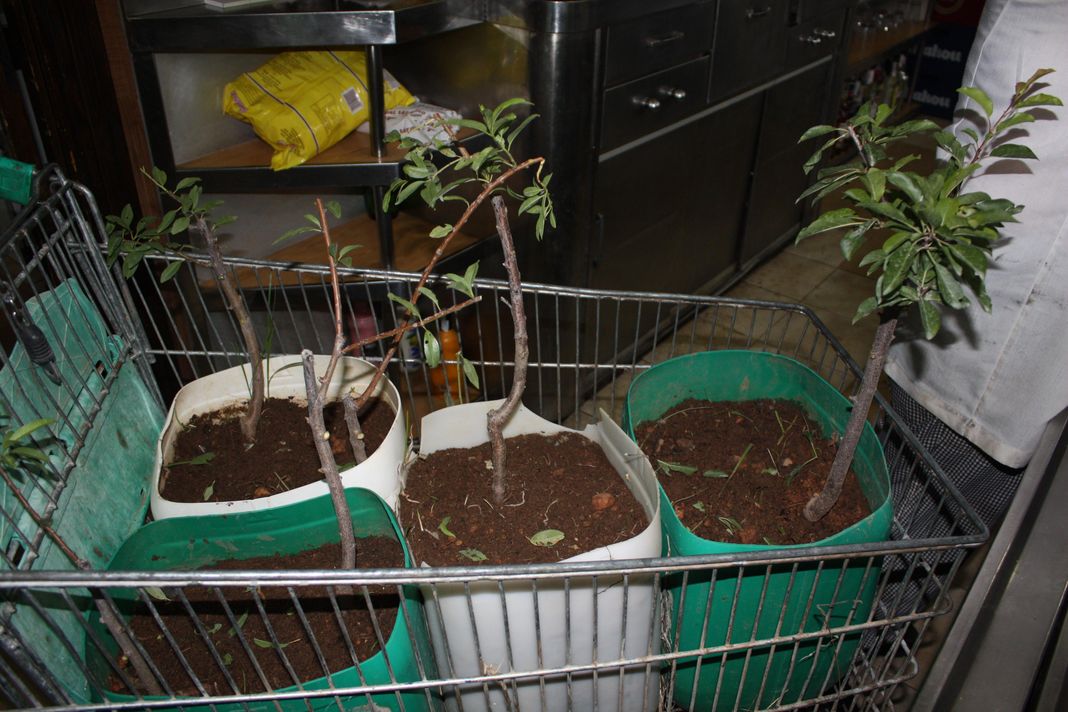
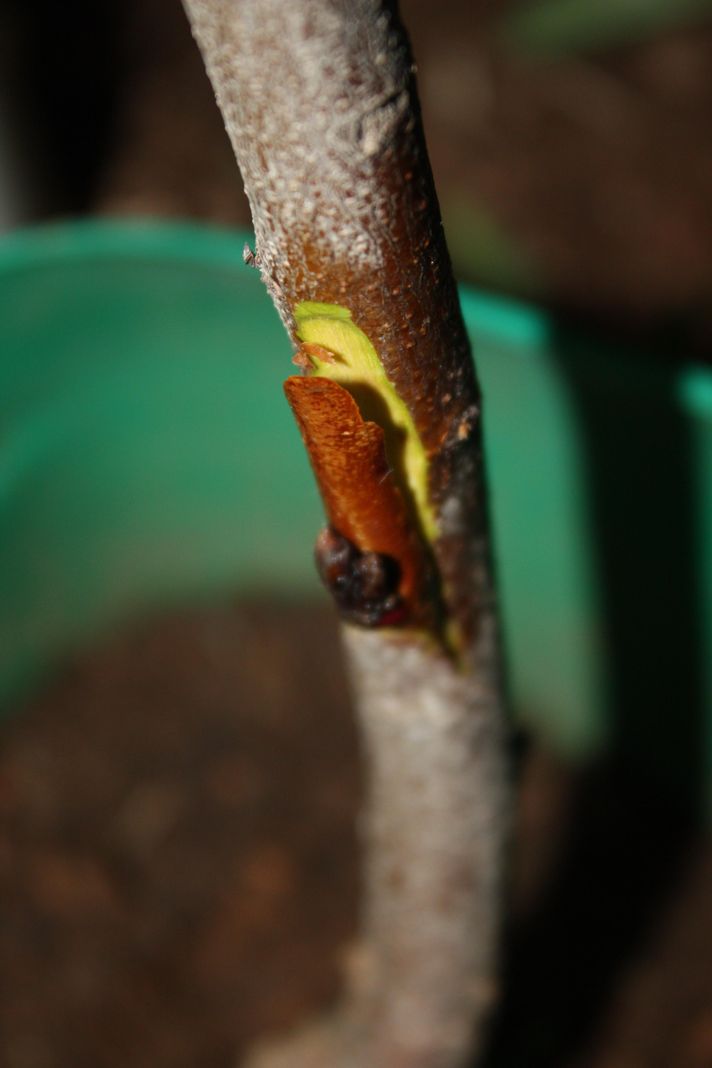
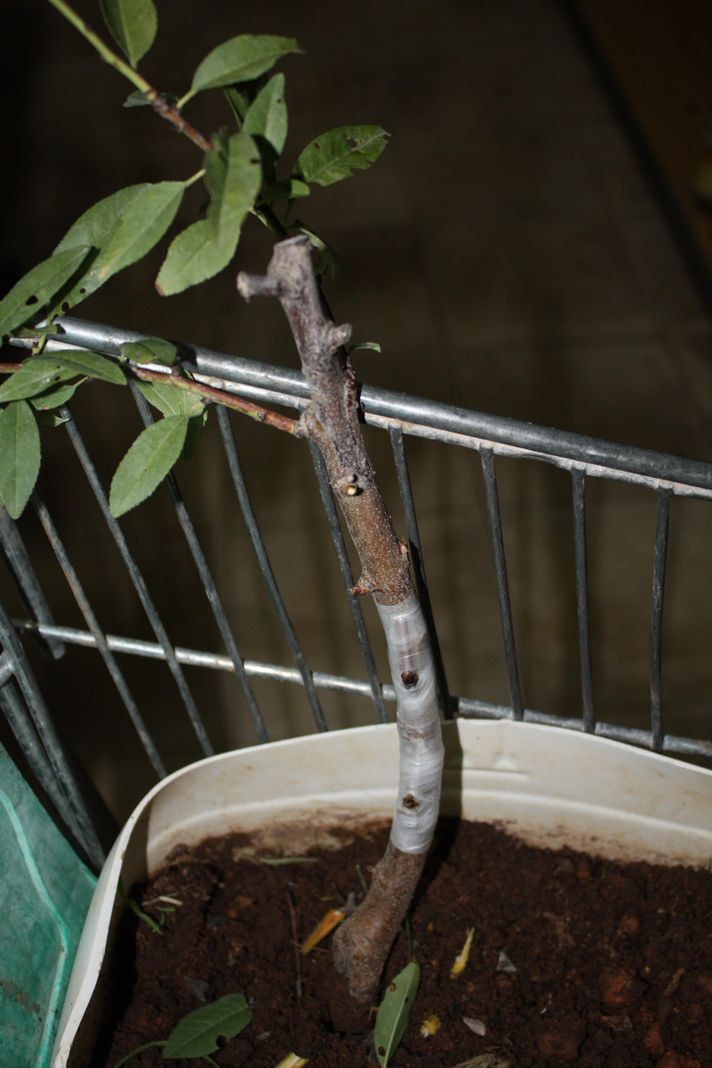
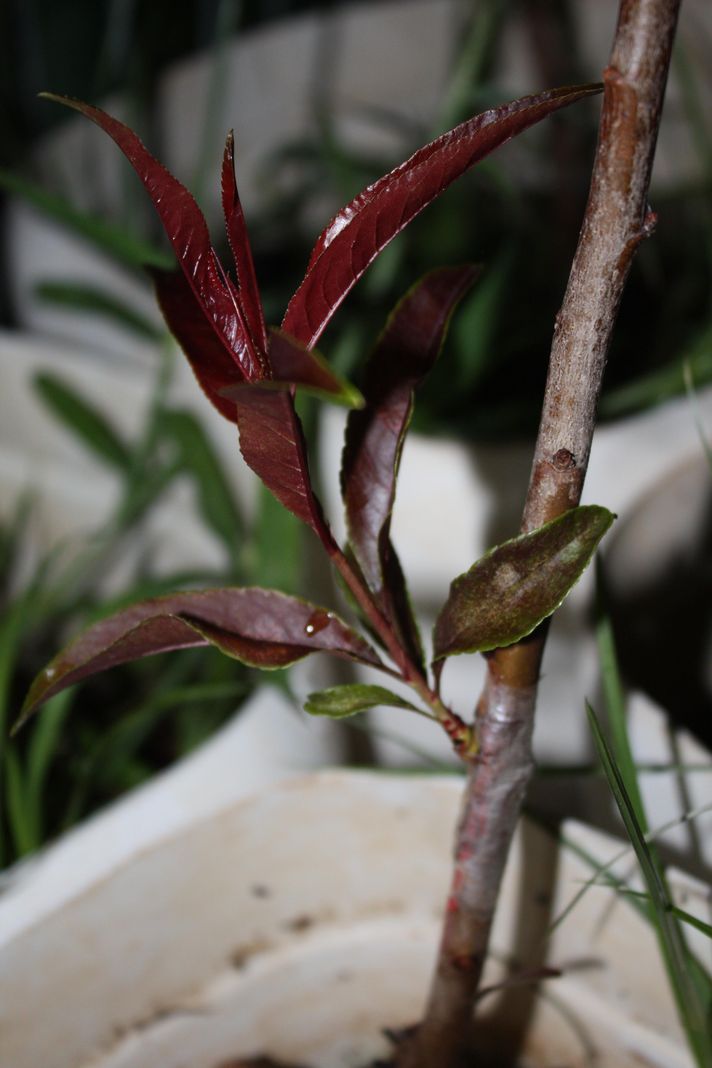
This is a Spice Zee Nectaplum grafted about 12-15 days ago (with cuttings collected in winter)

What I am going to comment next, is only important for the European members of the forum, since we regularly use these rootstocks.

Hybrid rootstocks of almond x peach tree:

  • GF-677 (obtained from the INRA of France)
  • GxN 15 Garnem (Almond Garfi x Peach Nemared, obtained by the CITA of Aragon in Spain)

That said, the Spice Zee Nectaplum variety has magnificent graft affinity with GxN 15 Garnem, and no or very poor graft compatibility with GF-677.

I have an SMS-280 cherry tree grafted to Budding chip with cuttings winter wood starting budding that I will put pictures of in a few days.

To graft now in the T bud system with branches in a vegetative state, it has no mystery, but graft now with cold cuttings collected in winter "this really does have its mystery " hahahahaha

Regards
Jose

7 Likes

Have you ever compared your success rate between sterilized and unsterilized scion wood? I suspect the bark itself provides adequate defense against pathogens and I would need some researched results to further complicate my harvest and storage of scion wood. Time is money- except I always have too little of the former.

1 Like

Sorry Alan for not responding more quickly, but the same thing happens to me as you, I have very little free time.
I fully understand that in principle this method of preparing cuttings may seem very laborious, but it really does not involve so much extra work.
It is very important to have a good quantity of plastic cut bottles ready like the ones you saw in the photographs to introduce the cuttings in the dilution.
Having the material prepared (it is the same for all years, cut bottles, bleach, water and plastic kitchen film).
Once you arrive from the garden in winter with the cuttings collected, you have 25 or 30 bottles ready, and the process is really fast.
The slowest part is drying the cuttings on a clean tablecloth, but in this task it is not necessary to be present, you can be doing other things (preparing the labels).
Regarding whether I have verified the difference in the maintenance of the cuttings by performing the process of over-hydration and disinfection, compared to a normal conservation in a Ziploc bag, the difference is like the night and day.
At this time, 7 months after having collected the cuttings in winter, all the varieties (all the small packages of cuttings) are perfectly viable for grafting.

If this method is not carried out, what you see in this photos can come up very easily, which will be easily recognizable to you , and also they would be dehydrated ,and they would not be suitable for grafting .

Mold ( fungal contamination )

Dehydrated

I don’t like being a prophet of anything, and I’d rather you discover it for yourself.
Next year, carry out the process only with some varieties (10 or 12 varieties), and after 7 months in the refrigerator you can see the result for yourself.

It is absolutely worth the little effort to make, since the reward is enormous (maximum duration of the cuttings in the refrigerator, maximum quality of the cuttings over time).

Regards
Jose

6 Likes

Ah, but I only do splice grafts in the spring so my wood only need stay viable for two months max. If I did budding I could use fresh buds from the tree I was using as scion wood.

4 Likes

Alan, when you are going to graft on these dates, and the varieties to graft are availables in your orchard, the best system is to do a vegetative bud graft in T (T- Bud graft).

But when you do not have the variety available in your orchard , but you have grafting material refrigerated of a friend , it is very important to keep the cuttings “impeccable” state, in case an unforeseen event arises and it is necessary to graft late summer, so whit this system the cuttings are perfectly viable for grafting.
That is the goal , and this cuttings preparation system offers you that added “plus” of durability in perfect condition of the graft cuttings.
And of course the system is essential to send cuttings to a friend from another continent in winter, when the package will be traveling for at least a month.

Regards
Jose

5 Likes

Jose, I’m not suggesting your approach is without merit, I’m just saying that for folks that gather wood a month or two before grafting it it may not be worth the effort. The point is for folks to know what they are getting for their time- it may or may not be worth it for them and I think we’ve clarified the matter to help people decide the best course of action for them. Thank you for providing such a helpful tutorial on sterilizing scion wood- I might use it someday and I bet some here will use it next time they gather wood.

5 Likes

Hello Jose,
Very nice method. What is the concentration of the bleach you use? Bleach varies a lot at least in the USA. Can you provide more information about the bleach itself that you utilize?

4 Likes

Clorox is 7.5% sodium hypochlorite (common laundry bleach). The CDC says 8 oz bleach per gallon of water will kill mold. If a stronger 1 to 9 formula was used that would be about 13 oz per gallon. I have found a 4 oz per gallon for 15 minutes works for me as an absolute minimum. The best concentration is debateable. If @Jose-Albacete is using 7.5% sodium hypochlorite 1 to 9 and it safe for him that’s fine but I wouldn’t use more. I’m going to use 8 oz per gallon.

2 Likes

For a long time, probably when most of us were forming opinions and rules of thumb were developed, Chlorox was a 6% solution.

3 Likes

Yes, and there is high concentration bleach also so checking the label is smart.

1 Like