Oops, read the first post so long ago I forgot it was all there as links. Thanks!
1 Like
Just because you know how to skin a cat feet first does not mean you can’t skin a cat starting with the head.
I’ve got an inkbird thermostat and some raw heat cable. While it would be easy to purchase the materials as per the first post, why should I when I already have literally everything needed except the 2 inch pipe insulation?
One thing Americans are good at is re-inventing wheels in different sizes, colors, and shapes. 


2 Likes
I read through a bunch of the thread and this looks awesome. The how to pdf in the first post is wonderful, and I think this should be put in the reference section if it isn’t already there (certainly with an explanation so other members have an idea of the objective if this thread is not included). My question for you Dax, and it may have already been answered and I missed it, what is the spacing you chose between cuts in the insulation pipe? It looks like there is just enough for a pot between each so I’d guess about 5-6 inches on center?
*edit I see this is already in the guides section.
2 Likes
I edited this to reflect what you see here (above) and is the reason I’m showing it here, now. I’ve always meant edit to say that when using containerized rootstocks, you should have cut slits on the (foam) pipe for a perfect fit. Pots are laid out opposite each other on the pipe in a staggering pattern as shown here:

Otherwise, I like 1.5 inch spacing for setting bagged and bareroot bench grafts onto the pipe much better than 1 inch. Don’t do 1 inch.
Dax
2 Likes
Thanks Dax! I appreciate the update. That is very helpful. Sometimes the simple question is the best one to ask, right?
I have pool noodles that had been protection for my kayak rack in a previous iteration of transporting them. I’ll have to see if the holes in the center are big enough for the heating coil to fit, but it might be worth a trip to the big box store to get the grey ones pictured, they seem more robust.
1 Like
You’ll figure it out I’m sure.
The awareness I have of pool noodles (3-4 inches in diameter) are not soft but a very dense foam. I don’t know or believe that’s the right choice for this project, but, it might be??? I just don’t know. There are differences among foam that I have now purchased to build three of these pipes. If you go to Menard’s for example, you can get more-dense foam than the first and only type available at my local neighborhood hardware.
A bit of stiffness is certainly good. The first foam I bought were very wobbly when being handled and after a lot of use I have to say for just one year, the slits have marginalized some, but, still 100% usable. The foam really never should become a problem even if it should widen. The foam acting together always holds the stick I’ve found regardless if the foam has been cut all the way thru.
Dax
1 Like
Has anyone had issues with mold in their root bags?
1 Like
Inside a 2" tube I have a 1/2" length of agricultural polypipe filled with water and sealed at each end. On the bottom side of this pipe I have taped the heating cable. In this way the water acts as a heat sink both reducing the amount of electricity used and it maintains a more stable temperature. With the cable on the bottom of the pipe it is kept well away from the grafts.
4 Likes
I tried the roof and pipe heating cables by cutting the thermostat off ,( the thermostat does as indicated and makes them unsuitable) but the wire inside is hair sized and very difficult to work with , of course one needs a controller if they remove the thermostat as those usually produce far too much heat. I am working on other ideas and will report on them eventually but probably too late for this year. So far the self regulating easy heat cable with the braided metal outside is the best for most.
1 Like
This is almost always some combination of not using sterile seed start mix or using too much fertilizer or using the wrong ingredients in the grow mix.
I purchased a reptile tank heating cable from a large petshop supplier. It works well and was available in several different lengths.
My pipe is located in completely unheated space in a pole building , The ambient was 34-45F I saw temp inside the pipe at the actual grafts 66-72F , measured higher simply inside the pipe. after 14 days I opened several Oak and persimmon grafts, zero callus so I built a pipe with a PID controller and 7 watts per foot , now have set the controller to achieve 78-82F at the actual graft. I used a twig about same as a scion, carved off a bit on the side placed a PT 100 temperature sensor there and treated it as a graft, parafilm, rubber to measure the graft temperature. I noticed in the past that a critical temperature was needed to stimulate growth in persimmon. I found that they grow very slowly below 74F. I will look at the grafts again in a week or two.
4 Likes
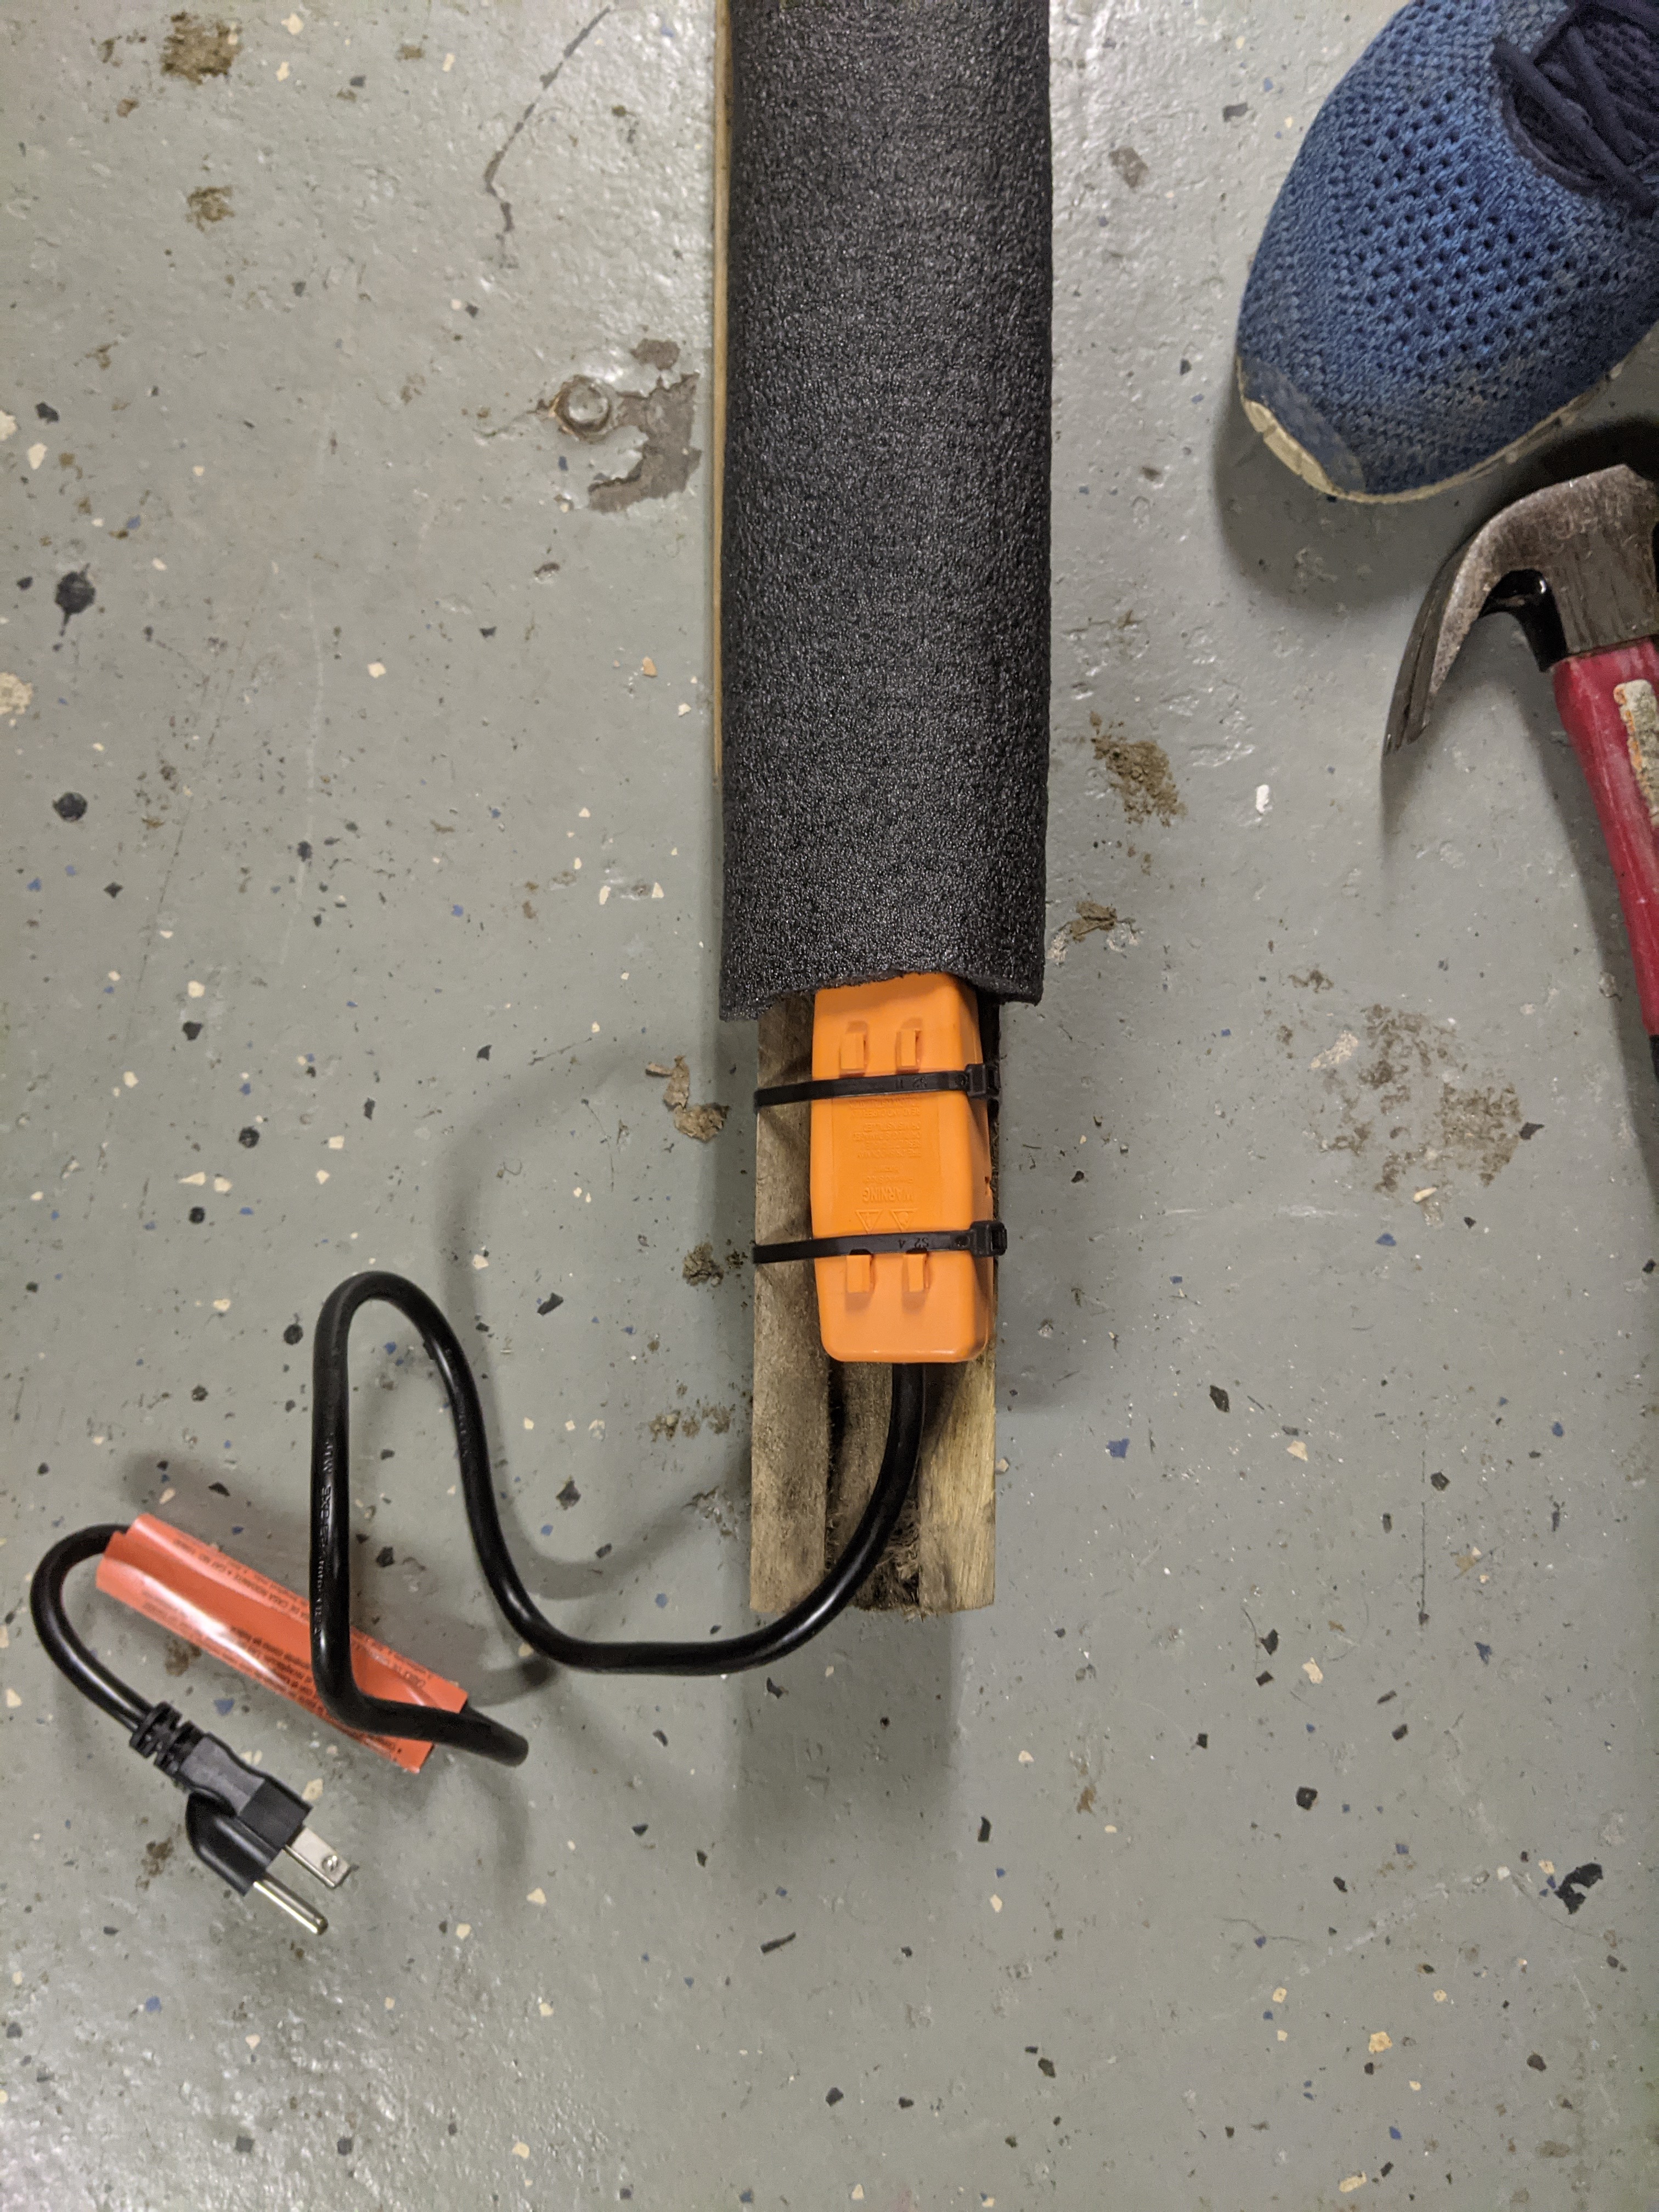
So I have “skinned the cat” slightly differently than the original design from @Barkslip based on the adjustment @Travis made using pex as an insulator.
I had a 10’ 2x4 left in the attic above my garage by the previous homeowner. That attic has been like a genie giving me just the boards I need for a lot of the landscaping projects I’ve worked on. Anyway, I also had access to some 2x3 wood that had been scrap from my job site as protection from the cables surrounding pipe we had delivered, so it already had a planed section down the middle. I used electric cable staples to secure the heat cable into it to keep the cable recessed from my grafts. This could easily be done just on the 2x4, by planing the center but I used what I had for free. I also picked up 4- 4’ sections of pipe insulation (1" hole) at Walmart for a little over $3 and the heat cable Dax listed on Amazon for $34. I think this is an improvement to the original design for the following reasons -
- Stapling the heat cable to the recessed board reduces risk of excessive heat to the scion and graft failure with minimal additional effort
- The sections of pipe insulation are able to be spread around the 2x3 blocks without having to secure them, so you can take them off if needed (easy to replace if worn) while the pipe insulation is fairly airtight along the edges. I’m not sure how you guys secured the insulation on your setups but this seems to be super efficient and easy.
- I imagine the heat will be retained better using this system. I’m not sure if it will be too much, I will monitor if possible during use.
- I have a scrap piece of Styrofoam I glued on the terminal end of the setup to reduce heat loss further. Is this a bad idea? Should I leave a gap on the temperature controller end? Am I thinking into this too much and trying to fix something that ain’t broke?


6 Likes
Looks good, Ryan. When your slits are cut into the pipe is the entirety of your carpentry going to fit inside the pipe? That’s all that’s needed from your design.
Best,
Dax
1 Like

I wouldn’t change any of the details unless you want to experiment and mess around with stuff.
The first post has links to the heating cables recommended that I have two-years experience of and the guy that built this originally has been using I think for 5-years.
Here’s an 8’ link:
https://www.amazon.com/gp/product/B01M4LWNDM/ref=ppx_yo_dt_b_asin_title_o00_s00?ie=UTF8&psc=1
Here’s a 10’:
https://www.amazon.com/gp/product/B01M4LWU7D/ref=ppx_yo_dt_b_asin_title_o00_s00?ie=UTF8&psc=1
The price for each has gone up 4 dollars since I purchased. To piece it together at a hardware store it will cost you more than to buy at the current price. You’ll save about 15-bucks to have someone else do all the work and ship it to you for free.
Dax
1 Like
Not exactly what most use , it has a built in thermostat and provides 6 watts per foot where the one suggested is self regulating so has no thermostat and produces 2 watts per foot. I use the one you show with an inkbird PID controller after i bypass the thermostat by cutting the black cover off , grinding off the metal cover , remove the white pin that operates the thermostat. Wrap the cut with electrical tape. The 2 watts per foot one does not have enough heat if your setup is located in a very cold place like an unheated building in winter with temperature as low as 30F. The 6 watts per foot one does a good job in such a situation. I might build you one if you don’t know how and really want it badly.
1 Like
No, it will turn on and off with the thermostat. I got same one from the link below, if you hate amazon, buy from Ebay. mobilehomesolutions was the seller. Fast shipping, they’ll make one any length if not listed. From the info included in package, I see exactly what this was intended for, and why it would work for grafting. Always meant to be on over the winter, heating the pipes on the underside of a mobile home.
After finding more about hot callus pipe grafting, I see that it supposedly does not make much difference in apples and pears. They callus easily at lower temps. But I am going to use it anyway, since I want to see that there is callus tissue well before there isn’t a chance to redo a graft this spring. And it works while the whole tree is dormant.
2 Likes
@BeeDee pm-ed me the link to the one on ebay from mobilehomesolutions and I placed an order with them. Thanks everyone!
3 Likes
I’m a grafting neophyte but had my delivery of 25 persimmon seedlings arrive today. I have the parts ready for the callus pipe. I have a V cut tool. It looks like 6 or so seedlings will match up with scion wood on hand and the others need to grow out.
The question I have is what the most successful temperature of the roots outside the pipe while callusing.
Thanks in advance
1 Like