Those are healthy plants with such large roots coming out of the pots, do you have them on a rack so they air prune off.
I control algae with a small fan and I use a thin layer of chicken grit, or coir on top of the soil.
Those are healthy plants with such large roots coming out of the pots, do you have them on a rack so they air prune off.
I control algae with a small fan and I use a thin layer of chicken grit, or coir on top of the soil.
No rack, just a 1020 tray to catch water. I suppose i could put them on a rack but it might make things complicated because i need to keep the soil warm with a heat mat. I really would prefer that the root growth happened inside the pot as the roots that escape will likely get damaged in the transplant process.
I might add a small computer fan to see if that helps with algea growth.
My wife wanted to try starting a few tomatoes, even though I think it’s still a bit early. She cut some water bottles in half and put some starting mix in them and planted a few seeds of Watermelon, Pink Brandywine and Warren’s Yellow. They’re in the mitchen window sill.
Since we’ve usually had to wait until late May to plant out stuff, because of freezes and wet soil, I’m starting the rest of our seeds next month.
It’s not too early. I started my tomatoes a couple weeks ago already, and we live way up near Minneapolis. You might need to transfer the plants to bigger pots eventually and set them outside. Then just carry inside on cold nights. Late May or even early June is when we plant ours out. I started my peppers on Feb. 3 this year.
It looks like there are separate inserts that the individual pots fit into, which would make it very humid with very little airflow. I use a 200 cell tray to start onions and some small lettuce starts and find that since it covers the whole 1020 tray and lets very little air flow in, I get long roots, but on my tomatoes and peppers with separate six packs of cells and good airflow, very few roots escape until the plants are pretty big and I have to water almost every day which keeps it damp in the tray. For the 200 tray, I actually prop a dowel under the edges in a few places to lift it up and get more airflow and that reduces the root growth. Could you put something into those inserts to lift up your pots and get the airflowing? Although I guess that would mess with your bottom watering.
Well, I used to start my tomato seeds in March in little peat pods. In about two weeks after they sprout they get to about 3", so they would be transplanted into 16oz drinking cups, and go back under the lights until it’s time to plant out. By the end of April, they are about 6-8" tall and that’s big enough to plant out. Problem is, we have had a couple of May’s where we have had a couple of freezes, and/or the ground is very wet.
So, we had to wait a few more weeks for things to dry out, and the plants get to be over a foot tall and very unwieldy. The last three years we planted out about Memorial Day week and the plants were huge. So, that’s why I’m waiting a couple more weeks to start.
For me 6" means no tomatoes so I need mine to be blossoming by the time they are set out. And I agree they can get frustratingly hard to handle.
I started using the empty coffee ground bags. They are water tight, and tall. I cut off the bottom corners for drainage, roll down the sides and as the plant grows I roll them up and keep filling with dirt. They can tip so I put them in a milk crate to keep them upright. I don’t do more than 12, that is plenty for 2 people and keeps us in tomato soup and sauce all winter.
I understand, being that far north, you have to get a head start. I’m having trouble understanding how you use coffee ground bags, though. You mean those types that go into an older type coffee maker?
How many hours of daylight do y’all get in mid-summer? I bet it’s a lot, we get about 14 hours max. Right now, with daylight savings time going, it’s light until about 8 now. Can’t wait until June, it doesn’t get dark until 10.
I wouldn’t know what to do if we were still getting tomatoes in September, by then most of them have been either decimated by blight and/or deer. Or I get tired of taking care of them and the weeds take over. I’ve been growing them for this will be the sixth year here, and they are a real test of my patience. Peppers, beans, corn, cukes, okra- easy. Tomatoes? Not so much. Such as it is here in this very warm, humid, rainy environment. Our fruit trees aren’t producing yet, so I can just imagine how difficult it’s going to be to get somewhat clean fruit when they do.
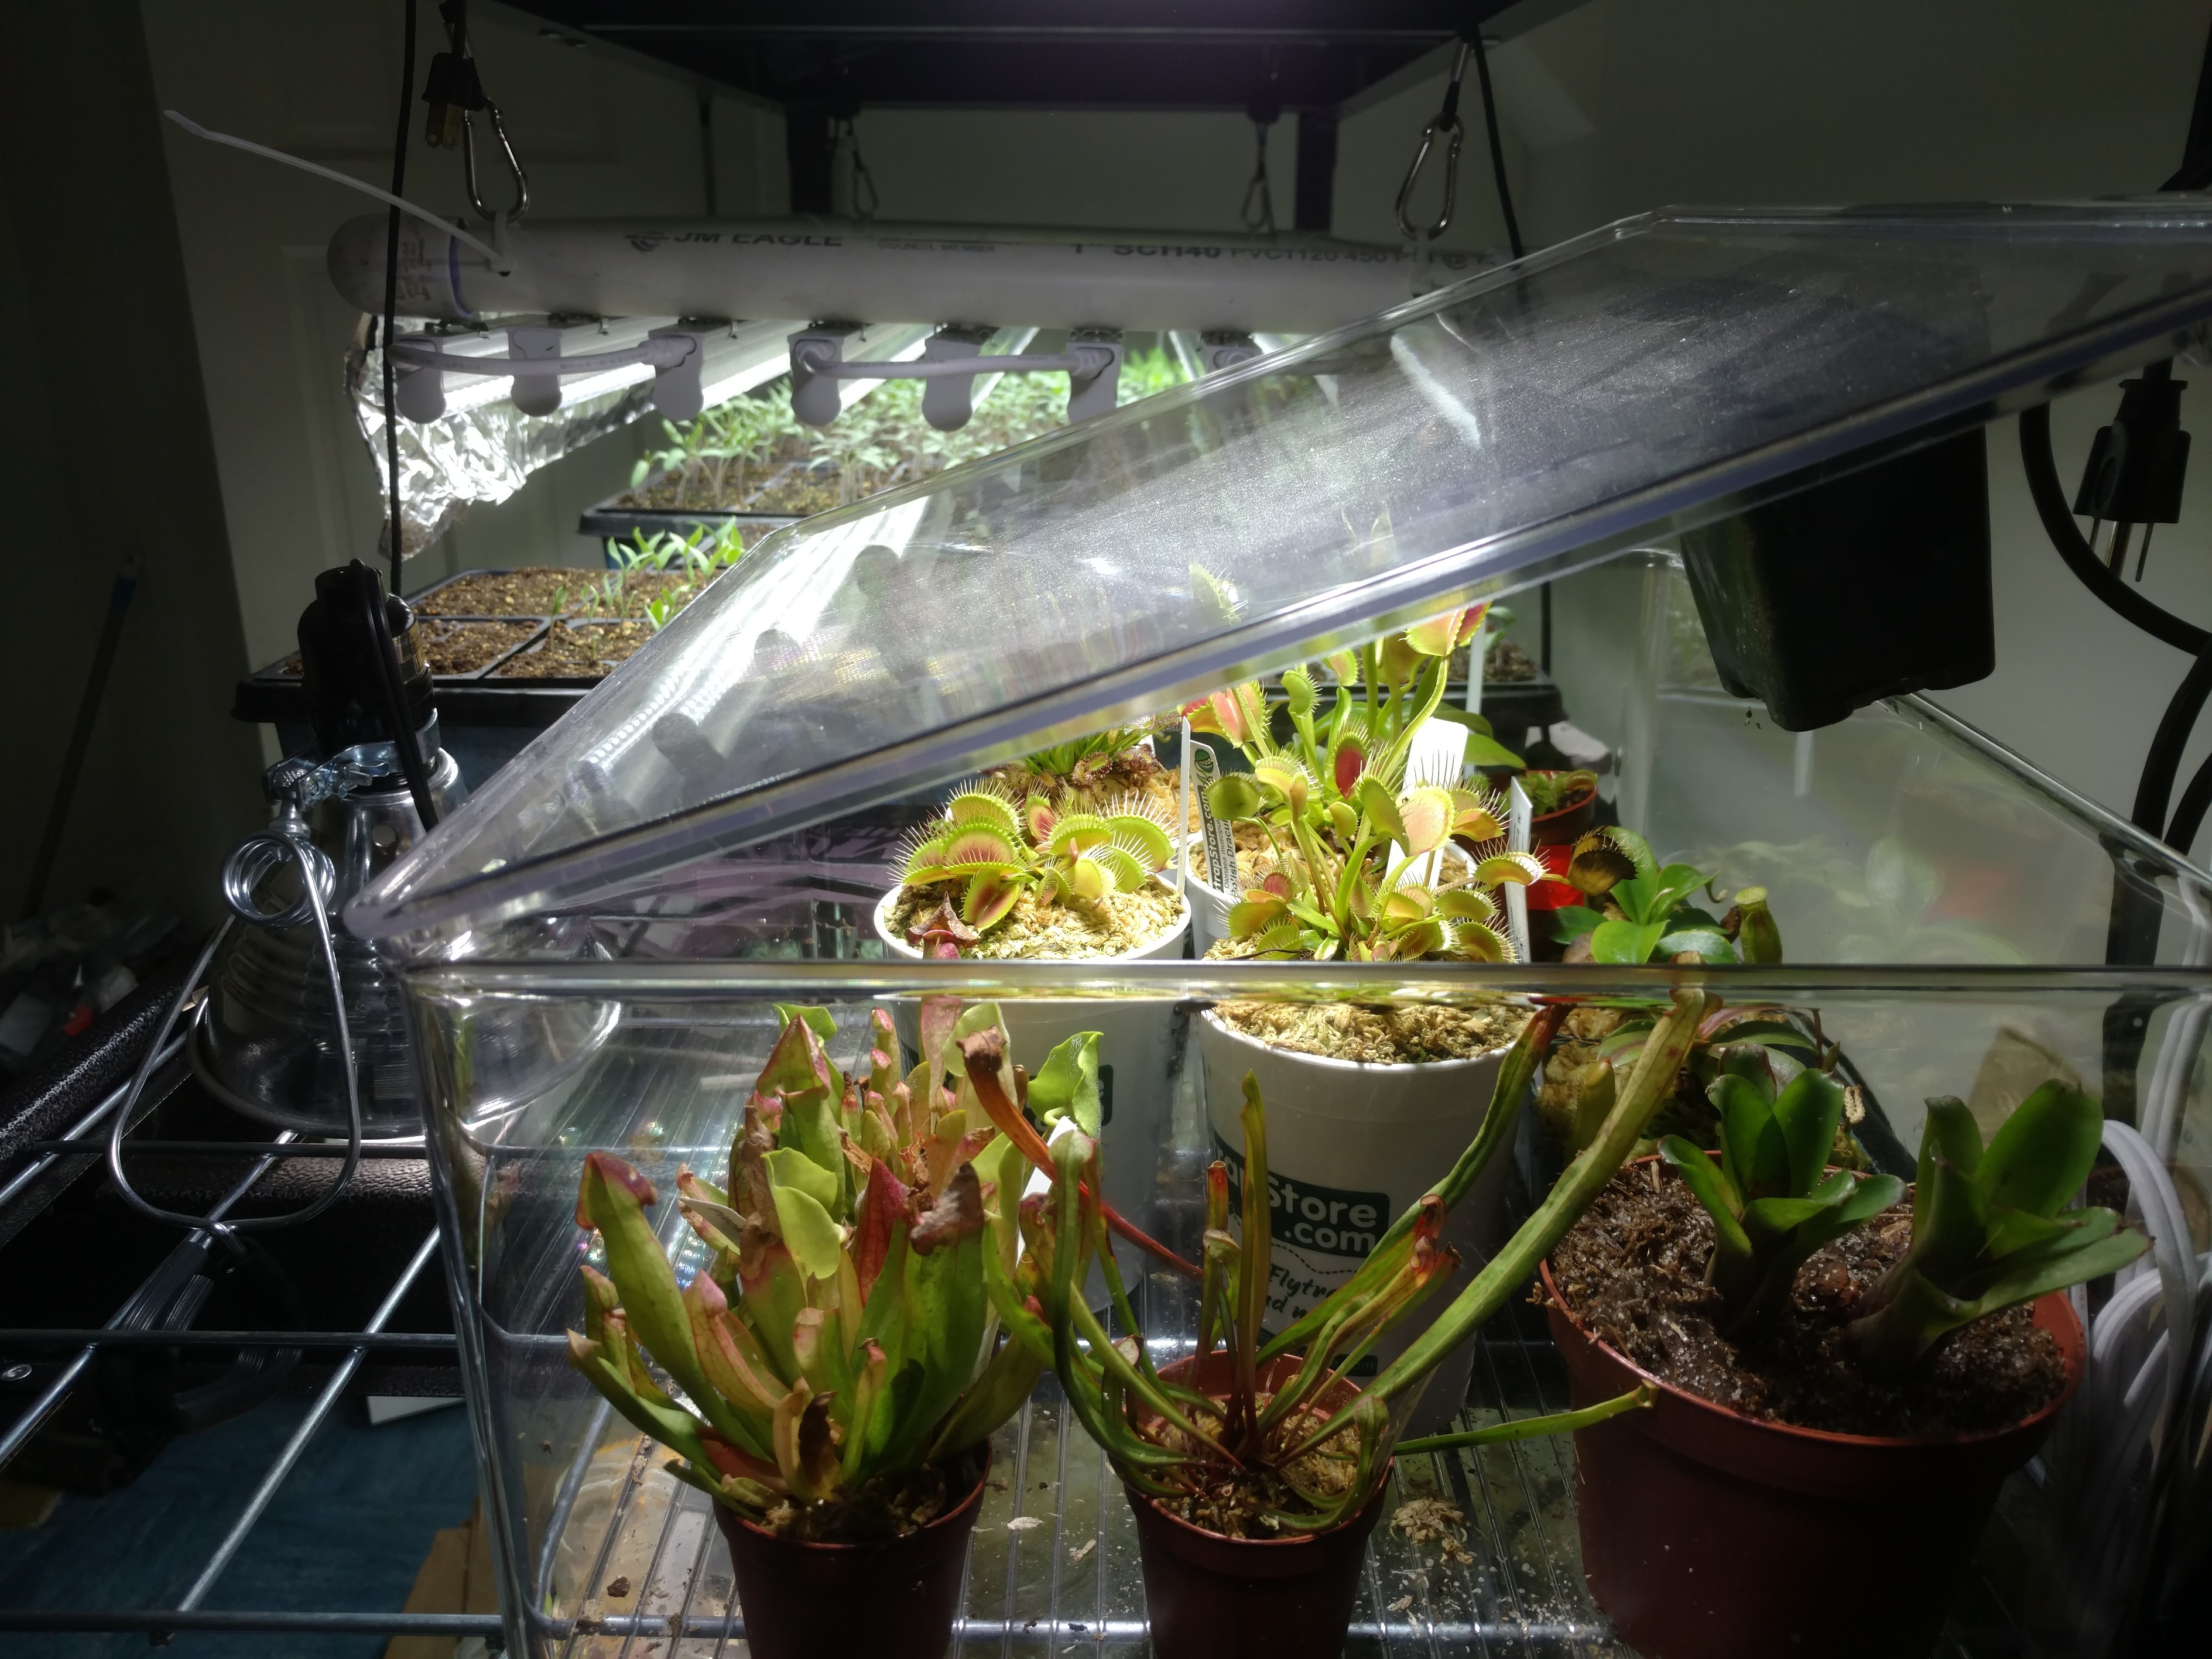
In previous years I’ve had some issues with fungus gnats. I’ve kept it from being bad, but they were an annoyance. This year I’ve kept my carnivorous plants on the same shelf. They’re in an acrylic box (with the top propped open) to keep them a bit more humid, but the gnats have found their way in and disappeared. I can see their remains in the flytraps and I’m sure the pitcher plants have gotten a snack as well. I’ll be doing this every year now!
That is so awesome, LOL.
I’ve used sticky boards with good results, esp if put out early, i.e. when the seeds go in. This year I experimented with mini zappers. I also put a solar powered one in the hoop house and had not needed to spray like prior years. I have to take it down and inspect it to see what’s up.
Now thats a good idea, I might have to get me some of those gnat eating plants. Goodness how do you keep those venus fly traps so healthy?
Older type coffee maker grounds, I am still old school and don’t have a single serve machine. I guess I am dating myself  I am trying my best to recycle anything that can’t go in the recycle bins. All those plastic pots are starting to get to me, I do hundreds of flower seedlings a year.
We are at about 12 hours of sunlight, it rises around 7 and sets at 7. In summer we are up to 16.
Your home made mix and this statement concern me because peat can run as acid as pH4. Quality commercial mixes buffer it with lime to raise the pH. They also include an absorbent (forget the right word) so the peat doesn’t repel water. I was taught in school that in containers you should aim for one point lower than in soil- so a general use mix should by at about 5.5. A greenhouse manager taught the class, but when I searched later I couldn’t find confirmation of potting soil needing to be a lower pH.
Have you ever done a side by side comparison of plants grown in your home-made mix and a high quality pro-mix? I used to make my own mixes but now use a pro-mix because my results are better this way with veggies. I make my own mix for container trees in my nursery.
I purchase a form of pro-mix from a commercial green house grower in 3 cu. ft compressed bails for $25. They sure fluff out when they are compressed. The ones big boxes tend to carry from Scott’s don’t seem as light and don’t work as well for me.
Like a lot of plants, it seems like it comes down to knowing their requirements. Most fly traps that show up at home depot, lowes, etc. are half way towards being dead, so it is uphill to get them healthy. Mine are from a place called the Fly Trap Store and were in good shape when I got them. The hardy pitcher plants I got from someone at a trade show who just wanted to get rid of them after almost killing them and they are just now coming back.
One of the most important things is to only water with distilled water or rain water. Most tap water has way too much mineral content and slowly kills them. Where they live they’re only getting rain water so there is no mineral build up in the soil/water around them. I grow them in pure spaghnum moss and try to just keep flushing them out with rain water when I first get them. So if they’re at a regular store, you can be sure they’ve had the wrong water for a while.
The other thing is that most of these are hardy and need a dormant period. These look very good since they are bursting out with new growth after their dormancy. Without the dormancy they’ll just go into decline. They like bright light so they’re under strong LEDs for now and will go outside this spring through fall. I just let them go dormant in fall and then keep them cool for 2-3 months. The last things are don’t let them dry out, but don’t let them sit in water, don’t fertilize (they get what they need from the bugs) and don’t be tempted to trigger the traps for fun since that uses up their energy.
They are fun, but do require a lot of vigilance to make sure they don’t get too dry.
Ugh. So under the something seems to happen every seedling season, I have a new ailment after getting rid of my fungus gnat problem. This is some white spots (bumps really) that have just shown up in my trays of tomato rootstocks for grafting. So far it appears to have impacted some of the DRO141TX and Maxifort seedlings, but not yet on the RST-04-106-T seedlings. I really don’t want to loose these since it will totally mess up my grafting plans. I’m surprised that it is impacting the rootstocks that I would think would be more resistant, but maybe that is only to soil born disease. It showed up quickly and is a bit random on which are effected - not just an obvious point of infection and spread. Any idea what this is? Some type of Septoria? Tiny mites? An evil spell?
Thought that would be eriophyid mites, but turns out to be edema. Maxifort is apparently known for it.
My Maxifort had this last year and I contacted Johnnies and they indicated it is an ignorable trait of some rootstocks. So no worries and proceed as usual. Happy grafting. 
Thank you @hoosierbanana and @JustAnne4. I am breathing a bit of a sigh of relief that it is physiological and not a real disease or infestation. I expect it is a combination of too much water, high humidity and my new LED lights (less UV?) this year. Based on the article Brent linked to, it gets worse with the lack of UV light inside so I rushed them outside for the last hour of sunlight and will try to get them out as much as possible over the next week. As long as they’re still strong and vigorous they should be graftable. Whew!
I do think I’m getting things wetter than I’d like this year. I am using new, more rigid 1020 trays this year, but they have very deep grooves in the bottom to help make them stiffer and I’m finding I have to add more water than I’d like to get the cells evenly moistened by bottom watering. Amazingly they’ll suck up every drop of water in those deep grooves through capillary action, but they won’t even start until you get the bottoms of all the cells covered and that is a lot of water. Hopefully as they get bigger and use up the water faster, they won’t be in very moist substrate like they are for at least a day after each watering now. I might be better off going to the floppier trays again next year.
Has this been diagnosed yet? It’s OK. We are here for you @zendog.
On a serious note. I didn’t have LEDs last year and had the blistered appearance, so I don’t think it is the LEDs but more likely the aggressive rate at which vigorous rootstocks pick up and transport water.
Lol, and you know I need it.