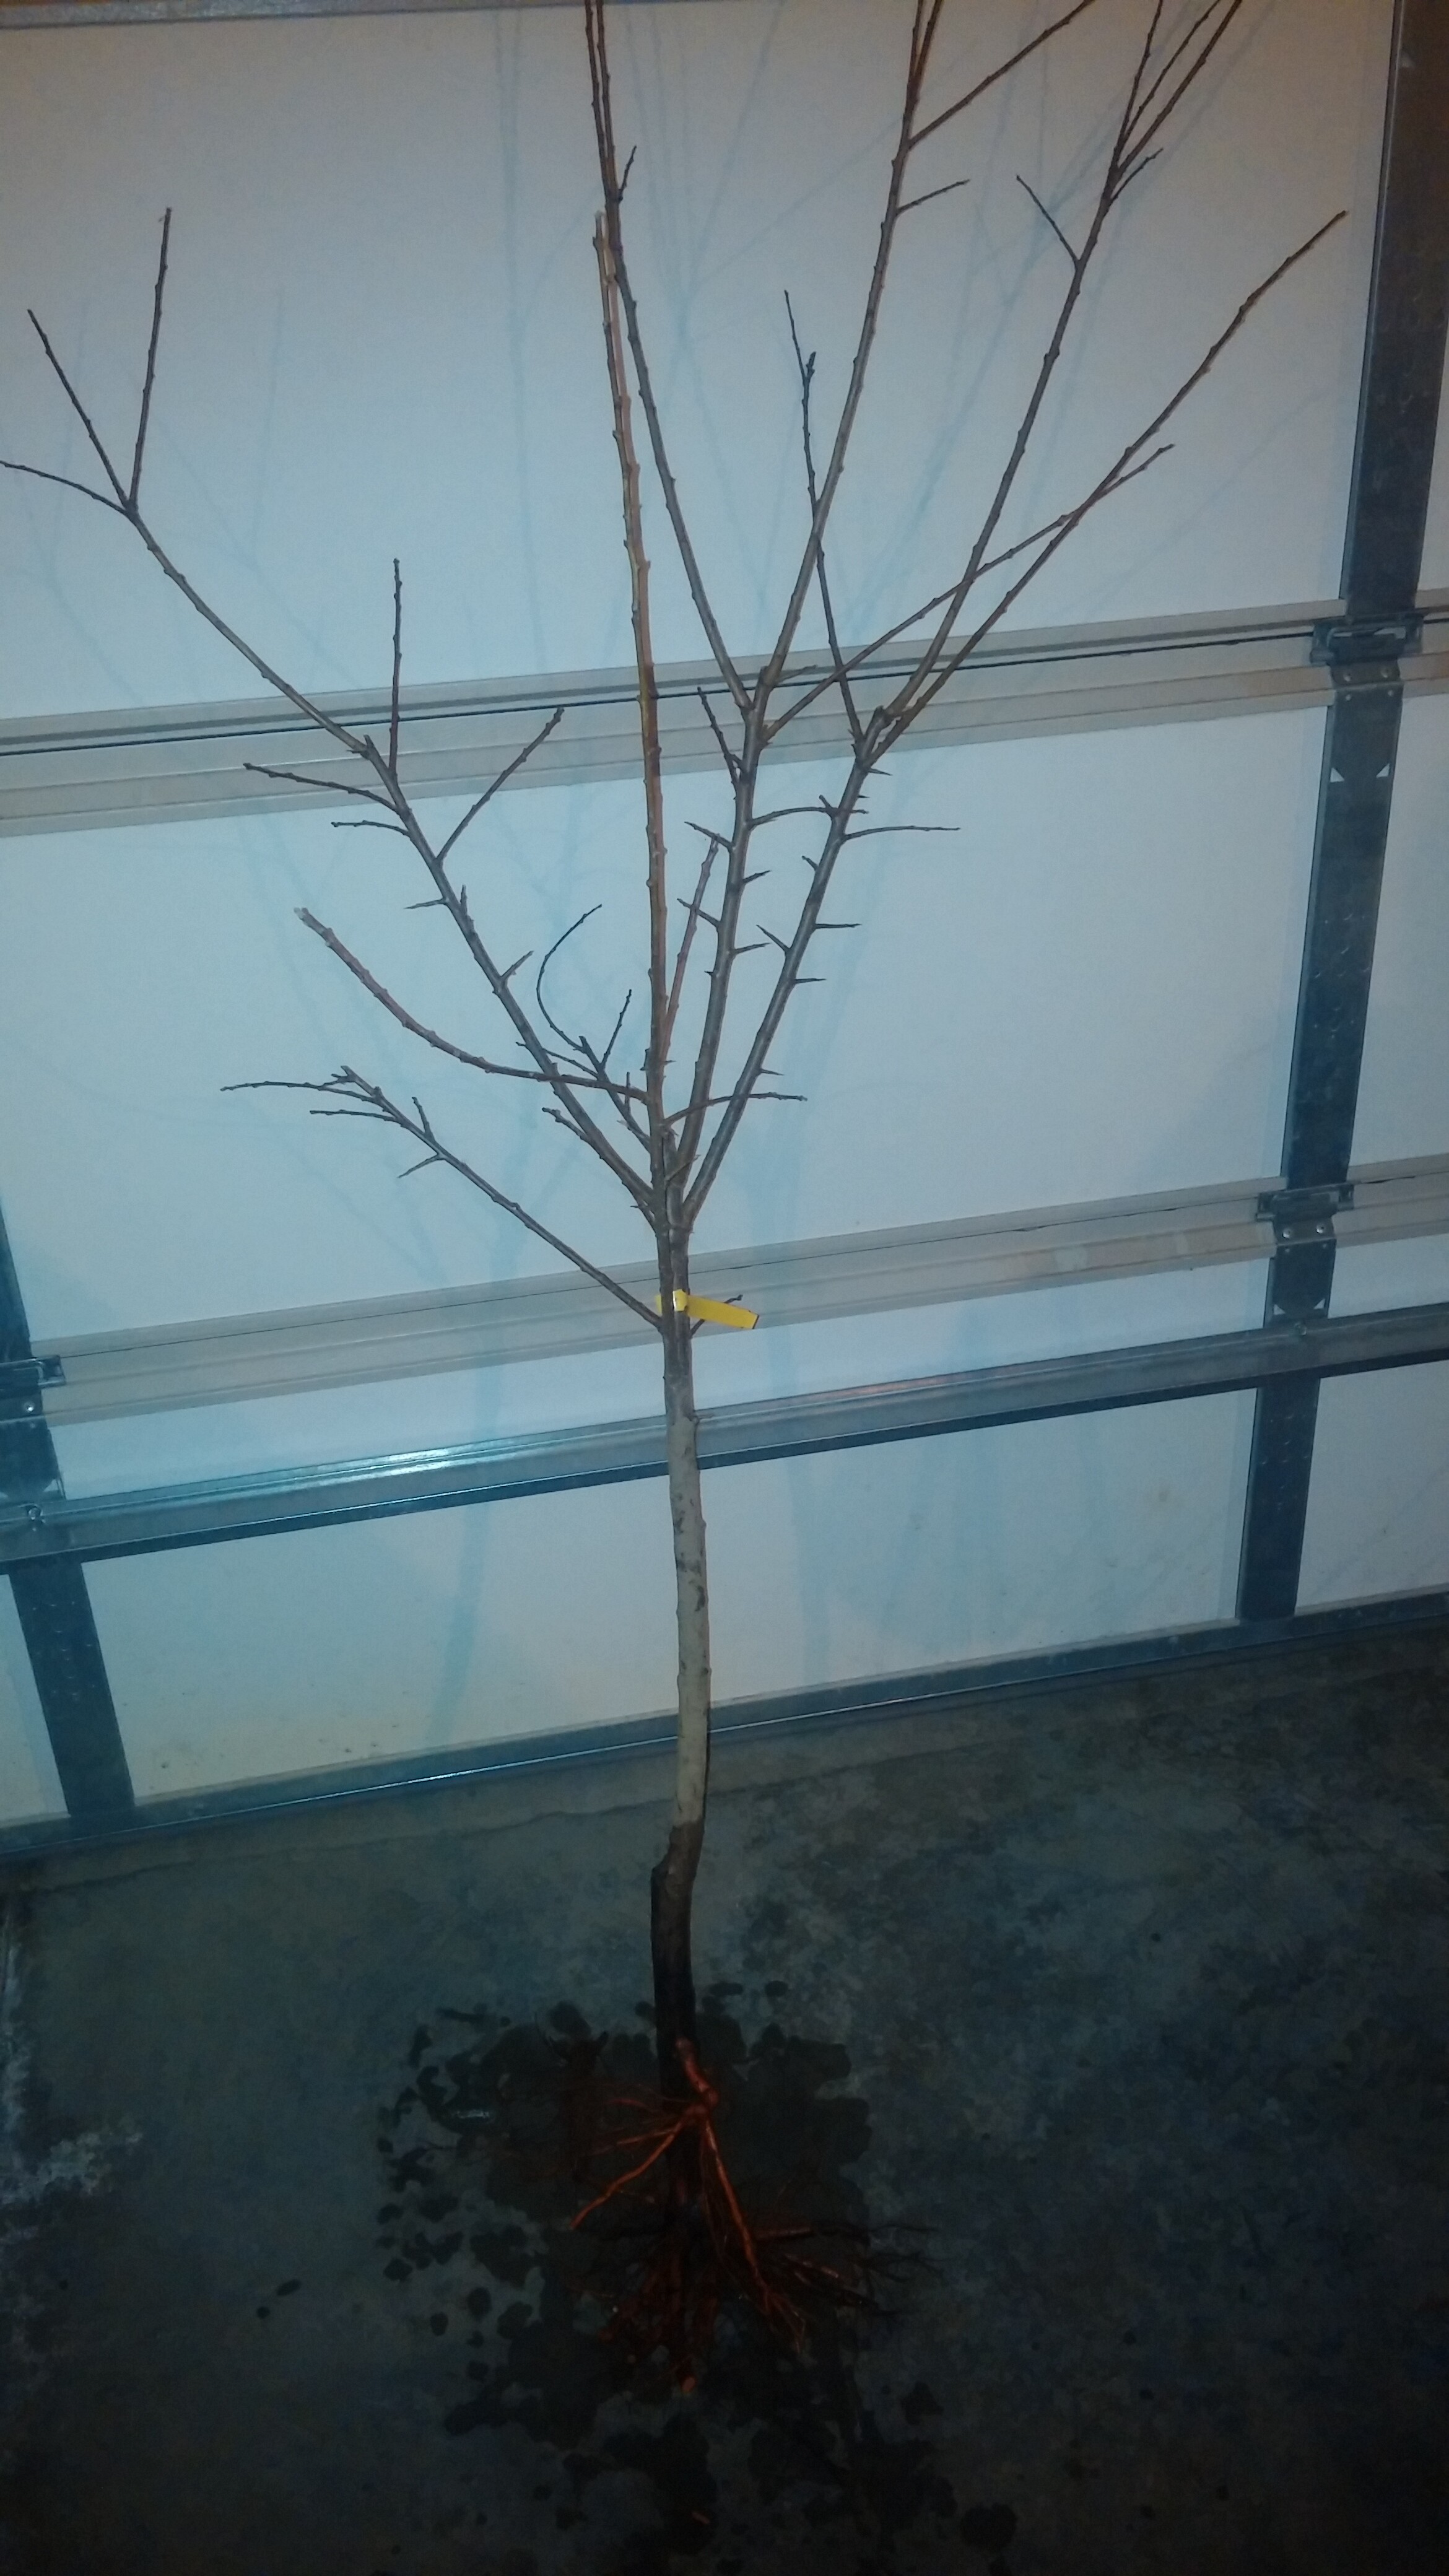
Here is a lesson to learn from. When I first started growing fruit trees I thought it would be an excellent idea to amend the planting hole with a tad bit of Tree & Shrub “soil”. The bag clearly stated mix half native with half T&S so i thought what the hell… Should work, I just got to break the side walls to allow for root growth outwards. I did that 2 years ago. This last season I decided to use that area for my new raised beds so the tree (Splash pluot) had to be moved so I decided to put it in my nursery row for temp. storage. I got myself a 7 gallon RootMaker green knit bag and dug the tree up. Spaded around it and lifted it out. and moved it to the bag soil and all. Added some soil around it and called it good. Didn’t even think to inspect the rootball and made sure I had about 3/4-1 inch space around the rootball to allow the roots to grow out and then become trapped. Well this year I wasn’t happy with the area so I have decided to dig up my dormant trees and pot them to allow for better control until I can get their new home finished. After digging up this tree and washing off the native soil here is what I discovered…
It appears the roots just circled and circled due to the increased nutrients in the amended soil and never branched out. In comparison here is a Dapple Dandy but with the soil removed before moving it and placing it in the same knit bag the same season, and tree dug up and soil removed this year.
Both trees arrived with the same “butchered roots” everyone worries about but let me tell you this… It doesn’t matter. Even in this junk soil they were in the Dapple Dandy had to have so many roots cut off that were going through the bag it wasn’t even funny. I found some to be well over 4 feet long that had actually gone into other bags around this tree. The stubs you see cut were to remove the tree from the bag. As the larger root grows into the bag it gets stopped and then from that it sends out many more (found one place it sent out about 9 new roots) through the small holes that all branch out.
This is a reassuring post because I have marginal soil and I’ve had to fight every inclination I have to amend the soil prior to planting. the devil on my left shoulder is telling me to add a bag of compost to each hole and the angel on my right shoulder is telling me to plant the tree in the native dirt. I will listen to the angel. Lol. My only concern is that I want to plant them slightly high and I’ll need a little additional dirt. Instead of adding amendments maybe I should get the soil from a sacrificial hole at the corner of my plot. Then fill that hole with some top soil from the ag store.
Sean,
One question.
How was the growth and vigor on the Splash as compared to the Dandy?.
I wonder if the Splash roots were just using what was readily available growing really well and would THEN move out once there was no more benefit to be had by just hanging around the old neighborhood.
Just wondering if it was a total “no benefit” to the amendments in the planting hole.
Both started off different sizes. The Dapple Dandy was a tad thicker caliper (5/8+) and the splash was about 3/8-1/2. So the Splash was headed a lot lower.
Thanks for these pictures Sean, they are priceless. People continue to repeat this mistake of planting in too rich a soil right around the tree and if they saw these pictures they would change their mind fast!
So it looks like the Splash which started behind the Dapple grew much more vigorously and very quickly outgrew and leapfrogged the Dapple.
So assuming that vigor for Splash & Dapple is the same and accepting the dangers of a “universe of one as an accurate sampling”… one might conclude that adding amendments is not to so bad.
Sean, this is SO helpful. I preach this over on the GW Citrus Forum - do not amend your hole for this exact reason. Instead, put your amendments on top of the soil, out at the drip line and somewhat beyond to allow nutrients to percolate down, and make the feeder roots reach outward. “Picture is worth a thousand words” comes to mind. Will save these photos for future use
I think it depends on the situation. I’ve amended the soil just enough to help in the first year and roots eventually spread out to a distance roughly equal to the height of the tree. I’ve accidentally dug them up when working at what I thought was safe distance.
My soil type is channery silt loam with a fragipan about 10"-20" below the surface. It’s difficult to dig a hole in the stuff with a shovel and pickaxe, so I use my backhoe. The holes end up irregular shaped and about 6’ diameter and 3’ deep. The teeth on the bucket help to breakup the transition to the undisturbed soil.
I refrain from watering the tree during dry periods. My area tends to get at least a 4-6 week no rain period every summer. I water once a week if the trees start dropping leaves from lack of rain. I think the lack of water encourages the roots to spread.
If I fertilize, I will try to put it in ring just beyond where I think the roots are at for its age. Of course that is just guess work.
Thanks for taking the time to post this vivid pictorial lesson.
Like you, I’ve learned a lot from digging up trees and moving them.
I believe the best way to “amend” heavier soils is to build large mounds/terraces. The soil is so loose it provides no resistance to the roots as they branch out to seek nutrients. Then top dress as necessary.
AJ, I have caliche. We can’t even use a pick ax, either. We actually have purchased an impact shovel (i.e., jackhammer) to dig our holes in some areas of the yard (left the backhoe in Indiana). I do not amend my holes ever. I put my amendments on the surface then top with mulch so it doesn’t wash away in the few rainstorms we get. We use micro-sprinklers that water at the drip line and beyond to encourage roots to grow outward in search of water and nutrients. It works very well. In fact, funny story about digging a tree hole: A couple of years ago, my gardener that comes in once a week to do the simple stuff saw my new bare root stone fruit tree sitting in a bucket of water ready to be planted. He asked me if I wanted him to plant it. I said, “Sure.” Pointed out where I wanted it planted. About 30 mins later he rings the doorbell to tell me he can’t plant the tree where I want it because there is a large boulder under the ground (not out of the ordinary, as I am on this DG and caliche, and we have a LOT of granite and blue granite boulders on the property, above and below ground). I said, “Okay, no worries, I’ll find another spot.” Told my hubby, and he said there was no rock, he bet it was just the caliche. Pulled out the impact shovel. It sounded like he was hitting rock. Nope. Just 8" of caliche (translated almost rock). He was able to bust through. Planted the tree and it is HUGE now (that’s my pluerry). Had to prune it back by about 3 to 4’.
I made this mistake on several of the first trees j planted. The nursery told me to dig a shallow hole twice as wide as the roots and mix the dirt from the hole with compost… anything I can do to not get them root bound?
All the more recent trees I planted, I used native dirt only
The roots weren’t moving out at all. It probably looks that way from the way it was laid out on the garage floor. I thought out was odd that I grabbed the shovel and started to spade around the bag and didn’t hear a single snap of a root being broken. I pulled the bag up pretty easily and there wasn’t a single root exiting from the bag.
Also I will tell you this, the Splash may have had more vigor compared to the Dapple but when I pruned the top after putting it in the bag a found a lot of dead wood. That whole central branch along with a good 1-1.5 inches of trunk was completely dead. I found that very odd that it survived the winter we had 2 years prior with many days of -20 and a stretch of not having a high above 0 and this year we had only one really cold day with a pretty mild winter and it had this much winter kill, if you can even call it that.
[quote=“hoosierquilt, post:11, topic:606”]
Just 8" of caliche (translated almost rock).
[/quote]Patty, how far down does the caliche typically start? I assume there is some sort of friable topsoil layer above the caliche.
Depends on where it is in my yard. My 1 acre lot is on a slope N to S. So, in order to create a flat pad for the house, much of the topsoil has been cut away. In this particular area, the caliche is right on top. In other areas, it can be about a foot down, even a little further. And, it is not everywhere that I’ve dug holes and it varies in thickness. Any “friable topsoil” I have, has mostly been created myself, with careful gardening (I try not to rake up dropped leaves, I mulch, anything to improve my fairly non-existent topsoil, since I’m on DG). The evidence my topsoil is improving is in the increase in number of earthworms I dig up, which is a very good and healthy sign my soil is improving. And, less water and fertilizer needed for all my plants. And, less pest pressure.
Sean, Thank you! Very interesting post and amazing pictures. I’ve always amended my soil, until seeing your pictures. This year I’ll be planting in native soil only.
Sean- I just wanted to say thanks for this and to add one more voice telling you how helpful it was. Sadly, I’ve been planting all my trees for 3 years by digging a hole about 2.5 by 3 ft and backfilling it with a mixture of composted tree mulch, super-fertile black dirt I get from a river bottom nearby, and the existing soil along with a little fertilize mixed throughout. I also have been adding a handful or so of fertilize about 3 inches under the hole bottom. After seeing your photos, I now suspect I have an orchard full of root-bound trees! Oh well…I’m not going to dig them all up but thanks to you I wont have to do all that work from now on. Thanks again. Another helpful post here on growingfruit.org
Lol… I’m glad I could be helpful. My intent wasn’t really to make a helpful post, just something that I found and thought it’s be a nice lol moment. I’ve done some really dumb things, gone over the top on most and usually things turn out ok.
This just happened to be pure dumb luck but I’m glad that I found out, and now really glad people are learning. Without knowing how others do it I assumed many, if not all, would just give me a “yep, it’s common knowledge and that’s why no one does that” but instead it turns out that many do what I did. I’m glad that I actually learned something for once and this didn’t turn out being a money pit. The trees were meant to be in and out and not meant to be long term residents there. Looks like my procrastinating paid off this time.
In the end it’s true what they say… a picture is worth a thousand words.