If you want to see what I drafted up let me know, always happy to share although there are likely better out there.
1 Like
My raised beds are untreated redwood lined with 1/4 inch hardware cloth to keep out the pocket gophers The Redwood Side boards have not rotted, but the posts did. I think my husband just used a cheap pine two by 4 to fasten the redwood boards together, but were I to do it over again, I would use Redwood posts as well.
4 Likes
we have white cedar here which is very rot resistant and is the wood of choice for raised beds. with ground contact on one side, it can last 40 yrs.
3 Likes
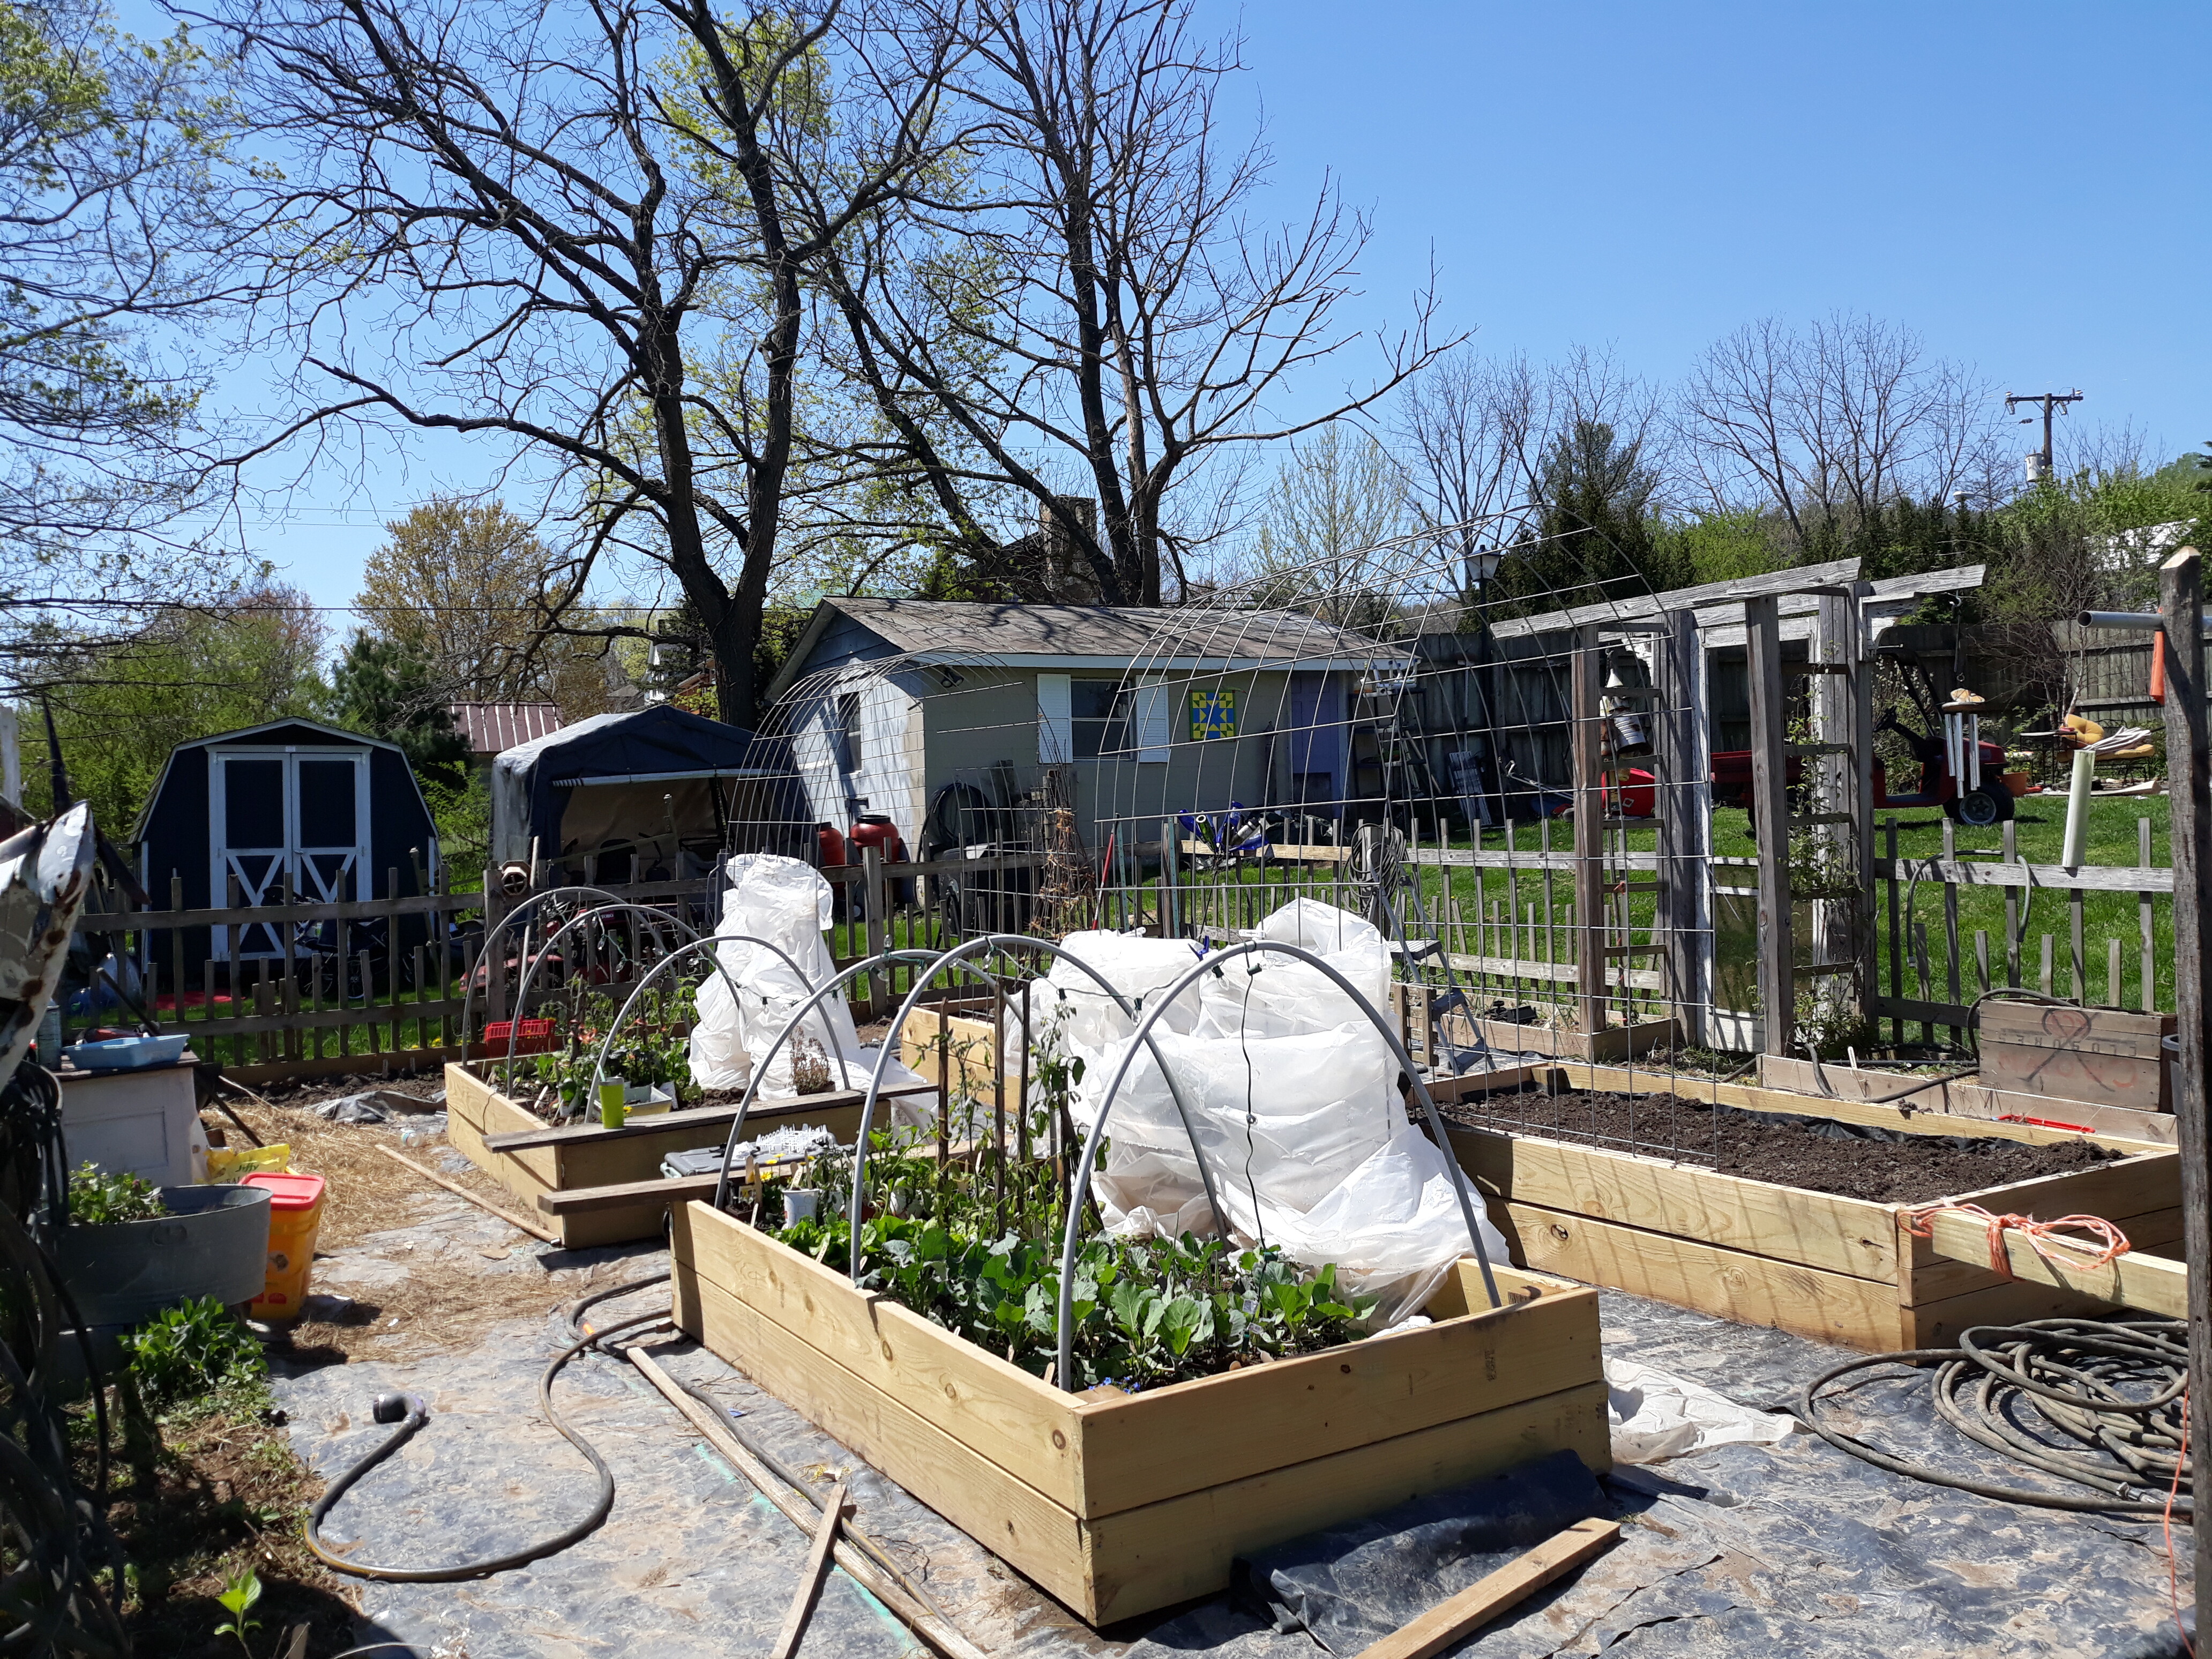
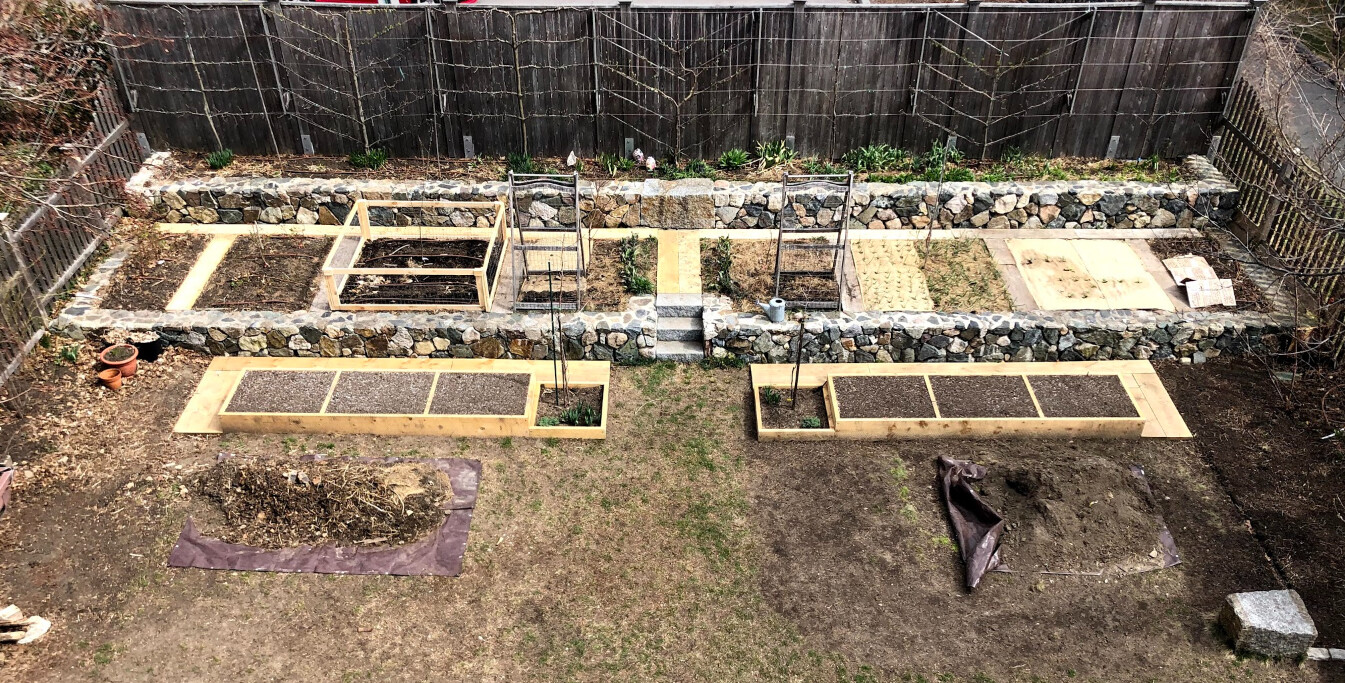
I’ve since torn out the raised beds and abandoned the idea of mulching the path. This spring I leveled the beds and used the 60" tiller on my compact tractor to make a single swath the length of the garden. Only the top right and lower right planting areas have some fruit in them. The rest I can now mow flush with the riding mower every few weeks. Now I only have do deal with the thistle in the planting row, and it gets shaded by the vegetables.
So far this is more manageable. I’ll need to pull and reinstall the arch trellises if I re-till the existing row. Next year we’ll probably add a 2nd.
7 Likes
That looks like a good plan. The only areas that I truly eradicated thistles and blackberries, are where I planted grass seed and kept it mowed, or where I grew crops that needed a lot of repeated hoeing, like sweetcorn or tomatoes, or trench growing like potatoes.
I did just try to be surgical about applying roundup to my worst thistles among the fruit trees. I can only manually remove so much, and it became a choice of giving up those areas, or being chemical about it. I hope I didn’t damage the fruit trees there. I don’t think so, but some do have shallow roots. I don’t like using the stuff, but sometimes chemotherapy is one of the few viable options.
4 Likes
Looks just like mine including the arch. Why did you decide to remove it? It looks like it would be low maintenance. I had my entire garden area covered in heavy plastic the year before and just cut out for plants I decided to leave it for now even though I don’t like the look.
5 Likes
I removed it because my weed strategy was thick mulch outside the beds. The thistle loved that, and took over. Looks like your plastic is a more effective barrier.
tilling in the spring, and mowing grass pathways, has been much easier so far.
1 Like
I liked the idea of a picket fence, but it has been a weed eating nightmare. I added long fencing boards to the bottom all the way around and it has been a much easier process
2 Likes
I purchased raised bed stones from Lowes and they are slotted for a nominal 2 by to be fit right into.

10 Likes
Looks really good!
1 Like
What do you have in the raised beds for soil? I need to put mine together for a nursery bed this week. Apple, pear, cornelian cherry, and currant. I was going for mostly compost.
2 Likes
That nursery bed has 148 apple grafts and a large red lake currant bush in it. It is a mixture of composted cow manure and sawdust from our cattle. To it I added some miracle grow garden soil, some peat moss and some mushroom compost. After planting I mulched the top with more sawdust from a local amish mill.
2 Likes
Those stones look convenient. That bed is so wide seems like you’d need to climb in to get to the middle trees. Do they not need any attention before transplanting?
1 Like
The bed is 8’ by 8’. I made it a square just because its temporary for the nursery bed, and I didnt want to cut the boards if I decide to use them for something else later.
I will need to climb in a couple times to prune off lower growth on the root stocks, but it wont hurt the growing trees.
2 Likes
I have seen a lot of people using what I call " horse watering " oblong tubs for gardening. I have noticed it more these last two or tree years. Easy to do. Put in place and fill with dirt.
1 Like
You all have some very nice raised beds of various kinds…
Here is one more type to mention…
Borderless raised beds. They work great too.
I have some 250 ft of borderless or you might say edgeless (no retaining wall) raised beds.
Till them up, load them up with compost, rake them up into raised beds then cover in deep mulch. Works great.

TNHunter
10 Likes
For those of you growing low hanging fruit and veggies in borderless beds, do you have issues with rodents? I feel like I have less chance of issues with a walled raised bed as a deterrent.
This is what I am working with.

5 Likes
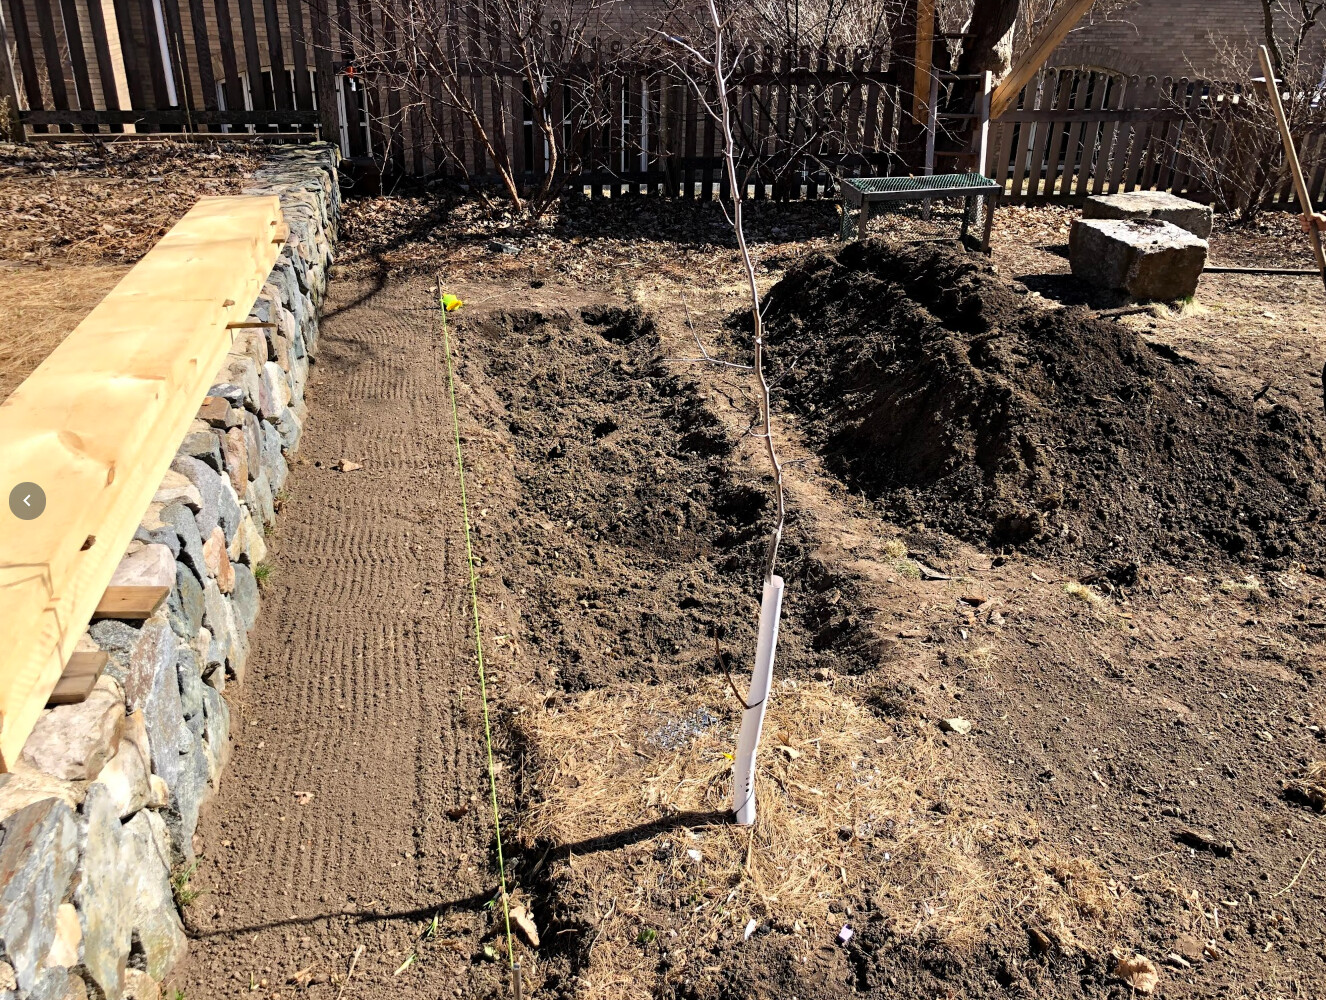
This year I made some new raised beds. Previous ones in this spot had been just pine 1x3 screwed together and put on top of the grass, then filled with compost. Nothing in these beds really grew that well, despite me continuing to put compost and other additions on it, as well as broadforking it most years. Also, a nearby maple was sending tree roots into it. And after a couple years the 1x3 was rotten enough to lose all integrity. I have come to feel that 1x thickness wood for the sides of beds is not really worth the work since it won’t last very long.
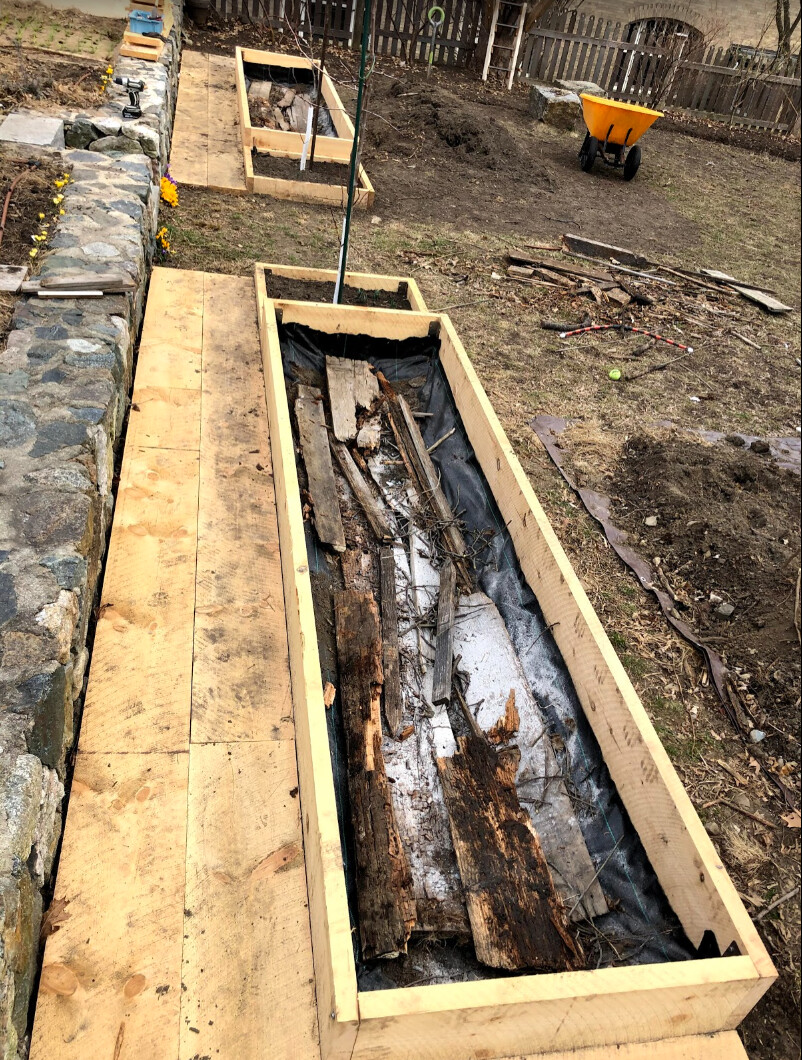
So this year I demolished the remains of the old ones and dug down probably 15cm below grade to cut tree roots, remove rocks, etc. I got a delivery from a local sawmill of 2x12 full dimension rough cut green lumber to make the sides of the new beds. Moving green 12’ 2x12 is no picnic! I decided on 12 high because this is the widest normal lumber you can get and I didn’t want to go multiple layers for cost and complexity reasons. Most plants will probably be ok with this depth though some may suffer.
I designed a stainless bracket for this project and got a bunch cut at https://sendcutsend.com/. I feel like other beds I have made from 2x12 always fall apart at the ends of boards first so maybe the brackets will extend the life a bit. I usually use stainless hardware - after it rots and I take this apart I can reuse almost all the hardware. Boxes are held together with these custom brackets supplemented with stainless structural screws. Probably this set of beds will last 5-10 years.

Looked at making them out of black locust, but it was going to cost over $1000 just for the wood, which is 10x the price of the local pine.
Once I got the frames put together and in the right place I lined the bottom with landscape fabric - hoping to delay ingress of tree roots. Then I layered in some old rotted lumber I had around, partly from previous raised beds. The white powder is bbq ashes.
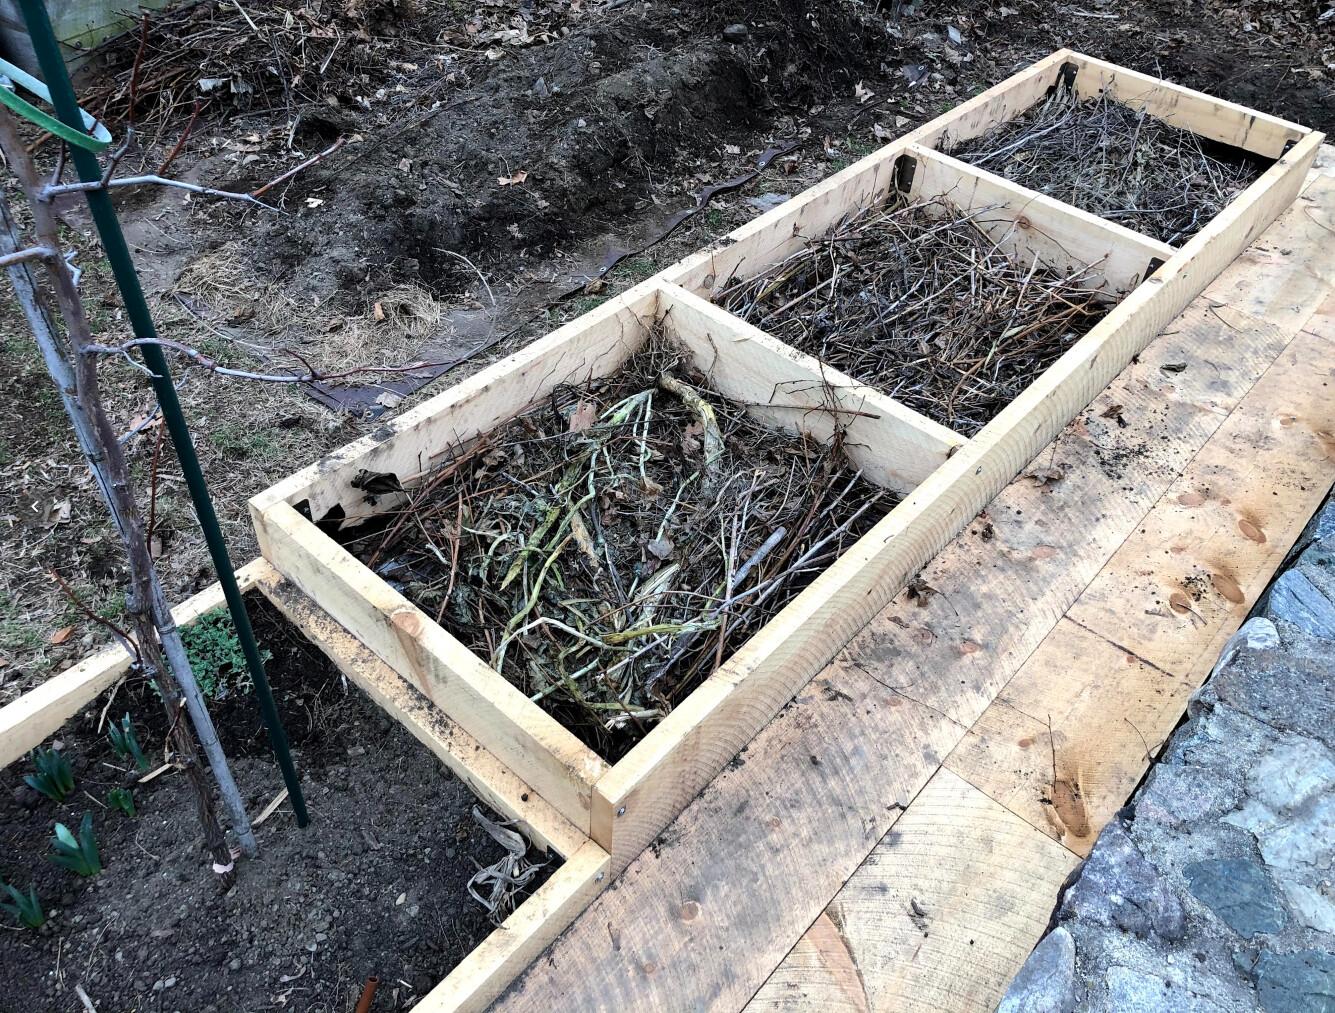
I used more 2x12 to make a kind of walkway partly around the back of the beds. On previous version I found it annoying to mow and edge that strip. Next I put in some cross braces of 2x12 to divide each bed into three 3x4’ sections, then threw in sticks, prunings, and various other woody waste I had around. This is in the direction of hugelculture. Last year I buried some old logs I had in another bed and the plants I put in there did better than anything I’ve ever planted at this house, so I wanted to try to replicate that back here.
Next I started filling . I mixed one wheelbarrow at a time and dumped it in. About equal amounts of:
- peat moss
- vermiculite/perlite mix
- homemade screened compost
- trucked in compost from a home composting service
- screened soil that I had dug out of this location
Plus one 30lb bag of worm castings divided among the top loads for all 6 beds. The ends were lower and made of 2x6 since I had existing jujube trees there. Those got topped with some compost and a few new flowers planted but otherwise were mostly left alone.
As you can see after I was done filling the beds I had leftover soil and debris. I screened all this and mixed the resulting soil with compost and spread over the lawn to help level it and rejuvenate it. I’m always struggling to make the lawn halfway decent, so far without a lot of success.
One thing I’m trying this year is using burlap as a kind of mulch. So you can see a few spots where my soil is covered with that and I make a slit to plant a seedling through it. I don’t know if it is worth the work but it certainly makes things look tidy, which my wife likes. We’ll see how I feel about it at the end of the season.
I topped the new beds with burlap and applied some 1x3 pine battens to hold it down. My wall-o-waters were put on top. I just planted tomato seedlings in these last weekend. I’ve put some tubes in for drip to these beds but won’t need to hook that up until July or so.
The outer left and right beds will get new strawberries this year and the other 4 will get annuals. Tomatoes, peppers, some alliums, and squash. Based on recent threads here, I’m probably overcrowding the tomatoes.
I’ve got high hopes for these beds and I think they look pretty good, which is at least half the reason why I garden at all. It was a lot of work to build them actually, mainly in the removing, screening, mixing, and refilling of dirt. As I was straining my back to mix the nth load of soil in the wheelbarrow, I would think of the irony about how raised beds were supposed to make gardening “easy”. In the course of this project my wheelbarrow broke; had to stop and devise a fix for that. Then my soil/compost screen setup broke; had to rebuild that. It wasn’t especially cheap either, between the compost delivery, other soil ingredients, stainless brackets and screws, and the lumber. But I’m happy with it so far.

15 Likes
In case anyone local to MA is interested, the sawmill I used is called Brightman Lumber:
http://www.brightmanlumber.com/
Usually I compile a list of the amount and size of wood I want for my project and email it to them for a quote. Then I call and pay by credit card. They mill the wood more or less to order for you within a week or two. So the wood is very wet when you get it and you should stack it with stickers in between unless you are going to use it within a few days. You will want to wear gloves working with it since it will have some droplets of pitch and the wood is rough. Get a helper for moving green 2x12s if you can!
Last time I paid $0.82 per board foot for 2x12 pine. A “board foot” is a chunk of wood equal to one foot square by one inch thick. So a 12’ long 2x12 has 24 board feet in it. These 2x12s I got for this project were less than $20 each. This is full dimension lumber so actually 2" by 12", not like the dressed wood you would get at home depot. Full dimension is much chunkier and I like that, plus I think the wood is better quality than what you find at home depot.
They also sell oak, which I have bought before, for about double the price of pine. It didn’t last any longer before rotting for me so I felt like it wasn’t worth the extra money. It does look nice though.
Brightman will deliver to my house with a truck for $125.
If anyone is interested PM me and I can email you the DXF file for the bracket. It is nothing special - I spent like 10 minutes drawing it. But I was pretty happy with how it turned out. I can bend in the 90 by hand while building.
3 Likes

These are the raised beds I built last year. On the right I used 12’ boards(cedar) for the lower level, 8’ for the mid level and 4’ for the top. The arbor is 4’ wide with sunken posts. On the left is a tall 8’ bed and then perpendicular to that (behind the table) is a 6" high 8’ bed. The low bed has my gooseberries and the other beds I used for annuals. I’m putting some Mara de Bois strawberries in the tiered side this week. The tall beds are filled with rotten logs and trim from a sugar maple we had to take down (bad maple borers under the previous owners). The top 8-12" are filled with native top soil and grass that we dug up to put in the gravel patio. That is amended with compost we made and purchased mushroom compost. Unfortunately, the tiered levels turned it quickly into a chipmunk condominium, but I am hoping (but not optimistic) that they’ll move to my firewood pile as the raised bed logs breaks down and the beds settle.
16 Likes